Введение
This guide is used to disassemble the lens from the camera. This will be used to further clean the lens if you experience the E18 error.
Выберете то, что вам нужно
-
-
-
Turn off the camera by pressing the power button above the LCD screen.
 Спросите у FixBot
-
-
-
Remove the two small screws on the bottom of the camera using a Phillips #00 screwdriver.
-
-
-
Use a Phillips #00 screwdriver to remove the two small screws on the right side of the camera.
-
-
-
Use a Phillips #00 screwdriver to remove the screw on the left of the camera under the A/V out digital label.
-
-
-
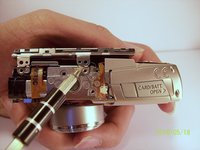
Use a Phillips #00 screwdriver to remove the screw on the bottom of the camera near the battery and memory card slots.
-
-
-
Remove the front, back, and side casings from the camera and set to the side.
-
-
-
-
-
Remove the two screws that connect the LCD and backlight to the main body of the camera.
-
-
-
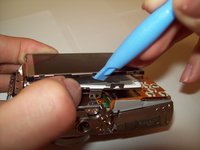
Gently pry the LCD and the backlight from the main body of the camera.
-
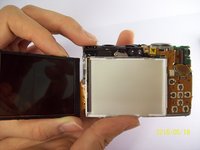
Gently pry the LCD from the backlight.
-
The thin ribbon cable is for the backlight.
-
The thick ribbon cable is for the LCD screen.
-
-
-
-
Carefully lift the ZIF connector that covers the thick ribbon cable.
-
This ZIF connector is fragile. Use caution when lifting it from its down position.
-
Insert the new LCD and reassemble the camera.
-
-
-
-
Инструмент, используемый на этом этапе:Tweezers$4.99
-
Unplug the ribbon from the housing on the circuitry.
-
Take the new ribbon and insert it into the housing.
-
Tweezers or a tool with a sharp point can be used.
-
-
-
-
-
Detach the LCD and backlight.
-
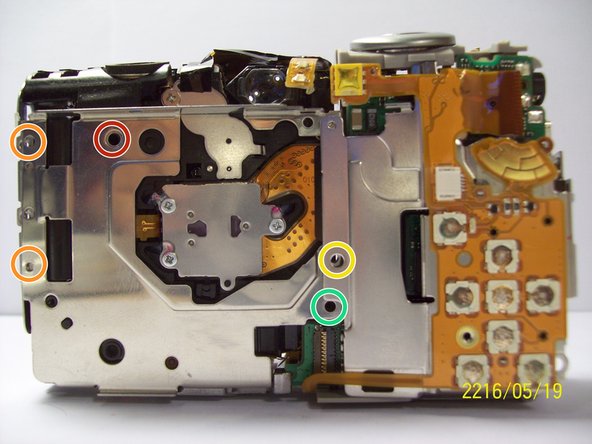
Remove the larger screw.
-
Remove the two smaller sized screws.
-
Remove the small screw.
-
Remove the small screw.
-
-
-
Remove the two screws near the the tripod mount using a Phillips #00 screwdriver.
-
-
-
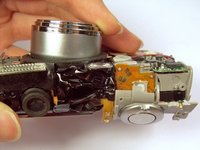
Remove the screw next to the shutter on the top of the camera with a Phillips screwdriver.
-
-
-
Remove the orange ribbon cable by lifting the ZIF connector attached to the ribbon with a spudger.
-
-
-
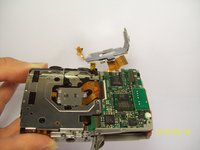
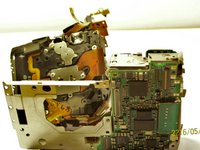
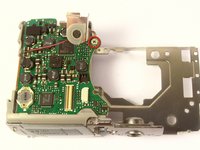
Carefully lift the shutter along with the ribbon connected to it. This will remove the casing around the motherboard.
-
-
-
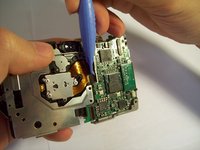
With the motherboard casing detached, remove the short orange ribbon by lifting the ZIF connector with a spudger or other plastic opening tools and slide the ribbon out. Detaching this ribbon will disconnect the side of the camera containing the motherboard from the rest of the camera.
-
-
-
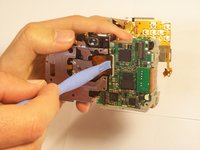
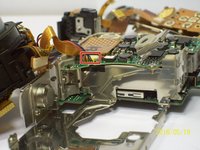
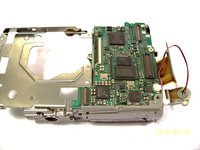
Disconnect the wires that are attached to the motherboard.
-
Remove the film by lifting it gently from the motherboard.
-
-
-
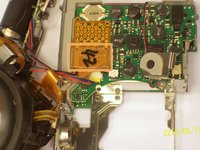
Remove the last wires connected to the motherboard by gently lifting upwards.
-
-
-
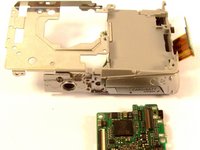
Remove the screw using a Phillips #00 screwdriver.
-
Gently lift the motherboard away from the case.
-
-
-
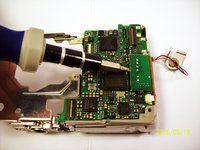
Remove the screw.
-
Once the screw is removed, you can remove the board.
-
-
-
-
-
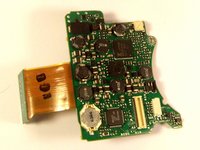
Once you have removed the lens from the main chassis, gently brush off any dirt, sand, or dust that may have accumulated in the crevices. Using a compressed air canister or a brush can help remove all the dirt.
-
-


To reassemble your device, follow these instructions in reverse order.
Отменить: Я не выполнил это руководство.
2 человек успешно провели ремонт по этому руководству.
Команда

Cal Poly, Team 9-71, Walters Spring 2011 Участник Cal Poly, Team 9-71, Walters Spring 2011
CPSU-WALTERS-S11S9G71
4 членов
Автор 10 руководств