Перейти к основному содержанию
Присоединяйся к сообществу ремонтников - Создай аккаунт

Disassembling Nokia E61i Volume Control Buttons

Выберете то, что вам нужно

    1. Disassembling Nokia E61i Volume Control Buttons, Battery: шаг 1, изображение 1 из 2 Disassembling Nokia E61i Volume Control Buttons, Battery: шаг 1, изображение 2 из 2
      • First, gather all necessary tools.

      • Remove the back cover to access the battery by pushing the tab on the bottom of the cover.

      • Slide the back cover downwards off of the phone while pressing down on the tab.

      Спросите у FixBot

      Добавить комментарий

    2. Disassembling Nokia E61i Volume Control Buttons: шаг 2, изображение 1 из 1
      • Locate the bottom-left corner of the phone where there is a spot to remove the battery.

      Спросите у FixBot

      Добавить комментарий

    3. Disassembling Nokia E61i Volume Control Buttons: шаг 3, изображение 1 из 1
      • Lift the battery out using your finger.

      • The E61i uses a Nokia BP-4L standard battery.

      Спросите у FixBot

      Добавить комментарий

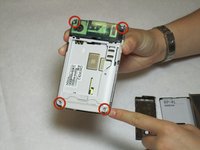
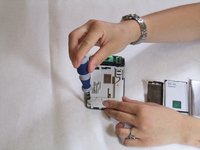
    1. Disassembling Nokia E61i Volume Control Buttons, Front Cover: шаг 4, изображение 1 из 2 Disassembling Nokia E61i Volume Control Buttons, Front Cover: шаг 4, изображение 2 из 2
      • To remove the top of the back cover, pry the sides and pop it off.

      • Remove the four screws that secure the front cover to the rest of the phone using a T7 screwdriver.

      Спросите у FixBot

      Добавить комментарий

    2. Disassembling Nokia E61i Volume Control Buttons: шаг 5, изображение 1 из 1
      • Remove the cover by pulling it up and off.

      Спросите у FixBot

      Добавить комментарий

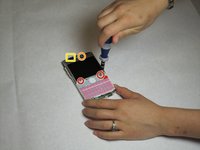
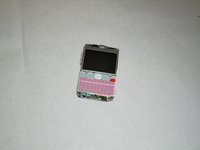
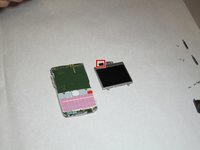
    1. Disassembling Nokia E61i Volume Control Buttons, Display: шаг 6, изображение 1 из 2 Disassembling Nokia E61i Volume Control Buttons, Display: шаг 6, изображение 2 из 2
      • Take off the casing and keyboard.

      • Remove the screws while holding the screen in place using a Torx T6 screwdriver.

      • Remove the single screw while holding the screen in place using a Torx T5 screwdriver.

      • Lift the ribbon, disconnecting contact with the motherboard.

      • Firmly press the contacts into place to connect the ribbon and the motherboard when reassembling.

      Спросите у FixBot

      Добавить комментарий

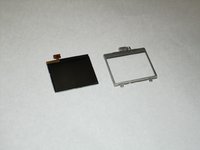
    2. Disassembling Nokia E61i Volume Control Buttons: шаг 7, изображение 1 из 2 Disassembling Nokia E61i Volume Control Buttons: шаг 7, изображение 2 из 2
      • Gently pull the screen off of the phone.

      • Be sure not to rip the sticker that connects the display and the motherboard.

      • Pull the silver case off to completely free the cracked or damaged screen.

      Спросите у FixBot

      Добавить комментарий

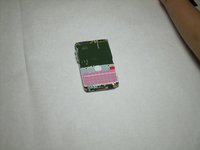
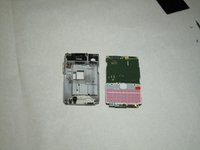
    1. Disassembling Nokia E61i Volume Control Buttons, Motherboard: шаг 8, изображение 1 из 3 Disassembling Nokia E61i Volume Control Buttons, Motherboard: шаг 8, изображение 2 из 3 Disassembling Nokia E61i Volume Control Buttons, Motherboard: шаг 8, изображение 3 из 3
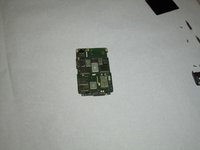
      • Pull the green motherboard from the back casing.

      Спросите у FixBot

      Добавить комментарий

    1. Disassembling Nokia E61i Volume Control Buttons, Volume Control Buttons: шаг 9, изображение 1 из 1
      • The volume control buttons are secured to the frame only by their fit around a small piece of the plastic. Using a small flat-head screwdriver or other flat object, lift the ribbon over this piece of the cover.

      Спросите у FixBot

      Добавить комментарий

    2. Disassembling Nokia E61i Volume Control Buttons: шаг 10, изображение 1 из 1
      • Next, remove the volume control buttons from the cover by pushing or pulling them out away from the interior of the cover.

      Спросите у FixBot

      Добавить комментарий

Заключение

To reassemble your device, follow these instructions in reverse order.

Отменить: Я не выполнил это руководство.

Christopher Patton

Участник с: 04/07/11

208 Репутация

Автор 12 руководств

Команда

Cal Poly, Team 9-63, Walters Spring 2011 Участник Cal Poly, Team 9-63, Walters Spring 2011

CPSU-WALTERS-S11S9G63

5 членов

Автор 108 руководств

0 Комментарии к руководству

Добавить комментарий

Статистика просмотров:

За последние 24 часов: 0

За последние 7 дней: 4

За последние 30 дней: 28

За всё время: 2,023