Перейти к основному содержанию

DualSense Edge Battery Replacement

Абсолютно необходимое руководство
Это руководство только для предварительной подготовки! Этот гайд является частью другой процедуры и не предназначен для самостоятельного использования.

Выберете то, что вам нужно

  1. DualSense Edge Battery Replacement, Remove the front trim: шаг 1, изображение 1 из 3 DualSense Edge Battery Replacement, Remove the front trim: шаг 1, изображение 2 из 3 DualSense Edge Battery Replacement, Remove the front trim: шаг 1, изображение 3 из 3
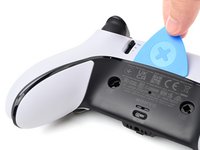
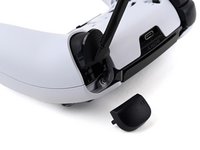
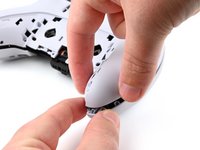
    • Place the controller on a work surface with the joysticks facing down.

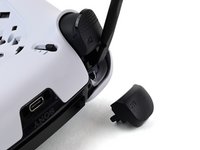
    • Use a spudger or your finger to slide the Release tab to the left. The front trim should fall to the table.

    • If the front trim doesn't fall open, make sure the front trim has room to fall down and the Release tab is pushed all the way to the left.

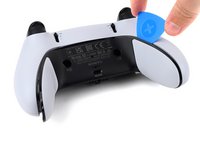
    • Lift the controller up, leaving the front trim on the table.

    • During reassembly, insert the front trim at an angle so the top slots in first, then lower the trim into place and snap it onto the controller.

  2. DualSense Edge Battery Replacement, Remove the joysticks: шаг 2, изображение 1 из 3 DualSense Edge Battery Replacement, Remove the joysticks: шаг 2, изображение 2 из 3 DualSense Edge Battery Replacement, Remove the joysticks: шаг 2, изображение 3 из 3
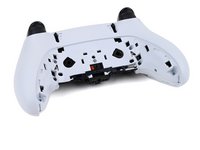
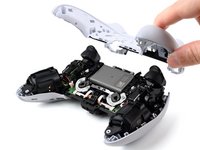
    • Flip the controller over so the joysticks are facing up.

    • Lift the metal lever that holds the joystick in place until the joystick slides out slightly.

    • Slide the joystick out from its slot.

  3. DualSense Edge Battery Replacement: шаг 3, изображение 1 из 1
    • Repeat this process to remove the other joystick.

  4. DualSense Edge Battery Replacement, Insert an opening pick: шаг 4, изображение 1 из 3 DualSense Edge Battery Replacement, Insert an opening pick: шаг 4, изображение 2 из 3 DualSense Edge Battery Replacement, Insert an opening pick: шаг 4, изображение 3 из 3
    • The rear trim is held in place by fragile plastic clips. Work slowly and gently to avoid breaking the clips.

    • If you installed the back button paddles included with your controller, remove them before beginning this process.

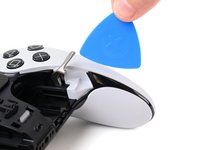
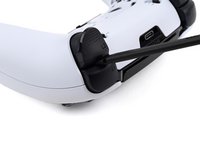
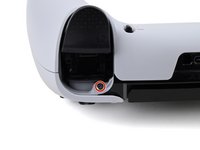
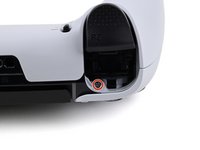
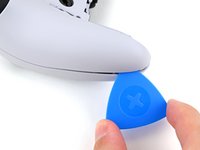
    • Insert the flat edge of an opening pick between the black portion of the rear trim and the top cover, near the joystick lever.

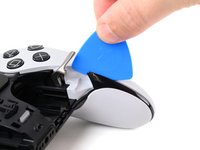
    • Slide the opening pick towards the bottom of the grip to release the clips.

  5. DualSense Edge Battery Replacement, Release the clips: шаг 5, изображение 1 из 2 DualSense Edge Battery Replacement, Release the clips: шаг 5, изображение 2 из 2
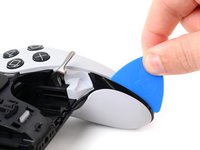
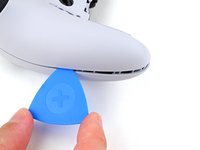
    • Slide the pick around to the rear of the controller and flip the controller over so the buttons are facing down.

    • Slide the opening pick around the edge of the rear trim to release the clips.

  6. DualSense Edge Battery Replacement, Remove the rear trim: шаг 6, изображение 1 из 3 DualSense Edge Battery Replacement, Remove the rear trim: шаг 6, изображение 2 из 3 DualSense Edge Battery Replacement, Remove the rear trim: шаг 6, изображение 3 из 3
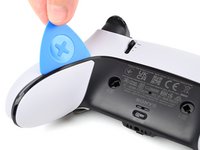
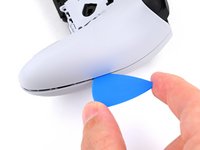
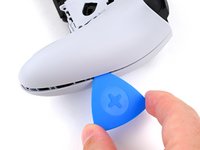
    • Slide the opening along the edge of the trim on the other grip.

    • Once all clips are released, remove the trim.

    • If at any point the trim feels stuck, stop and look for any clips that may have re-engaged and release them with the opening pick to avoid damaging them.

  7. DualSense Edge Battery Replacement, Remove the L1 and R1 buttons: шаг 7, изображение 1 из 3 DualSense Edge Battery Replacement, Remove the L1 and R1 buttons: шаг 7, изображение 2 из 3 DualSense Edge Battery Replacement, Remove the L1 and R1 buttons: шаг 7, изображение 3 из 3
    • The L1 and R1 buttons are held in by two clips. If only one clip releases, move your spudger to the other side of the button to release the remaining clip. Don't continue prying on one side after a clip is released, or you risk breaking the other clip.

    • Insert the flat end of a spudger in the gap between the L1 and L2 buttons.

    • Use the spudger to pry out the L1 button.

    • The buttons tend to shoot out in this step. You can place your thumb over the button to prevent this.

    • Repeat this process to remove the R1 button.

  8. DualSense Edge Battery Replacement, Remove the screws: шаг 8, изображение 1 из 2 DualSense Edge Battery Replacement, Remove the screws: шаг 8, изображение 2 из 2
    • Remove the two 6.4 mm screws behind the L1 and R1 buttons.

    • Use a JIS J0 driver or an official iFixit Phillips PH0 driver, which is designed to be cross-compatible with JIS screws. Using a screwdriver other than an official iFixit driver or a JIS driver may result in stripped screws.

  9. DualSense Edge Battery Replacement, Lift the release bar spring: шаг 9, изображение 1 из 2 DualSense Edge Battery Replacement, Lift the release bar spring: шаг 9, изображение 2 из 2
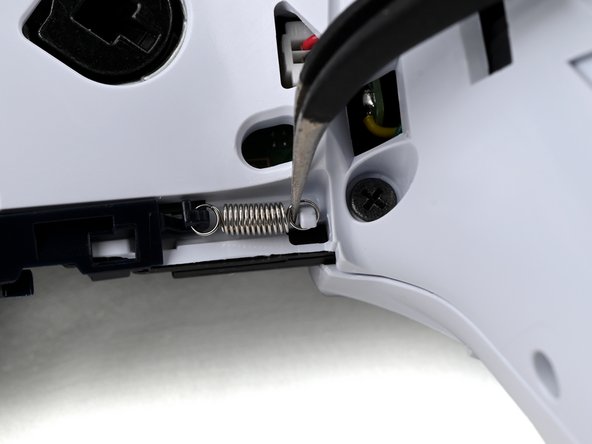
    • Rotate the controller so the grips are pointing towards you.

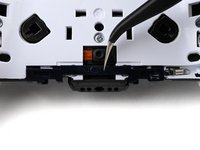
    • Use a pair of angled tweezers to lift the right end of the release bar spring off of the white post.

    • The spring is located below the RB button.

  10. DualSense Edge Battery Replacement, Remove the trim release bar: шаг 10, изображение 1 из 3 DualSense Edge Battery Replacement, Remove the trim release bar: шаг 10, изображение 2 из 3 DualSense Edge Battery Replacement, Remove the trim release bar: шаг 10, изображение 3 из 3
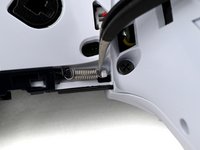
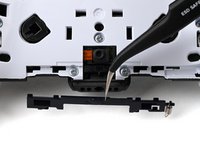
    • Use a pair of tweezers or your fingers to slide the release bar to the left.

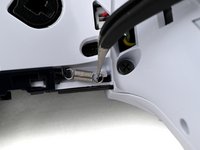
    • Slide the release bar away from the controller to remove it.

  11. DualSense Edge Battery Replacement, Remove the rear case screws: шаг 11, изображение 1 из 1
    • Remove the nine screws securing the rear case:

    • Seven 6.4 mm‑long screws

    • Two 10.5 mm‑long screws

  12. DualSense Edge Battery Replacement, Insert an opening pick: шаг 12, изображение 1 из 2 DualSense Edge Battery Replacement, Insert an opening pick: шаг 12, изображение 2 из 2
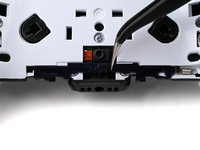
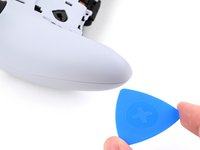
    • Insert the point an opening pick in the gap along the outside edge of one of the controller grips, near the bottom.

  13. DualSense Edge Battery Replacement, Separate the rear case: шаг 13, изображение 1 из 3 DualSense Edge Battery Replacement, Separate the rear case: шаг 13, изображение 2 из 3 DualSense Edge Battery Replacement, Separate the rear case: шаг 13, изображение 3 из 3
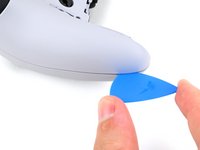
    • Pry with the opening pick to separate the rear case from the front case by releasing the clips that hold them together.

    • Continue prying along the edge of the controller until one side is separated.

  14. DualSense Edge Battery Replacement: шаг 14, изображение 1 из 2 DualSense Edge Battery Replacement: шаг 14, изображение 2 из 2
    • Repeat this process to separate the other side of the rear case.

  15. DualSense Edge Battery Replacement, Remove the rear case: шаг 15, изображение 1 из 3 DualSense Edge Battery Replacement, Remove the rear case: шаг 15, изображение 2 из 3 DualSense Edge Battery Replacement, Remove the rear case: шаг 15, изображение 3 из 3
    • If at any point the case feels stuck, stop and look for any clips that may have re-engaged and release them with the opening pick to avoid damaging them.

    • Hold the main body of the controller with one hand.

    • Lift the rear case with your other hand. It should lift at an angle.

    • Pushing slightly towards the L and R buttons, lift the rear case off of the controller and remove it.

    • During reassembly, make sure the plastic covers for the adaptive trigger assembly adjustment sliders are correctly installed over the sliders.

  16. DualSense Edge Battery Replacement, Replace the slider covers: шаг 16, изображение 1 из 3 DualSense Edge Battery Replacement, Replace the slider covers: шаг 16, изображение 2 из 3 DualSense Edge Battery Replacement, Replace the slider covers: шаг 16, изображение 3 из 3
    • The rear case holds two small plastic covers for the adaptive trigger assembly adjustment sliders. These may have come off during removal. Place them back in the rear cover now to avoid losing them.

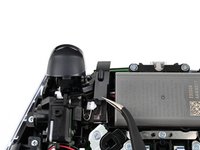
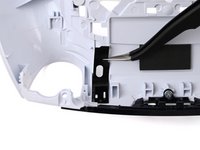
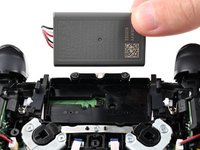
    • Use a pair of tweezers or your fingers to lift the cover from the controller.

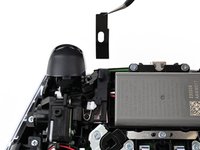
    • Slide the flat end of the cover under the plastic tab in the rear case.

    • Make sure it is placed so it can move freely in its groove. The edge with the notch should be towards the middle of the controller.

    • If a cover got bent during the rear case removal or reassembly process, apply a small amount of heat with a hair dryer to restore it to its original shape.

    • During reassembly, you can use a small piece of painter's tape on the outside of the rear case to hold the covers in place.

  17. DualSense Edge Battery Replacement, Lift the battery: шаг 17, изображение 1 из 2 DualSense Edge Battery Replacement, Lift the battery: шаг 17, изображение 2 из 2
    • If your battery is swollen or deformed in any way, take appropriate precautions.

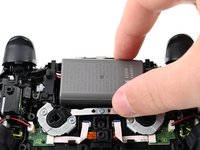
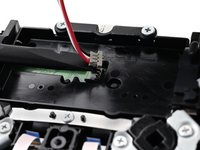
    • Lift the battery and move it to the right, so the connector underneath the battery is accessible.

  18. DualSense Edge Battery Replacement, Disconnect the battery: шаг 18, изображение 1 из 3 DualSense Edge Battery Replacement, Disconnect the battery: шаг 18, изображение 2 из 3 DualSense Edge Battery Replacement, Disconnect the battery: шаг 18, изображение 3 из 3
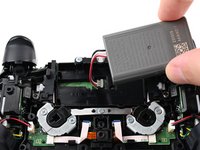
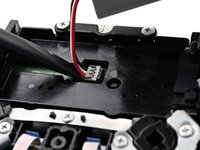
    • Use the flat end of a spudger to pry up the low profile connector.

    • Only pry on the connector. Do not pry on the wires, as that may damage the wires.

    • Remove the battery.

Заключение

To reassemble your device, follow these instructions in reverse order.

For optimal performance, calibrate your newly installed battery.

Take your e-waste to an R2 or e-Stewards certified recycler.

Repair didn’t go as planned? Try some basic troubleshooting, or ask our Answers community for help.

Spencer Pennington

Участник с: 09/09/23

23 581 Репутация

Автор 125 руководств

Команда

Guide Team Участник Guide Team

Staff

10 членов

Автор 15 952 руководств

0 Комментарии к руководству

Добавить комментарий

Статистика просмотров:

За последние 24 часов: 1

За последние 7 дней: 1

За последние 30 дней: 4

За всё время: 83