Перейти к основному содержанию
Присоединяйся к сообществу ремонтников - Создай аккаунт

Dyson DC39 Origin Cyclone Filter Replacement

Выберете то, что вам нужно

  1. Dyson DC39 Origin Cyclone Filter Replacement, Bin: шаг 1, изображение 1 из 3 Dyson DC39 Origin Cyclone Filter Replacement, Bin: шаг 1, изображение 2 из 3 Dyson DC39 Origin Cyclone Filter Replacement, Bin: шаг 1, изображение 3 из 3
    • Push down on the gray button located next to the power button to release the bin from the ball housing.

    • Pull the bin away, then up from the ball housing to remove it.

    • If the bin won't fit back into place during re-assembly, you may need to push the grey button again.

    Спросите у FixBot

    Добавить комментарий

  2. Dyson DC39 Origin Cyclone Filter Replacement, Pre-filter: шаг 2, изображение 1 из 3 Dyson DC39 Origin Cyclone Filter Replacement, Pre-filter: шаг 2, изображение 2 из 3 Dyson DC39 Origin Cyclone Filter Replacement, Pre-filter: шаг 2, изображение 3 из 3
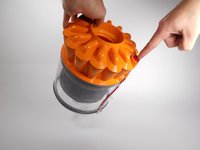
    • Remove the purple pre-filter by pulling it up and out of the bin.

    Спросите у FixBot

    Добавить комментарий

  3. Dyson DC39 Origin Cyclone Filter Replacement, Cyclone Filter: шаг 3, изображение 1 из 2 Dyson DC39 Origin Cyclone Filter Replacement, Cyclone Filter: шаг 3, изображение 2 из 2
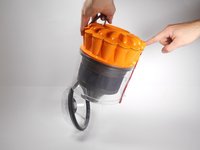
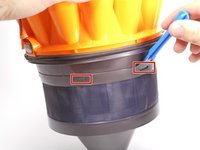
    • Push down on the red button, located on top of the bin, to release the bottom section of the bin.

    Спросите у FixBot

    Добавить комментарий

  4. Dyson DC39 Origin Cyclone Filter Replacement: шаг 4, изображение 1 из 1
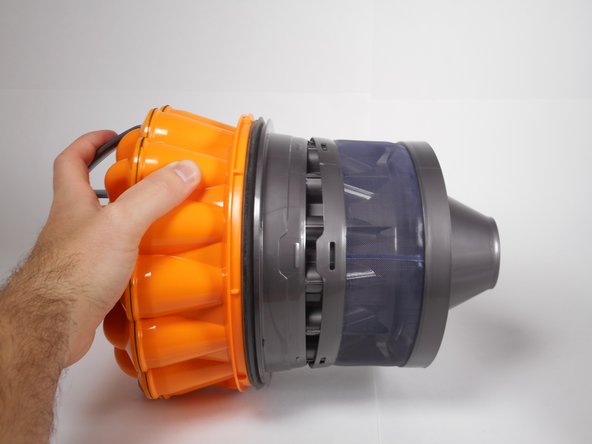
    • Push the grey button located in between the parts of the red lever to release the clear, bottom section of the bin.

    • The grey button can only be pressed after the bottom section is open.

    Спросите у FixBot

    Добавить комментарий

  5. Dyson DC39 Origin Cyclone Filter Replacement: шаг 5, изображение 1 из 3 Dyson DC39 Origin Cyclone Filter Replacement: шаг 5, изображение 2 из 3 Dyson DC39 Origin Cyclone Filter Replacement: шаг 5, изображение 3 из 3
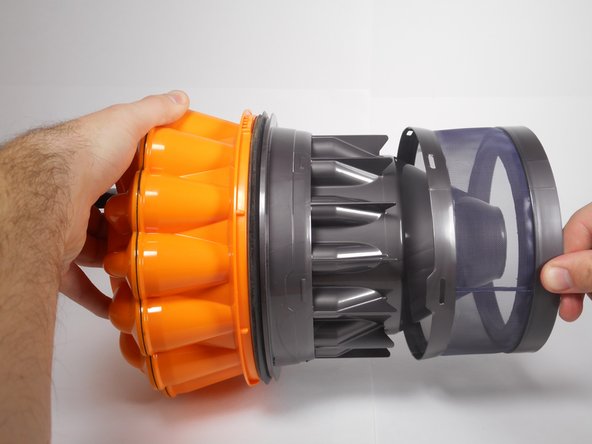
    • You should notice several notches around the rim of the filter. Slide the plastic opening tool around the rim to release the notches.

    • After releasing all of the notches, pull the filter away from the orange cyclone assembly to remove it from the bin.

    Спросите у FixBot

    Добавить комментарий

Заключение

To reassemble your device, follow these instructions in reverse order.

Отменить: Я не выполнил это руководство.

3 человек успешно провели ремонт по этому руководству.

Sam Nelson

Участник с: 04/26/17

167 Репутация

1 руководство автора

Команда

Cal Poly, Team S23-G6, Livingston Spring 2017 Участник Cal Poly, Team S23-G6, Livingston Spring 2017

CPSU-LIVINGSTON-S17S23G6

3 членов

Автор 6 руководств

0 Комментарии к руководству

Добавить комментарий

Статистика просмотров:

За последние 24 часов: 1

За последние 7 дней: 11

За последние 30 дней: 32

За всё время: 3,963