Введение
If your Dyson motor is no longer functioning correctly, grab a pair of long tweezers and check out this guide to replace the main body,
Выберете то, что вам нужно
Видеообзор
-
-
Locate the red lever parallel to the red trigger and on the side of the clear bin.
-
-
-
Push the red lever downward to open the clear bin. You may need to do this over a trash bin if there is debris in the clear bin.
-
-
-
-
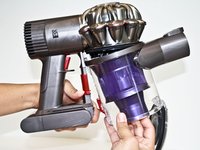
Push the red lever downward again while pulling the clear bin away from the main body of the Dyson vacuum.
-
-
-
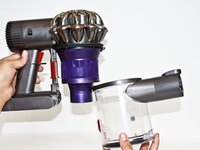
Flip the vacuum over so that the silver cyclone part of the vacuum is now at the base.
-
-
Инструмент, используемый на этом этапе:Tweezers$4.99
-
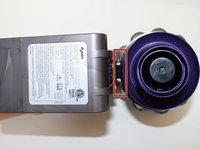
Locate the two visible white clips seen between the main body and the purple cyclone of the vacuum.
-
Use tweezers to pinch the two visible white clips together.
-
-
-
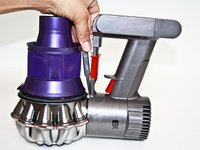
Tilt and pull the main body away from the purple cyclone of the vacuum.
-


To reassemble your device, follow these instructions in reverse order.
Отменить: Я не выполнил это руководство.
12 человек успешно провели ремонт по этому руководству.
Команда

CSU Fullerton, Team 2-4, Bruce Fall 2015 Участник CSU Fullerton, Team 2-4, Bruce Fall 2015
CSUF-BRUCE-F15S2G4
4 членов
Автор 19 руководств
4 Комментарии к руководству
Mine ended up dismantled after it had been dropped. Couldn't get it back together until I read the bit about the tweezers /(pliers) and the white clips. It does not push in with out squeezing them first
Has anyone replaced the red release catch?
The white C-ring with clips must be pushed down in order to reassemble device. Takes some time to practice.
I'm trying to figure out how to put spring and plastic pieces back in on the inside of red lever on motor body?? Any help I'd really appreciate ?