Перейти к основному содержанию
Присоединяйся к сообществу ремонтников - Создай аккаунт

EasySMX X15 Main Board Replacement

Выберете то, что вам нужно

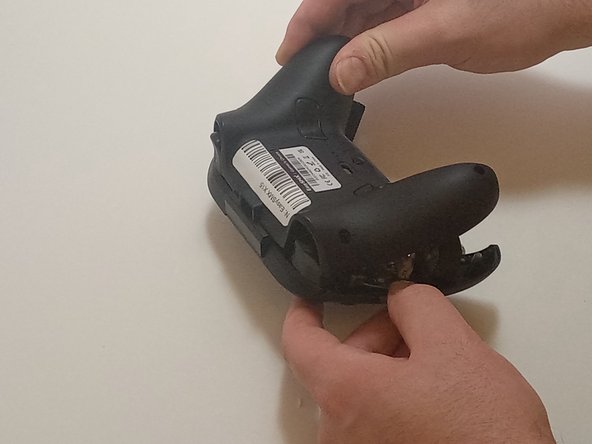
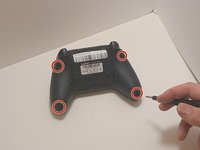
  1. EasySMX X15 Main Board Replacement, Bottom Casing: шаг 1, изображение 1 из 2 EasySMX X15 Main Board Replacement, Bottom Casing: шаг 1, изображение 2 из 2
    • Use a Phillips #00 screwdriver to remove the four 9 mm screws from the bottom of the EasySMX X15.

    • Use an opening tool to gently pry between the seams of the controller to separate the lower and upper casings.

    • Be gentle when separating the lower casing from the upper casing to avoid breaking any of the plastic snap tabs.

    Спросите у FixBot

    Добавить комментарий

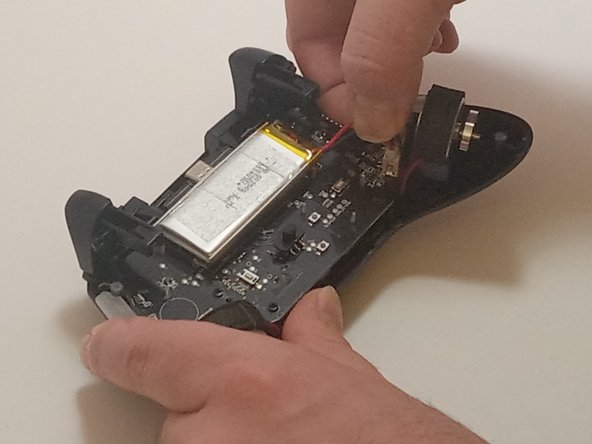
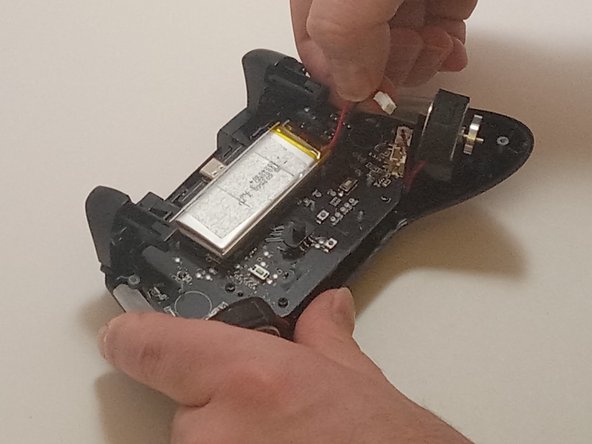
  2. EasySMX X15 Main Board Replacement, Battery: шаг 2, изображение 1 из 3 EasySMX X15 Main Board Replacement, Battery: шаг 2, изображение 2 из 3 EasySMX X15 Main Board Replacement, Battery: шаг 2, изображение 3 из 3
    • Push on alternating sides of the connector to disconnect the red battery cable from the board.

    • If that doesn't work, use a pair of tweezers to firmly grip the sides of the connector and pull straight away from the socket. Hold the tweezers closer to the connector to get a better grip.

    • Pull from the tab, not the cables, to avoid damaging them.

    Спросите у FixBot

    Добавить комментарий

  3. EasySMX X15 Main Board Replacement: шаг 3, изображение 1 из 1
    • Use a spudger to pry the battery loose from the controller.

    • The battery is glued onto the control board, so it may take a bit of work to release it from the adhesive.

    • Remove the battery.

    • Don't bend or pierce the battery. If the battery is swollen, follow the guidelines outlined in this article.

    Спросите у FixBot

    Добавить комментарий

  4. EasySMX X15 Main Board Replacement, Main Board: шаг 4, изображение 1 из 1
    • Disconnect the vibration motor cables from the connectors on the circuit board.

    • Use a Phillips #00 screwdriver to remove six, 6mm screws from the board.

    Спросите у FixBot

    Добавить комментарий

  5. EasySMX X15 Main Board Replacement: шаг 5, изображение 1 из 1
    • Gently lift the board away from the upper casing, maneuvering it around the triggers by lifting it from the bottom, away from the upper casing.

    Спросите у FixBot

    Добавить комментарий

Заключение

To reassemble your device, follow these instructions in reverse order.

Отменить: Я не выполнил это руководство.

ShawnDetiveaux

Участник с: 09/09/24

646 Репутация

Автор 4 руководств

Команда

Austin Community College, Team 7-3, Watkins Fall 2024 Участник Austin Community College, Team 7-3, Watkins Fall 2024

AUSTINCC-WATKINS-F24S7G3

3 членов

Автор 7 руководств

0 Комментарии к руководству

Добавить комментарий

Статистика просмотров:

За последние 24 часов: 0

За последние 7 дней: 7

За последние 30 дней: 39

За всё время: 412