Введение
The fan is located in the base of the humidifier. It is used to evaporate the water present in the reservoir. If the heating filament and the valve are both functioning properly but still no vapour is being produced, then one might have a faulty fan. This guide demonstrates the way to replace a faulty fan.
Выберете то, что вам нужно
-
-
-
Remove the top cover of the humidifier by pulling upwards.
 Спросите у FixBot
-
-
-
Grip the dial from the front of the device and gently pull it away to remove it.
-
-
-
Remove the blue water tank of the humidifier by pulling upwards.
-
-
-
-
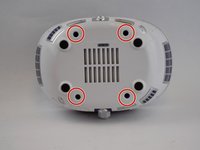
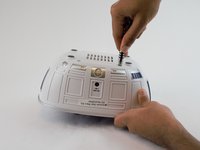
Use a PH1 screwdriver bit and 150mm extension to unscrew the four screws from the bottom cover.
-
-
-
Remove the blue plastic top by pulling upwards on the middle notch.
-
-
-
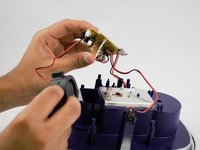
This is where the fan is located. Carefully remove the fan from its compartment.
-
Remove the screws on the printed circuit board using the same PH1 driver.
-
-
-
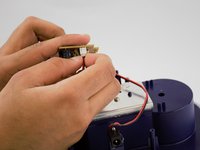
Grip the fan's connector located on the printed circuit board and pull it away from the connector (see second picture).
-
-




To reassemble your device, follow these instructions in reverse order.
Отменить: Я не выполнил это руководство.
4 человек успешно провели ремонт по этому руководству.

Команда

USF Tampa, Team 8-5, Eyestone Spring 2017 Участник USF Tampa, Team 8-5, Eyestone Spring 2017
USFT-EYESTONE-S17S8G5
4 членов
Автор 5 руководств
