Перейти к основному содержанию
Присоединяйся к сообществу ремонтников - Создай аккаунт

Framework Laptop 12 Fan Replacement

Выберете то, что вам нужно

  1. Framework Laptop 12 Fan Replacement, Power down your laptop: шаг 1, изображение 1 из 3 Framework Laptop 12 Fan Replacement, Power down your laptop: шаг 1, изображение 2 из 3 Framework Laptop 12 Fan Replacement, Power down your laptop: шаг 1, изображение 3 из 3
    • Before you begin repairs, unplug your laptop and shut it down from the operating system. This ensures that the laptop isn't in standby/suspend mode.

    • The indicator LEDs along the edges should be unlit. The laptop should be silent.

    • If you accidentally turn on the laptop during repair, hold the power button down for 10 seconds to shut it down.

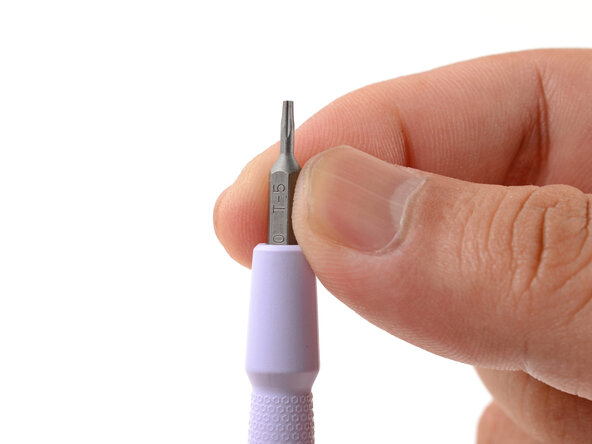
    • Make sure your Framework Screwdriver has the T5 Torx bit (labeled as T-5) facing outwards. If it's not, pull the bit out and flip it.

    Спросите у FixBot
  2. Framework Laptop 12 Fan Replacement, Set your laptop down: шаг 2, изображение 1 из 1
    • Set your Framework Laptop face-down on a clean work surface.

    Спросите у FixBot
  3. Framework Laptop 12 Fan Replacement, Loosen the bottom screws: шаг 3, изображение 1 из 2 Framework Laptop 12 Fan Replacement, Loosen the bottom screws: шаг 3, изображение 2 из 2
    • Use your Framework Screwdriver to fully loosen the eight captive T5 Torx screws on the bottom of your laptop.

    • Most screws in your Framework Laptop (including these) are captive—they're designed to stay in place after you loosen them.

    Спросите у FixBot
  4. Framework Laptop 12 Fan Replacement, Flip your laptop over: шаг 4, изображение 1 из 1
    • Flip your laptop over so it's face-up on your work surface.

    Спросите у FixBot
  5. Framework Laptop 12 Fan Replacement, Open your laptop: шаг 5, изображение 1 из 2 Framework Laptop 12 Fan Replacement, Open your laptop: шаг 5, изображение 2 из 2
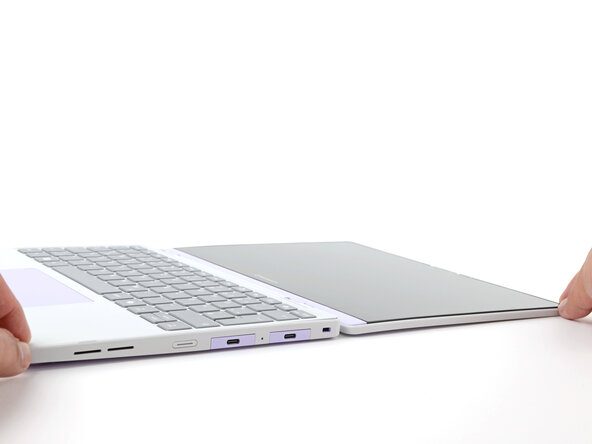
    • Open the laptop lid so that both the screen and the base lie flat on your work surface.

    Спросите у FixBot
  6. Framework Laptop 12 Fan Replacement, Remove the Input Cover: шаг 6, изображение 1 из 3 Framework Laptop 12 Fan Replacement, Remove the Input Cover: шаг 6, изображение 2 из 3 Framework Laptop 12 Fan Replacement, Remove the Input Cover: шаг 6, изображение 3 из 3
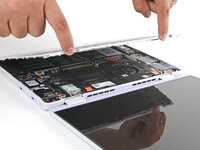
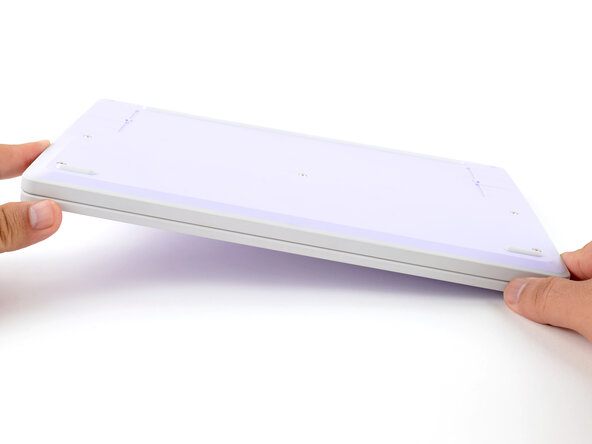
    • Use your fingers to grip the Input Cover in the hinge cutouts.

    • Lift upwards to swing the Input Cover up from the base of the laptop.

    • Magnets hold the Input Cover down, so you'll feel some resistance. If it feels stuck, check that you've fully loosened all the screws on the bottom of your laptop.

    • Remove the Input Cover.

    Спросите у FixBot
  7. Framework Laptop 12 Fan Replacement, Disconnect the fan connector: шаг 7, изображение 1 из 3 Framework Laptop 12 Fan Replacement, Disconnect the fan connector: шаг 7, изображение 2 из 3 Framework Laptop 12 Fan Replacement, Disconnect the fan connector: шаг 7, изображение 3 из 3
    • Use the flat end of your Framework Screwdriver to gently push on one of the fan connector's protruding edges, then the other, to loosen the connector out of its socket.

    Спросите у FixBot
  8. Framework Laptop 12 Fan Replacement: шаг 8, изображение 1 из 2 Framework Laptop 12 Fan Replacement: шаг 8, изображение 2 из 2
    • Use your fingers and your Framework Screwdriver to slide the fan connector out of its socket.

    Спросите у FixBot
  9. Framework Laptop 12 Fan Replacement, Loosen the fan screws: шаг 9, изображение 1 из 1
    • Use your Framework Screwdriver to loosen the two captive T5 Torx screws securing the fan.

    Спросите у FixBot
  10. Framework Laptop 12 Fan Replacement, Remove the fan: шаг 10, изображение 1 из 2 Framework Laptop 12 Fan Replacement, Remove the fan: шаг 10, изображение 2 из 2
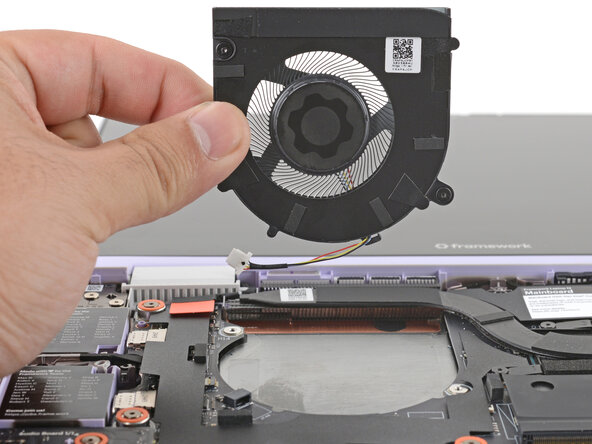
    • Lift and remove the fan.

    Спросите у FixBot
  11. Framework Laptop 12 Fan Replacement, Clean the fan: шаг 11, изображение 1 из 2 Framework Laptop 12 Fan Replacement, Clean the fan: шаг 11, изображение 2 из 2
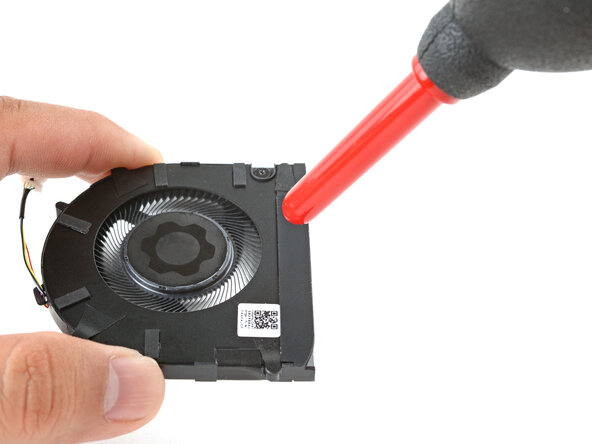
    • If your fan's dirty, this is a great opportunity to clean it! A clean fan will help your laptop stay cooler.

    • Use a soft bristled brush or a clean toothbrush to gently scrub the fan blades and exhaust fins.

    • Use a dust blower to blow away the dust from the fan.

    Спросите у FixBot
  12. Framework Laptop 12 Fan Replacement, Disassembly complete: шаг 12, изображение 1 из 1
    • Congratulations on completing disassembly! The remaining steps will show how to reassemble your Framework Laptop.

    Спросите у FixBot
  13. Framework Laptop 12 Fan Replacement, Install the fan: шаг 13, изображение 1 из 1
    • Lay the fan in the laptop.

    Спросите у FixBot
  14. Framework Laptop 12 Fan Replacement, Tighten the fan screws: шаг 14, изображение 1 из 1
    • Use your Framework Screwdriver to tighten the two captive T5 Torx screws to secure the fan.

    Спросите у FixBot
  15. Framework Laptop 12 Fan Replacement: шаг 15, изображение 1 из 2 Framework Laptop 12 Fan Replacement: шаг 15, изображение 2 из 2
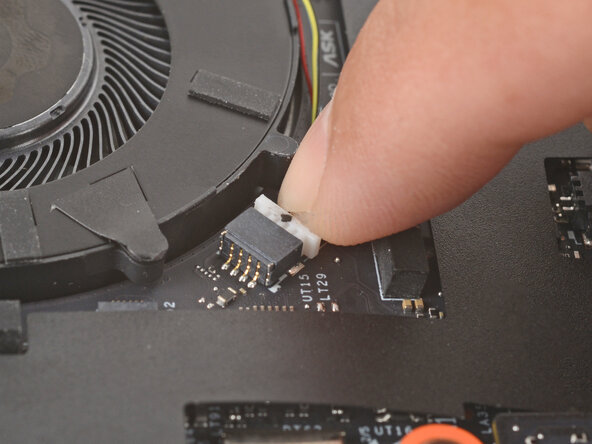
    • Use your fingers to gently push the fan connector back into its socket.

    • Don't push too hard, or you may break the socket. If you're having trouble, wiggle the connector slightly to help it slide into the socket.

    Спросите у FixBot
  16. Framework Laptop 12 Fan Replacement, Install the Input Cover: шаг 16, изображение 1 из 3 Framework Laptop 12 Fan Replacement, Install the Input Cover: шаг 16, изображение 2 из 3 Framework Laptop 12 Fan Replacement, Install the Input Cover: шаг 16, изображение 3 из 3
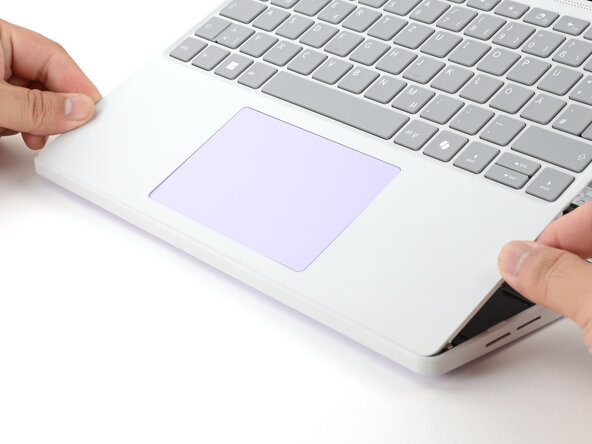
    • Angle the bottom edge of the Input Cover towards the base of the laptop.

    • Align and insert the bottom edge of the Input Cover into the base of the laptop.

    • Make sure the slots along the bottom edge of the Input Cover slide into the tabs in the base.

    • Lower the Input Cover's top edge onto the laptop until the magnets snap it in place.

    • Make sure the Input Cover sits neatly within the laptop frame and no corners are popping up.

    Спросите у FixBot
  17. Framework Laptop 12 Fan Replacement, Close and flip your laptop: шаг 17, изображение 1 из 2 Framework Laptop 12 Fan Replacement, Close and flip your laptop: шаг 17, изображение 2 из 2
    • Close the laptop lid.

    • Flip your laptop face-down on a clean work surface.

    Спросите у FixBot
  18. Framework Laptop 12 Fan Replacement, Tighten the bottom screws: шаг 18, изображение 1 из 2 Framework Laptop 12 Fan Replacement, Tighten the bottom screws: шаг 18, изображение 2 из 2
    • Use your Framework Screwdriver to tighten the eight captive T5 Torx screws on the bottom of your laptop.

    • Tighten the screws until they're snug. Don't over-tighten them, or you may strip the screws.

    Спросите у FixBot
Заключение

You finished fixing your Framework Laptop!

Take your e-waste to an R2 or e-Stewards certified recycler.

If you need help, contact Framework support.

Arthur Shi

Участник с: 01/03/18

335 852 Репутация

Автор 848 руководств

Команда

Guide Team Участник Guide Team

Staff

10 членов

Автор 17 794 руководств

0 Комментарии к руководству

Добавить комментарий

Статистика просмотров:

За последние 24 часов: 1

За последние 7 дней: 12

За последние 30 дней: 52

За всё время: 738