Перейти к основному содержанию
Присоединяйся к сообществу ремонтников - Создай аккаунт

GD Midea FT30-3D Motor Replacement

Выберете то, что вам нужно

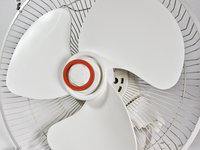
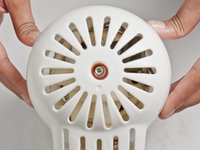
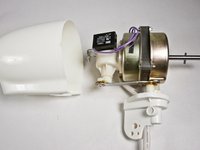
  1. GD Midea FT30-3D Motor Replacement, Fan Blades: шаг 1, изображение 1 из 2 GD Midea FT30-3D Motor Replacement, Fan Blades: шаг 1, изображение 2 из 2
    • Release the 3 clips that attach the front fan guard to the rear fan guard.

    • Notice: The lower connecting bracket is NOT a clip. It acts as a mounting alignment bracket for the front fan guard.

    Спросите у FixBot

    Добавить комментарий

  2. GD Midea FT30-3D Motor Replacement: шаг 2, изображение 1 из 1
    • Pull the front fan guard off.

    Спросите у FixBot

    Добавить комментарий

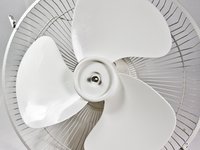
  3. GD Midea FT30-3D Motor Replacement: шаг 3, изображение 1 из 2 GD Midea FT30-3D Motor Replacement: шаг 3, изображение 2 из 2
    • Remove the spinner from the center of the fan blade.

    Спросите у FixBot

    Добавить комментарий

  4. GD Midea FT30-3D Motor Replacement: шаг 4, изображение 1 из 1
    • The fan blades should now be easy to lift up.

    • When reassembling the fan make sure the notches in the center of the fan blade line up with the protrusions in the motor's shaft.

    Спросите у FixBot

    Добавить комментарий

  5. GD Midea FT30-3D Motor Replacement, Oscillation Mechanism: шаг 5, изображение 1 из 1
    • Remove the rear fan guard by taking off the plastic nut that holds the rear fan guard to the upper assembly.

    • The plastic nut needs to be twisted off; like a screw.

    Спросите у FixBot

    Добавить комментарий

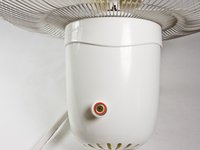
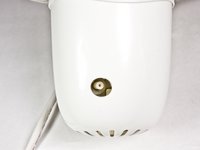
  6. GD Midea FT30-3D Motor Replacement: шаг 6, изображение 1 из 2 GD Midea FT30-3D Motor Replacement: шаг 6, изображение 2 из 2
    • Remove the screw at the center of the oscillator knob and remove the oscillator knob.

    • If the oscillator knob is clean and undamaged then the problem is with the oscillator. If the knob is damaged replace it and test your fan before proceeding forward in the guide.

    Спросите у FixBot

    Добавить комментарий

  7. GD Midea FT30-3D Motor Replacement: шаг 7, изображение 1 из 1
    • Remove the front motor housing by removing 4 screws.

    Спросите у FixBot

    Добавить комментарий

  8. GD Midea FT30-3D Motor Replacement: шаг 8, изображение 1 из 2 GD Midea FT30-3D Motor Replacement: шаг 8, изображение 2 из 2
    • The main motor housing can be taken off by removing a single screw at the back of the upper assembly.

    Спросите у FixBot

    Добавить комментарий

  9. GD Midea FT30-3D Motor Replacement: шаг 9, изображение 1 из 1
    • There is a capacitor attached to the oscillator by a single screw. Once the screw is removed the capacitor should come off easily.

    Спросите у FixBot

    Добавить комментарий

  10. GD Midea FT30-3D Motor Replacement: шаг 10, изображение 1 из 2 GD Midea FT30-3D Motor Replacement: шаг 10, изображение 2 из 2
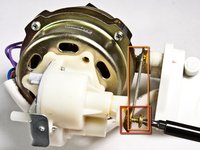
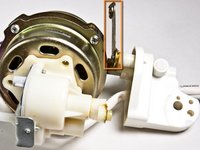
    • Remove the screw that connects the oscillator to the rocker arm.

    • Push down on the rocker arm after removing the screw and turn it away from the oscillator.

    Спросите у FixBot

    Добавить комментарий

  11. GD Midea FT30-3D Motor Replacement: шаг 11, изображение 1 из 1
    • The oscillator should now be easy to pull off.

    • Clean the oscillator and remove any jams. If the problem persists the oscillator is damaged and needs to be replaced.

    Спросите у FixBot

    Добавить комментарий

  12. GD Midea FT30-3D Motor Replacement, Motor: шаг 12, изображение 1 из 2 GD Midea FT30-3D Motor Replacement, Motor: шаг 12, изображение 2 из 2
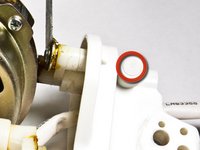
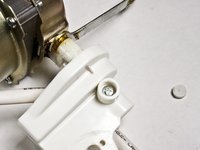
    • At the base of the upper assembly there is a plug which conceals a screw.

    • The plug can be removed with a screwdriver. Removing the plug may take a few attempts.

    Спросите у FixBot

    Добавить комментарий

  13. GD Midea FT30-3D Motor Replacement: шаг 13, изображение 1 из 1
    • Slide the motor out of the base of the upper assembly.

    Спросите у FixBot

    Добавить комментарий

Заключение

To reassemble your device, follow these instructions in reverse order.

Отменить: Я не выполнил это руководство.

10 человек успешно провели ремонт по этому руководству.

Alan Su

Участник с: 10/03/12

846 Репутация

Автор 6 руководств

Команда

Cal Poly, Team 24-28, Regan Fall 2012 Участник Cal Poly, Team 24-28, Regan Fall 2012

CPSU-REGAN-F12S24G28

4 членов

Автор 14 руководств

4 Комментарии к руководству

Alan Su (y contribuidores): Excelente aporte!!! Felicidades me ha sido muy útil. Gracias

Oliver K - Ответить Поделиться

Hey. Could you tell me where to buy the spare motor from please?

Hywel Williams - Ответить Поделиться

where can i buy the motor?

HAL SCHEDLER - Ответить Поделиться

Where can I buy the motor???

anonymous 2683 - Ответить Поделиться

Добавить комментарий

Статистика просмотров:

За последние 24 часов: 4

За последние 7 дней: 15

За последние 30 дней: 75

За всё время: 8,322