Введение
If the buttons are unresponsive or sticking, the keypad may be compromised and need to be replaced. This is a guide to replace the keypad buttons of the Garmin GPSmap 60CSx.
Выберете то, что вам нужно
-
-
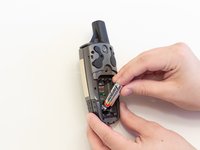
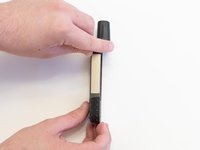
Lift and twist the battery cover release 90 degrees counterclockwise on the back of the device.
 Спросите у FixBot
-
-
-
-
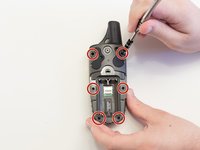
Remove the six 10 mm screws on the back of the device with a Phillips #0 screwdriver.
-
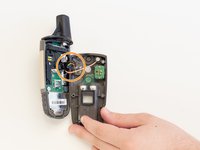
Flip the back panel over to view the green electronics board (the PCB) and the PCB covering.
-
Remove the black, yellow, blue, and red wires connected to the PCB with light force.
-
-
-
Place the spudger in the bottom right corner of the black PCB cover and pry the corner out.
-
The previous step will need to be done to the other three corners.
-
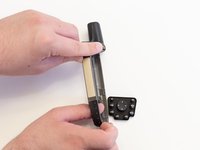
Pull the black PCB board out of the GPSMap 60 CSx.
-
-
-
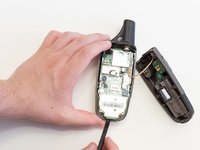
Carefully use a spudger to lift the PCB a few centimeters.
-
Pull the PCB out towards the bottom of the GPSMap 60CSx.
-


To reassemble your device, follow these instructions in reverse order.
Отменить: Я не выполнил это руководство.
3 человек успешно провели ремонт по этому руководству.

Команда

Linn Benton Community College, Team S2-G5, Johnson Spring 2018 Участник Linn Benton Community College, Team S2-G5, Johnson Spring 2018
LBCC-JOHNSON-S18S2G5
5 членов
Автор 11 руководств