Перейти к основному содержанию
/
Мой рабочий стол для верстки руководств

Получите быстрый доступ к руководствам, запчастям и ответам касательно ваших устройств

Gateway MA6 Laptop RAM Replacement

Gateway MA6 Laptop RAM Replacement

Chris Naughton

Chris Naughton и 3 другие участники

Последнее обновление June 23, 2019

10 мин.
Легко

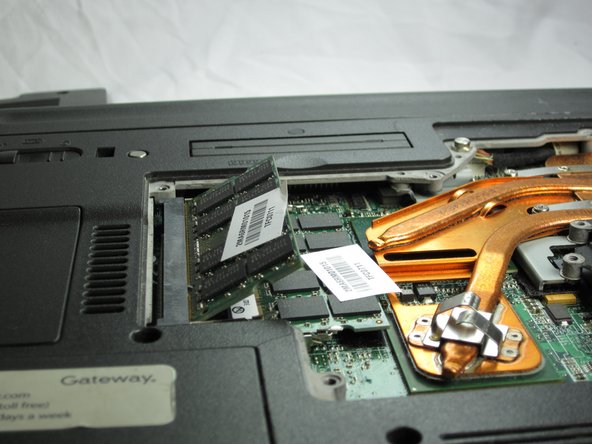
The RAM in this laptop can be accessed easily with very little disassembly. There are two slots that both accept PC2-5300S RAM.

Выберете то, что вам нужно

Инструменты

  1. Gateway MA6 Laptop RAM Replacement, Battery: шаг 1, изображение 1 из 1
    • To prevent injury, make sure the laptop is unplugged before removing the battery.

    • Make sure the switch in the upper right corner of the laptop is switched to the "unlock" position (toward the unlocked padlock icon).

  2. Gateway MA6 Laptop RAM Replacement: шаг 2, изображение 1 из 3 Gateway MA6 Laptop RAM Replacement: шаг 2, изображение 2 из 3 Gateway MA6 Laptop RAM Replacement: шаг 2, изображение 3 из 3
    • Pull the switch on the upper lefthand corner of the laptop towards the unlocked padlock icon.

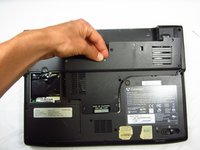
    • Firmly pull the battery outwards and away from the laptop.

  3. Gateway MA6 Laptop RAM Replacement, RAM: шаг 3, изображение 1 из 2 Gateway MA6 Laptop RAM Replacement, RAM: шаг 3, изображение 2 из 2
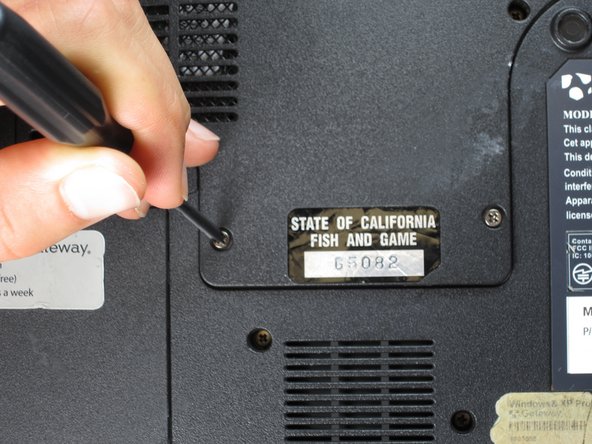
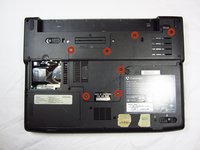
    • Remove the seven 6 mm Phillips #0 screws from the back of the case.

    • Leave all the screws in the back plate and so you don't lose them.

  4. Gateway MA6 Laptop RAM Replacement: шаг 4, изображение 1 из 2 Gateway MA6 Laptop RAM Replacement: шаг 4, изображение 2 из 2
    • Pull upwards on the top of the back cover to remove it.

  5. Gateway MA6 Laptop RAM Replacement: шаг 5, изображение 1 из 3 Gateway MA6 Laptop RAM Replacement: шаг 5, изображение 2 из 3 Gateway MA6 Laptop RAM Replacement: шаг 5, изображение 3 из 3
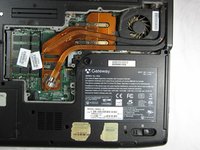
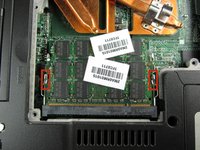
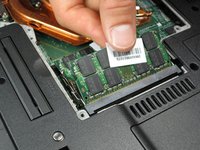
    • Pull outwards on the silver metal pins to release the upper RAM module.

    • The module will automatically lift up 30° after it has been released.

  6. Gateway MA6 Laptop RAM Replacement: шаг 6, изображение 1 из 2 Gateway MA6 Laptop RAM Replacement: шаг 6, изображение 2 из 2
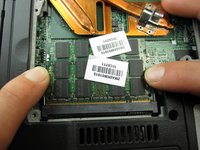
    • Firmly grasp the outer portion of the RAM module, and pull it outward to remove it from the port.

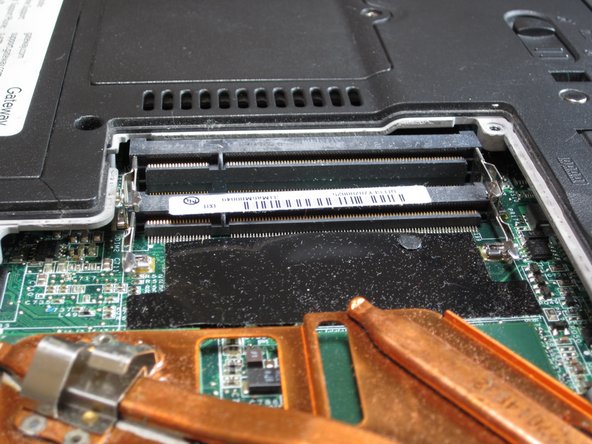
    • Repeat the same process for the lower RAM module.

Заключение

To reassemble your device, follow these instructions in reverse order.

Chris Naughton

Участник с: 04/07/14

705 Репутация

Автор 5 руководств

Команду

Cal Poly, Team 6-2, Forte Spring 2014 Участник Cal Poly, Team 6-2, Forte Spring 2014

CPSU-FORTE-S14S6G2

5 членов

Автор 20 руководств

0 Комментариев

Добавить комментарий

Статистика просмотров:

За последние 24 час(ов): 0

За последние 7 дней: 1

За последние 30 дней: 4

За всё время: 1,202