Перейти к основному содержанию

Gateway P-6831FX Hard Drive Replacement

Выберете то, что вам нужно

  1. Gateway P-6831FX Hard Drive Replacement, Hard Drive: шаг 1, изображение 1 из 2 Gateway P-6831FX Hard Drive Replacement, Hard Drive: шаг 1, изображение 2 из 2
    • Turn your laptop upside down and remove the four Philips #0 (5mm) screws for the cover of the hard drive.

    • Make sure to unplug your laptop charger, as removing the hard drive while the device is charging may damage the hard drive and or the charger.

  2. Gateway P-6831FX Hard Drive Replacement: шаг 2, изображение 1 из 2 Gateway P-6831FX Hard Drive Replacement: шаг 2, изображение 2 из 2
    • Gently pull the cover away from the device.

    • Set the cover aside for now, until reassembly.

  3. Gateway P-6831FX Hard Drive Replacement: шаг 3, изображение 1 из 2 Gateway P-6831FX Hard Drive Replacement: шаг 3, изображение 2 из 2
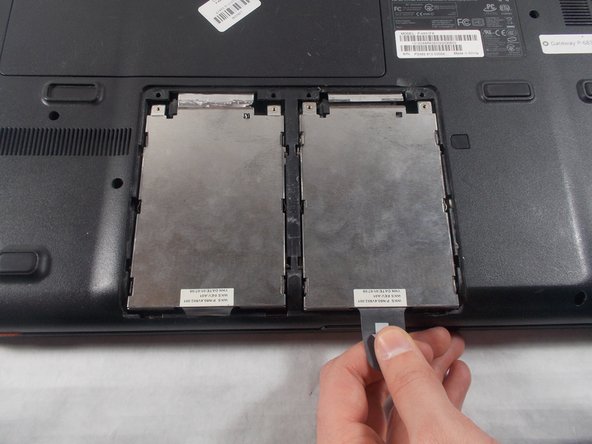
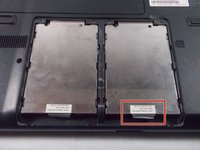
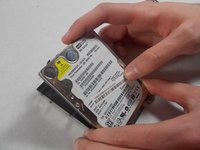
    • Pull the plastic tab as shown to remove the hard drive from the device.

  4. Gateway P-6831FX Hard Drive Replacement: шаг 4, изображение 1 из 2 Gateway P-6831FX Hard Drive Replacement: шаг 4, изображение 2 из 2
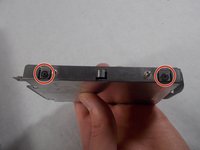
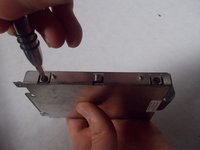
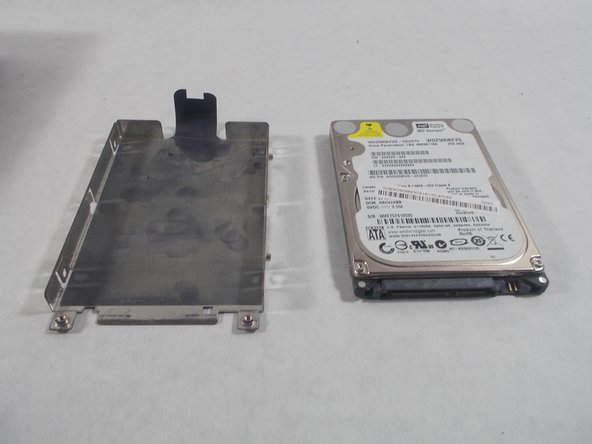
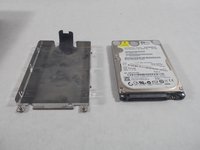
    • Remove the four Philips #0 (3mm) screws around the case for the hard drive. There will be two screws and the left and right side.

  5. Gateway P-6831FX Hard Drive Replacement: шаг 5, изображение 1 из 3 Gateway P-6831FX Hard Drive Replacement: шаг 5, изображение 2 из 3 Gateway P-6831FX Hard Drive Replacement: шаг 5, изображение 3 из 3
    • Remove the hard drive from the case.

Заключение

To reassemble your device, follow these instructions in reverse order.

Еще один человек закончил это руководство.

Chandler Jardin

Участник с: 03/19/18

507 Репутация

Автор 4 руководств

Команда

UMass Dartmouth, Team S3-G5, Peak Spring 2018 Участник UMass Dartmouth, Team S3-G5, Peak Spring 2018

UMASSD-PEAK-S18S3G5

2 членов

Автор 12 руководств

0 Комментариев

Добавить комментарий

Просмотр статистики:

За последние 24часов: 3

За последние 7 дней: 6

За последние 30 дней: 8

За всё время: 303