Перейти к основному содержанию
Присоединяйся к сообществу ремонтников - Создай аккаунт

Gateway Solo 1200 Fan Replacement

Выберете то, что вам нужно

    1. Gateway Solo 1200 Fan Replacement, Battery: шаг 1, изображение 1 из 3 Gateway Solo 1200 Fan Replacement, Battery: шаг 1, изображение 2 из 3 Gateway Solo 1200 Fan Replacement, Battery: шаг 1, изображение 3 из 3
      • Turn off your laptop and disconnect it from AC Adapter before use.

      • Locate the battery latch on the bottom of the laptop.

      • Release the latch by pressing it with your thumb and sliding it to the right.

      • Slide the battery out of its compartment.

      • Discharge your laptop by pushing the power button after removing the battery.

      Спросите у FixBot

      Добавить комментарий

    1. Gateway Solo 1200 Fan Replacement, Keyboard and Frame: шаг 2, изображение 1 из 2 Gateway Solo 1200 Fan Replacement, Keyboard and Frame: шаг 2, изображение 2 из 2
      • Turn the device so the back is facing you.

      • Unscrew the 2 mm screws with a Phillips #0 screwdriver.

      • Unscrewing these back screws partially releases the keyboard.

      Спросите у FixBot

      Добавить комментарий

    2. Gateway Solo 1200 Fan Replacement: шаг 3, изображение 1 из 2 Gateway Solo 1200 Fan Replacement: шаг 3, изображение 2 из 2
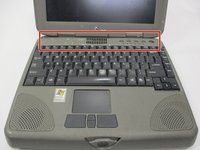
      • Open up the device so the keyboard is visible.

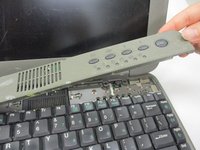
      • Locate the front panel with the power button above the keyboard.

      • Remove the panel by gently pulling on it.

      • The panel should pop out with little force.

      Спросите у FixBot

      Добавить комментарий

    3. Gateway Solo 1200 Fan Replacement: шаг 4, изображение 1 из 3 Gateway Solo 1200 Fan Replacement: шаг 4, изображение 2 из 3 Gateway Solo 1200 Fan Replacement: шаг 4, изображение 3 из 3
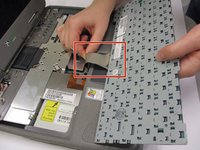
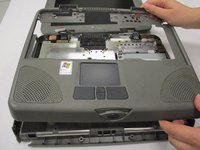
      • Gently lift the keyboard panel up.

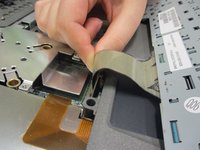
      • Flip the keyboard panel over to reveal the underside.

      • Gently tug on the ribbon cable at the bottom of the keyboard panel to release the keyboard.

      Спросите у FixBot

      Добавить комментарий

    4. Gateway Solo 1200 Fan Replacement: шаг 5, изображение 1 из 3 Gateway Solo 1200 Fan Replacement: шаг 5, изображение 2 из 3 Gateway Solo 1200 Fan Replacement: шаг 5, изображение 3 из 3
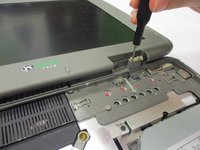
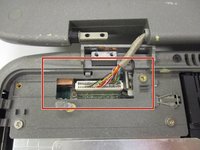
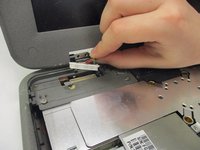
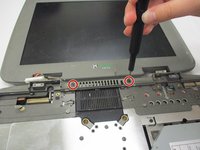
      • Remove both monitor hinge covers at the base of the screen by unscrewing the 2 mm screws with a Phillips #0 screwdriver.

      • Locate the visual output cord on the exposed left hinge connecting the monitor to the laptop.

      • Gently tug on the visual output cord to remove the screen.

      Спросите у FixBot

      Добавить комментарий

    5. Gateway Solo 1200 Fan Replacement: шаг 6, изображение 1 из 3 Gateway Solo 1200 Fan Replacement: шаг 6, изображение 2 из 3 Gateway Solo 1200 Fan Replacement: шаг 6, изображение 3 из 3
      • Once the screen is removed, locate the keyboard frame screws.

      • Unscrew the outer frame and gently pull it away from the device.

      • Gently tug on the trackpad connector underneath the keyboard frame to completely remove it.

      Спросите у FixBot

      Добавить комментарий

    1. Gateway Solo 1200 Fan Replacement, Fan: шаг 7, изображение 1 из 3 Gateway Solo 1200 Fan Replacement, Fan: шаг 7, изображение 2 из 3 Gateway Solo 1200 Fan Replacement, Fan: шаг 7, изображение 3 из 3
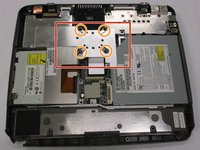
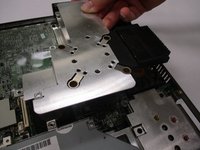
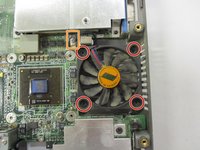
      • Locate the heatsink next to the fan.

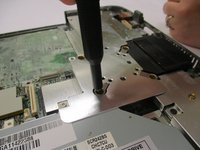
      • Unscrew the four 2mm screws attaching the heatsink to the device.

      • Lift the heatsink upwards, careful not to disturb other internal components.

      Спросите у FixBot

      Добавить комментарий

    2. Gateway Solo 1200 Fan Replacement: шаг 8, изображение 1 из 3 Gateway Solo 1200 Fan Replacement: шаг 8, изображение 2 из 3 Gateway Solo 1200 Fan Replacement: шаг 8, изображение 3 из 3
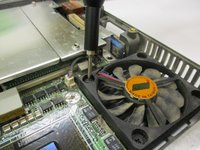
      • Unscrew the four screws attaching the fan to the device.

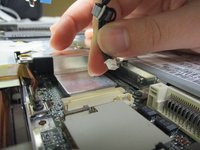
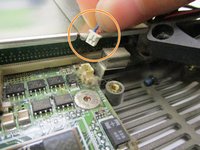
      • Carefully tug the fan's connector from the heat system.

      • The connector is fragile and shouldn't be yanked to avoid damages.

      Спросите у FixBot

      Добавить комментарий

Заключение

To reassemble your device, follow these instructions in reverse order.

Отменить: Я не выполнил это руководство.

Riki

Участник с: 08/26/19

235 Репутация

Автор 2 руководств

Команда

University of North Texas, Team S1-G3, Friess Fall 2019 Участник University of North Texas, Team S1-G3, Friess Fall 2019

UNT-FRIESS-F19S1G3

3 членов

Автор 73 руководств

0 Комментарии к руководству

Добавить комментарий

Статистика просмотров:

За последние 24 часов: 0

За последние 7 дней: 4

За последние 30 дней: 16

За всё время: 528