Перейти к основному содержанию
Присоединяйся к сообществу ремонтников - Создай аккаунт

HP Pavilion zv5000 Screen Replacement

Выберете то, что вам нужно

  1. HP Pavilion zv5000 Screen Replacement, Battery: шаг 1, изображение 1 из 1
    • Make sure that your device is properly shut down and unplugged from any outlet.

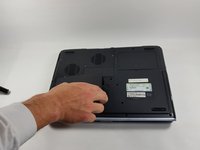
    • Flip Pavilion over so that the bottom faces up and locate the battery in the bottom left corner.

    Спросите у FixBot

    Добавить комментарий

  2. HP Pavilion zv5000 Screen Replacement: шаг 2, изображение 1 из 2 HP Pavilion zv5000 Screen Replacement: шаг 2, изображение 2 из 2
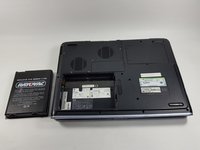
    • Press and slide up the battery release tab with your thumb until the battery pops out of place.

    Спросите у FixBot

    Добавить комментарий

  3. HP Pavilion zv5000 Screen Replacement: шаг 3, изображение 1 из 2 HP Pavilion zv5000 Screen Replacement: шаг 3, изображение 2 из 2
    • Using two fingers, pry the rest of the battery out of the socket.

    Спросите у FixBot

    Добавить комментарий

  4. HP Pavilion zv5000 Screen Replacement, Keyboard: шаг 4, изображение 1 из 2 HP Pavilion zv5000 Screen Replacement, Keyboard: шаг 4, изображение 2 из 2
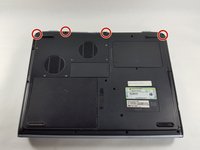
    • Using a Phillips #0 screwdriver, unscrew all four Phillips PM 2.5X13.0mm screws and place in a secure area until the end of the project.

    Спросите у FixBot

    Добавить комментарий

  5. HP Pavilion zv5000 Screen Replacement: шаг 5, изображение 1 из 1
    • Flip laptop back over and open as far as it can go.

    Спросите у FixBot

    Добавить комментарий

  6. HP Pavilion zv5000 Screen Replacement: шаг 6, изображение 1 из 1
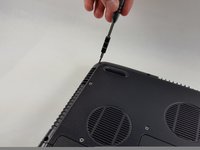
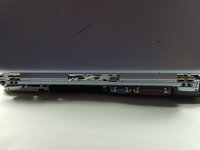
    • Use the flat edge of the plastic spudger inserted under the bottom of the strip cover and pry upwards to un-clip the cover, starting at the right and moving to the left.

    • If the plastic spudger is not doing the trick, try using the metal spudger careful to not pop any keys out.

    Спросите у FixBot

    Добавить комментарий

  7. HP Pavilion zv5000 Screen Replacement: шаг 7, изображение 1 из 2 HP Pavilion zv5000 Screen Replacement: шаг 7, изображение 2 из 2
    • Use hands to completely lift off the strip cover and remove.

    Спросите у FixBot

    Добавить комментарий

  8. HP Pavilion zv5000 Screen Replacement: шаг 8, изображение 1 из 1
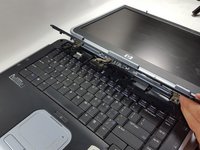
    • Use the Phillips #0 screwdriver again, unscrew all four Phillips PM 2.5X13.0mm screws from the top of the keyboard and set aside.

    Спросите у FixBot

    Добавить комментарий

  9. HP Pavilion zv5000 Screen Replacement: шаг 9, изображение 1 из 2 HP Pavilion zv5000 Screen Replacement: шаг 9, изображение 2 из 2
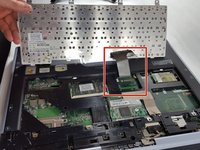
    • Using your hands, lift the keyboard up from the top towards yourself until the keyboard is resting in your hand.

    • Do not aggressively pull at the keyboard for risk of ripping the connector cable.

    Спросите у FixBot

    Добавить комментарий

  10. HP Pavilion zv5000 Screen Replacement: шаг 10, изображение 1 из 2 HP Pavilion zv5000 Screen Replacement: шаг 10, изображение 2 из 2
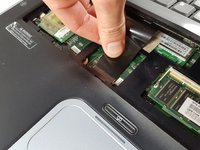
    • Gently slide out the connecting cable from the laptop to the keyboard.

    • Do not aggressively pull at the connecting cable.

    Спросите у FixBot

    Добавить комментарий

  11. HP Pavilion zv5000 Screen Replacement: шаг 11, изображение 1 из 1
    • Completely remove the keyboard from the rest of the laptop.

    Спросите у FixBot

    Добавить комментарий

  12. HP Pavilion zv5000 Screen Replacement, Screen: шаг 12, изображение 1 из 1
    • Flip the Pavilion back over on its backside.

    Спросите у FixBot

    Добавить комментарий

  13. HP Pavilion zv5000 Screen Replacement: шаг 13, изображение 1 из 3 HP Pavilion zv5000 Screen Replacement: шаг 13, изображение 2 из 3 HP Pavilion zv5000 Screen Replacement: шаг 13, изображение 3 из 3
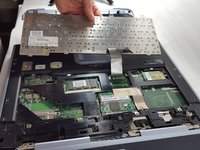
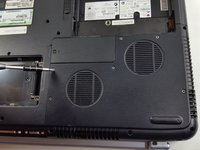
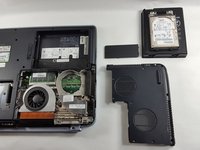
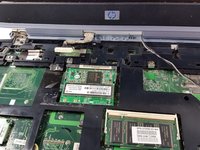
    • Using the same Phillips #0 screwdriver, unscrew the six Phillips PM 2.5X6.0mm screws.

    • Also remove the four Phillips PM 2.5X13.0mm screws to remove the thermal plate with the same screwdriver.

    Спросите у FixBot

    Добавить комментарий

  14. HP Pavilion zv5000 Screen Replacement: шаг 14, изображение 1 из 2 HP Pavilion zv5000 Screen Replacement: шаг 14, изображение 2 из 2
    Инструмент, используемый на этом этапе:
    Tweezers
    $4.99
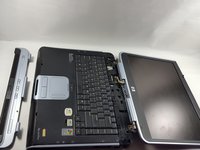
    • Flip the laptop back over and open the lid all the way.

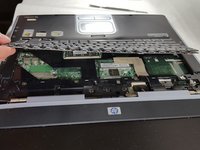
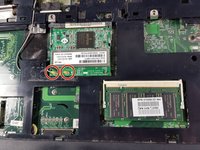
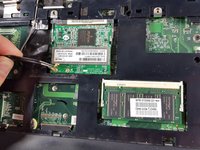
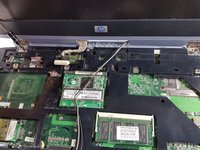
    • Using the flat edge of the plastic spudger, pry straight up to remove the Mini PCI Connector Cables from the board.

    • Tweezers can also be used to gently squeeze and pull up on the Mini PCI Cable Connectors to remove from the board.

    • When reinstalling, place the Mini PCI Connector Cables back in place and gently press straight down until they snap into place.

    Спросите у FixBot

    Добавить комментарий

  15. HP Pavilion zv5000 Screen Replacement: шаг 15, изображение 1 из 3 HP Pavilion zv5000 Screen Replacement: шаг 15, изображение 2 из 3 HP Pavilion zv5000 Screen Replacement: шаг 15, изображение 3 из 3
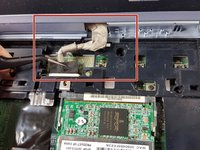
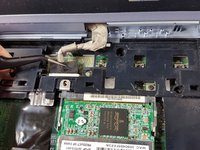
    • Using the tweezers, gently squeeze and pull backwards on the display cable until it is disconnected.

    • To reinsert, simply align the display cable to its proper spot and gently push into place.

    Спросите у FixBot

    Добавить комментарий

  16. HP Pavilion zv5000 Screen Replacement: шаг 16, изображение 1 из 2 HP Pavilion zv5000 Screen Replacement: шаг 16, изображение 2 из 2
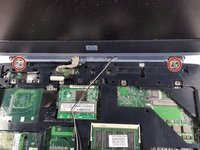
    • Use the Phillips #0 screwdriver again to remove the four Phillips 2.5X13.0mm screws that hold the clips for the screen into place.

    Спросите у FixBot

    Добавить комментарий

  17. HP Pavilion zv5000 Screen Replacement: шаг 17, изображение 1 из 2 HP Pavilion zv5000 Screen Replacement: шаг 17, изображение 2 из 2
    • Turn the laptop around until the top cover is facing you. Keep the laptop in an open position.

    • Unscrew the four Phillips PM 2.5X6.0mm screws using the Phillips #0 that hold the clips of the screen on to the base.

    Спросите у FixBot

    Добавить комментарий

  18. HP Pavilion zv5000 Screen Replacement: шаг 18, изображение 1 из 1
    • Firmly grasp the top of the screen with your hands and pull towards you and upwards to remove the screen from the base.

    Спросите у FixBot

    Добавить комментарий

Заключение

To reassemble your device, follow these instructions in reverse order.

Отменить: Я не выполнил это руководство.

2 человек успешно провели ремонт по этому руководству.

Eliza Marks

Участник с: 10/18/16

676 Репутация

Автор 5 руководств

Команда

UMass Dartmouth, Team 4-6, Catania Fall 2016 Участник UMass Dartmouth, Team 4-6, Catania Fall 2016

UMASSD-CATANIA-F16S4G6

3 членов

Автор 5 руководств

0 Комментарии к руководству

Добавить комментарий

Статистика просмотров:

За последние 24 часов: 0

За последние 7 дней: 6

За последние 30 дней: 38

За всё время: 1,573