Перейти к основному содержанию

HP ProBook 440 G1 Keyboard Replacement

Выберете то, что вам нужно

  1. HP ProBook 440 G1 Keyboard Replacement, Battery: шаг 1, изображение 1 из 2 HP ProBook 440 G1 Keyboard Replacement, Battery: шаг 1, изображение 2 из 2
    • Make sure the laptop is turned off before you start.

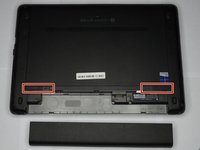
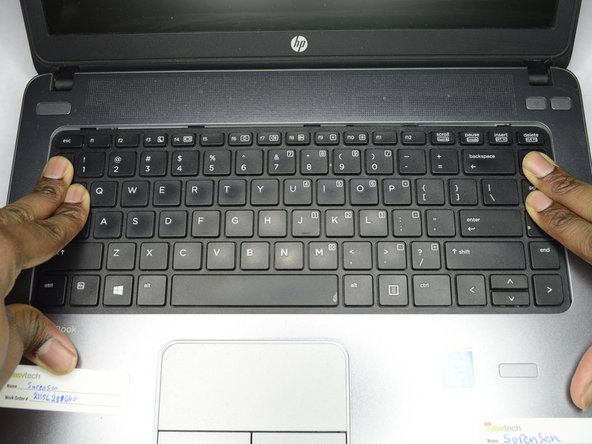
    • Push and hold the release tab on the right and left toward the center.

  2. HP ProBook 440 G1 Keyboard Replacement: шаг 2, изображение 1 из 2 HP ProBook 440 G1 Keyboard Replacement: шаг 2, изображение 2 из 2
    • Pull the battery out.

  3. HP ProBook 440 G1 Keyboard Replacement, Backplate: шаг 3, изображение 1 из 3 HP ProBook 440 G1 Keyboard Replacement, Backplate: шаг 3, изображение 2 из 3 HP ProBook 440 G1 Keyboard Replacement, Backplate: шаг 3, изображение 3 из 3
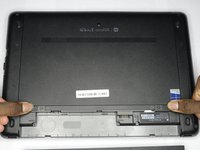
    • Push and hold the release tabs on the right and left toward the center again.

  4. HP ProBook 440 G1 Keyboard Replacement: шаг 4, изображение 1 из 1
    • Slide the backplate off.

  5. HP ProBook 440 G1 Keyboard Replacement, Keyboard: шаг 5, изображение 1 из 2 HP ProBook 440 G1 Keyboard Replacement, Keyboard: шаг 5, изображение 2 из 2
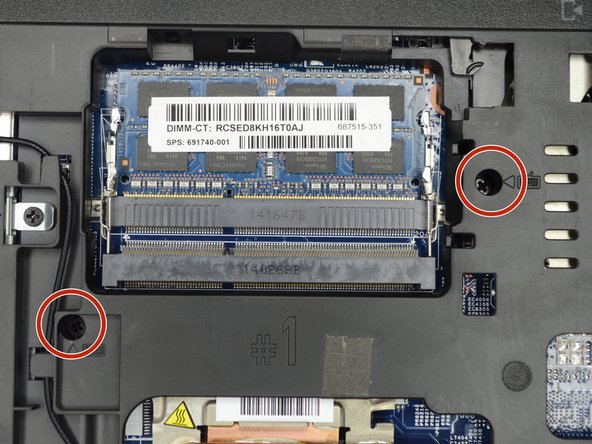
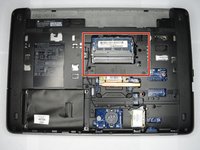
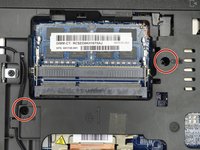
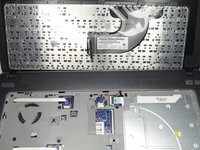
    • Locate the two screws on the back of the laptop, holding the keyboard.

    • Remove the two screws using a Phillips #00 screwdriver.

  6. HP ProBook 440 G1 Keyboard Replacement: шаг 6, изображение 1 из 1
    • Flip the computer over so as to see the keyboard.

  7. HP ProBook 440 G1 Keyboard Replacement: шаг 7, изображение 1 из 2 HP ProBook 440 G1 Keyboard Replacement: шаг 7, изображение 2 из 2
    • Place both hands on the keyboard and slide it back.

    • The keyboard will only slide back a small amount.

  8. HP ProBook 440 G1 Keyboard Replacement: шаг 8, изображение 1 из 2 HP ProBook 440 G1 Keyboard Replacement: шаг 8, изображение 2 из 2
    • Using a plastic opening tool, pull the keyboard up.

  9. HP ProBook 440 G1 Keyboard Replacement: шаг 9, изображение 1 из 3 HP ProBook 440 G1 Keyboard Replacement: шаг 9, изображение 2 из 3 HP ProBook 440 G1 Keyboard Replacement: шаг 9, изображение 3 из 3
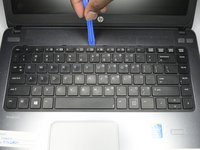
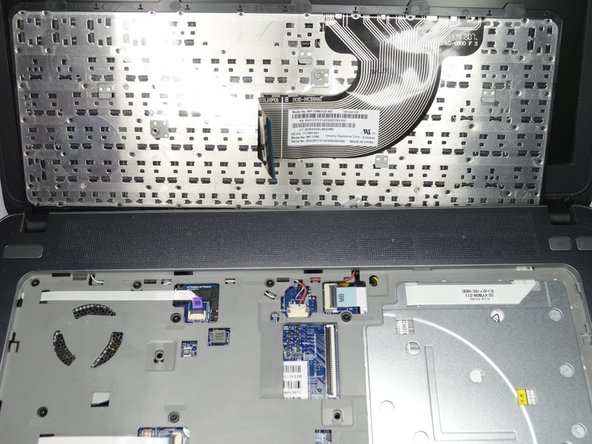
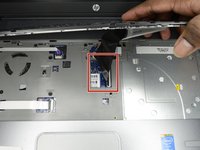
    • Locate the connector strip between the keyboard and the laptop.

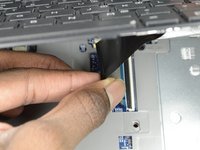
    • Pull the strip away from the connector until it unplugs.

    • It may take some force to make the strip disconnect.

Заключение

To reassemble your device, follow these instructions in reverse order.

Еще один человек закончил это руководство.

Ethan A Courtney

Участник с: 10/24/18

851 Репутация

Автор 7 руководств

Команда

Purdue University Northwest, Team S1-G4, Hingst Fall 2018 Участник Purdue University Northwest, Team S1-G4, Hingst Fall 2018

PNW-HINGST-F18S1G4

1 член

Автор 7 руководств

Один комментарий

thanks for that

sir i want original keyboard 440 G1

if u dont mine suggest me

karun kumar - Ответить

Добавить комментарий

Просмотр статистики:

За последние 24часов: 0

За последние 7 дней: 4

За последние 30 дней: 12

За всё время: 2,190