Этот перевод был сделан машиной и пока не проверен человеком. Говорите на этом языке? Просмотрите его.
Введение
Это руководство поможет вам заменить экран вашего ноутбука. Перед началом работы обязательно наденьте антистатический браслет и извлеките аккумулятор, чтобы избежать повреждения компьютера.
Выберете то, что вам нужно
-
-
Инструмент, используемый на этом этапе:Anti-Static Wrist Strap$7.95
-
Наденьте антистатический браслет.
-
Переверните компьютер нижней стороной вверх.
-
Открутите восемь черных винтов диаметром 3,3 мм на задней крышке с помощью отвертки T4 Torx.
 Спросите у FixBot
-
-
-
Используйте пластиковый медиатор, чтобы поддеть и снять заднюю крышку.
-
-
-
-
-
Открутите шесть серебристых винтов длиной 2,0 мм и два черных винта длиной 3,2 мм с помощью отвертки PH00 Phillips.
-
-
-
Аккуратно отсоедините шлейф от разъема CONO851 с помощью пластиковой лопатки.
-
-
-
-
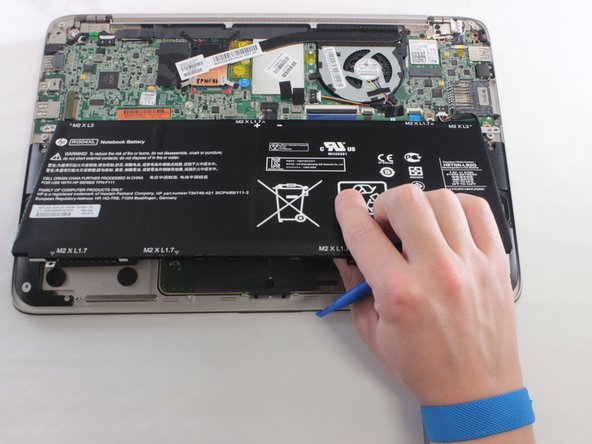
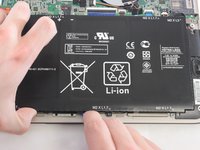
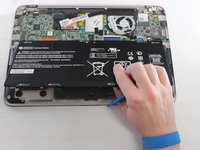
Аккуратно подденьте аккумулятор и извлеките его с помощью пластиковых инструментов для открывания.
-
-
-
-
-
Открутите два кронштейна с помощью крестовой отвертки Phillips #0.
-
-
-
Возьмитесь за язычок ленты, прикрепленный к черному штекеру, и потяните вверх, чтобы извлечь его из разъема.
-
-
-
После того как все разъемы отсоединены, а винты выкручены, просто снимите нижнюю часть компьютера, отделив ее от дисплейного модуля.
-
-




Для сборки устройства выполните эти действия в обратном порядке.
Отменить: Я не выполнил это руководство.
7 человек успешно провели ремонт по этому руководству.

Команда

University of Wisconsin Stout, Team 1-2, Schneider-Bateman Spring 2016 Участник University of Wisconsin Stout, Team 1-2, Schneider-Bateman Spring 2016
UWSTOUT-SCHNEIDER-BATEMAN-S16S1G2
3 членов
Автор 72 руководств
8 Комментарии к руководству
This does not cover replacement of the LCD screen, only the hinge-up LCD assembly. I was hoping for a LCD/Digitizer replacement guide.
I think that it is not necessary to remove the battery in order to replace the screen. So steps 3 and 5 can be skipped. It is a good idea though, to pull the battery cable as described in step 4, so you cannot accidently turn the notebook on during maintenance.
Another notice: The 13-3010dx is structurally identical with the 13-3010eg (which is the German version with QWERTZ-keyboard). So this manual can be used for that one as well.
Another observation I made:
Once I had removed the screen (I removed it entirely, including case, hinge, and everything), the notebook didn’t start anymore. This was strange, because I had the battery connected, the case closed and the power supply plugged in. Basically, I tried to use the notebook with an external screen, but whenever I pressed the power button, this happened: Fan and keyboard illumination turned on, the illumination faded until only the F5-key kept illuminated and then the notebook turned off entirely, then rebooted. No output on the screen, no BIOS visible, nothing. First I thought, I had damaged the mainboard, but then I tried out some advice, I found on Youtube:
In order to fix my boot-loop problem, I removed the power cable, then opened the case again, removed the battery cable, and pressed the power button for a minute. Then I attached the battery cable again, closed the case – and voila: The notebook started again and I was able to use it in combination with my external screen.
Something else to consider:
When I tried to replace a broken digitizer glass (the touch-screen, that sits in front of the IPS-panel), I found out that glass and screen are glued together all over and not only at the edges. For this reason, it is pointless to try to separate LCD-panel and glass. Even if you succeed somehow, it will be almost impossible, to glue together a new glass and the old screen without any bubbles of air in between!
So what you need is an assembly of digitizer and screen. On ebay I found a dealer named “ftdlcd”, who is originated in Hong Kong, China, but he somehow ships worldwide without shipping charges and without taxes. Shipping from China to Germany took about 2 weeks. A new assembly of digitizer and screen will take you about 170€ (October 2016). First time I received a wrong screen (one for the 4000-Series), but it was a high quality panel with QHD resolution and IPS technology. Now I’m waiting for the correct item, which the dealer promised to send immediately.
In order to find the correct screen, search for “13.3" LCD Touchscreen Digitizer Display Assembly für HP Spectre 13-3000 Series” on ebay, or for item number 222172811465 on ebay.de or for the dealer „ftdlcd“.
If someone is interested in how to change the panel – write a comment, then I’ll add some further steps to the manual.
