Перейти к основному содержанию

Hover-1 Horizon Power Button Replacement

Выберете то, что вам нужно

  1. Hover-1 Horizon Power Button Replacement, Base Plate: шаг 1, изображение 1 из 2 Hover-1 Horizon Power Button Replacement, Base Plate: шаг 1, изображение 2 из 2
    • Remove the six 12mm Phillips #2 screws holding the base plate.

  2. Hover-1 Horizon Power Button Replacement: шаг 2, изображение 1 из 2 Hover-1 Horizon Power Button Replacement: шаг 2, изображение 2 из 2
    • Remove the two 11mm Phillips #1 screws that hold the base plate to the body.

  3. Hover-1 Horizon Power Button Replacement: шаг 3, изображение 1 из 3 Hover-1 Horizon Power Button Replacement: шаг 3, изображение 2 из 3 Hover-1 Horizon Power Button Replacement: шаг 3, изображение 3 из 3
    • Remove the base plate by lifting it up.

    • The base plate is connected to the body with wires. The wires are long enough to set the base plate to the side.

  4. Hover-1 Horizon Power Button Replacement, Power Button: шаг 4, изображение 1 из 1
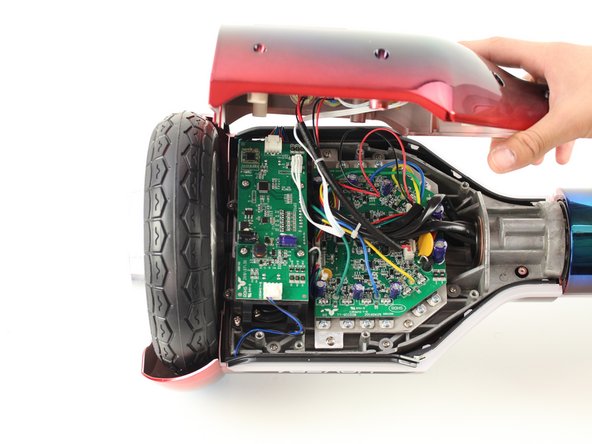
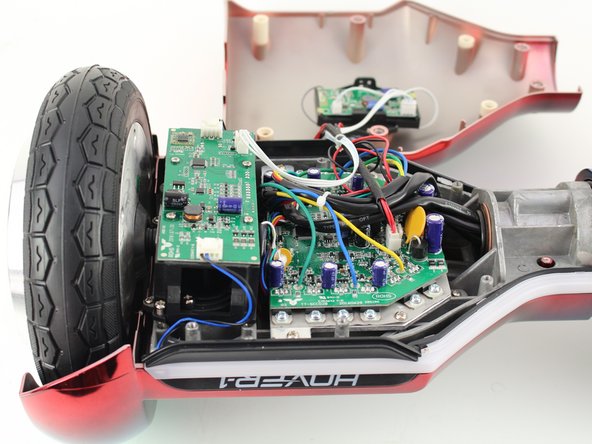
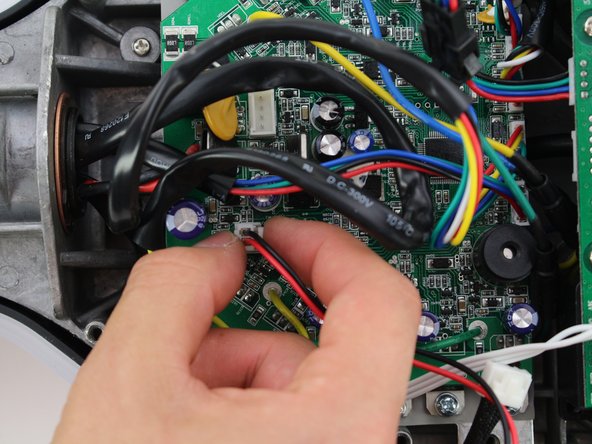
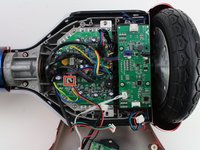
    • Reorient the Hover-1 Horizon so the base plate opens towards you.

  5. Hover-1 Horizon Power Button Replacement: шаг 5, изображение 1 из 3 Hover-1 Horizon Power Button Replacement: шаг 5, изображение 2 из 3 Hover-1 Horizon Power Button Replacement: шаг 5, изображение 3 из 3
    • Remove the connector by squeezing the tab and lifting up.

  6. Hover-1 Horizon Power Button Replacement: шаг 6, изображение 1 из 3 Hover-1 Horizon Power Button Replacement: шаг 6, изображение 2 из 3 Hover-1 Horizon Power Button Replacement: шаг 6, изображение 3 из 3
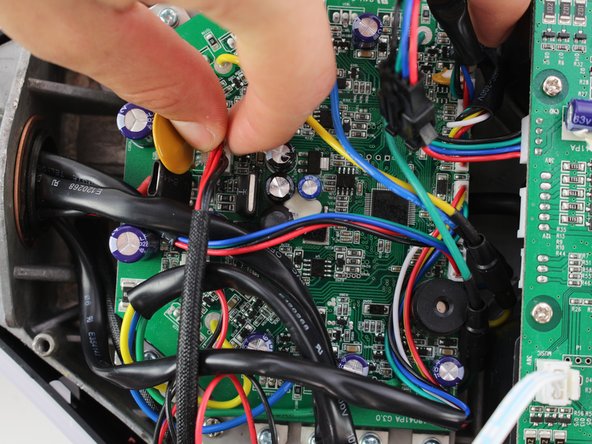
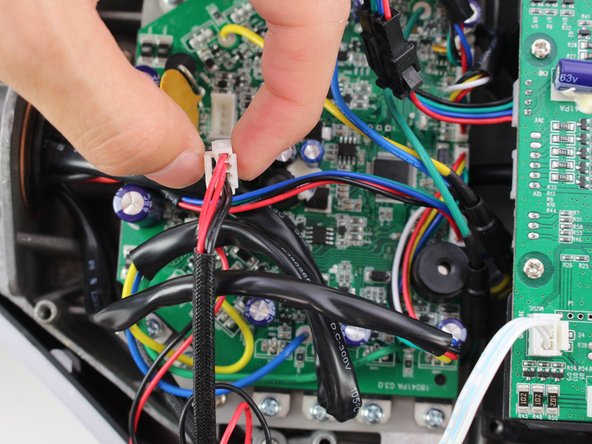
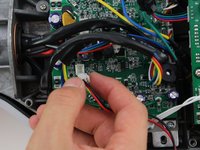
    • Remove the second connector by squeezing the tab and pulling up.

  7. Hover-1 Horizon Power Button Replacement: шаг 7, изображение 1 из 3 Hover-1 Horizon Power Button Replacement: шаг 7, изображение 2 из 3 Hover-1 Horizon Power Button Replacement: шаг 7, изображение 3 из 3
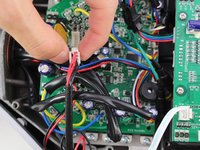
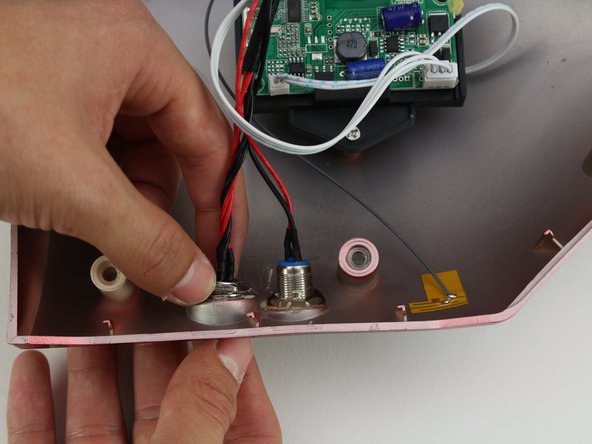
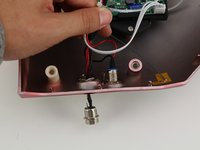
    • Unscrew the power button by holding the front and twisting the back nut counter-clockwise.

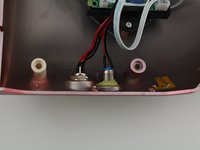
    • Push the power button through the base plate to remove.

    • A hot air gun may need to be used to remove the adhesive connecting the base plate to the power button.

Заключение

To reassemble your device, follow these instructions in reverse order.

Christina Fong

Участник с: 10/08/18

165 Репутация

1 руководство автора

Команда

Cal Poly, Team S13-G6, White Fall 2018 Участник Cal Poly, Team S13-G6, White Fall 2018

CPSU-WHITE-F18S13G6

4 членов

Автор 6 руководств

0 Комментариев

Добавить комментарий

Просмотр статистики:

За последние 24часов: 0

За последние 7 дней: 0

За последние 30 дней: 6

За всё время: 440