Введение
This guide details how to remove the battery from the Huawei Honor 8.
Выберете то, что вам нужно
-
-
-
Using a heat gun or hairdryer, apply heat approximately three inches above the glass panel to warm up the adhesive around the outside edge of the phone.
 Спросите у FixBot
-
-
-
Using a plastic opening tool, gently pry up a corner of the rear glass panel.
-
Slowly slide the plastic opening tool around the outside of the glass panel to break through the adhesive.
-
Gently lift the back panel off once all the adhesive has been removed.
-
-
-
Using a Phillips PH00 screwdriver, remove the silver Phillips 3.5 mm screw circled in red.
-
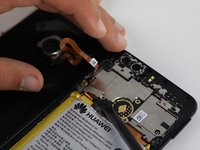
Using a spudger, gently lift off the small metal tab that was held in place by the screw.
-
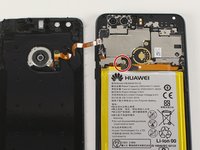
Gently pry off the orange ribbon wire on the back panel.
-
-
-
Using a Phillips PH00 screwdriver, remove the eight silver Phillips 3.5 mm screws circled in red.
-
Using a Phillips PH00 screwdriver, remove the six black Phillips 4.0 mm screws circled in orange.
-
Using a Phillips PH00 screwdriver, remove the single silver 3.0 mm Phillips screw circled in yellow.
-
Using the Phillips PH00 screwdriver tip, gently scratch away the white stickers outlined in green circles to expose hidden screws.
-
Using a Phillips PH00 screwdriver, remove the two black Phillips 4.0 mm screws circled in green.
-
-
-
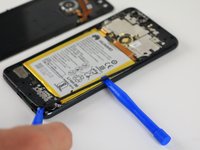
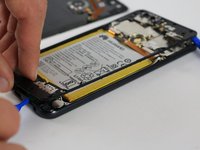
Slowly slide the plastic opening tool around the perimeter of the inner lining.
-
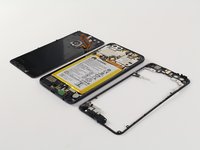
Gently pull the inner lining up to remove it from the phone body.
-
-
-
-
-
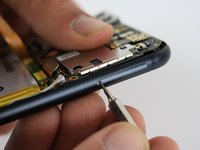
Holding the phone so that the cameras are at the top, locate the small hole on the top right edge of the device.
-
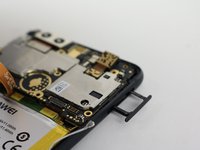
Using the 0.8 mm Sim Eject tool, push down on the small hole to release the Sim Card tray.
-
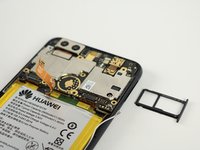
Gently pull out the Sim Card tray and set it aside.
-
-
-
-
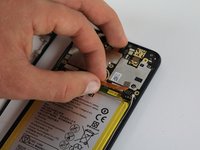
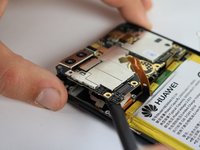
In the following steps you will disconnect the five connectors circled in red holding the motherboard in place.
-
-
-
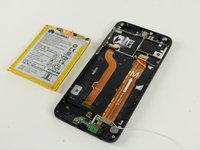
Gently pull the small ribbon connection between the battery and motherboard upward to disconnect it.
-
-
-
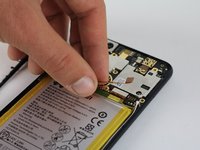
Use a spudger to gently pry off the small antenna cable on the right side of the motherboard.
-
-
-
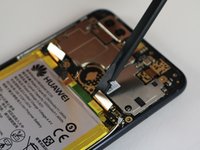
Using a spudger, gently pry up the small connection that holds the motherboard in place.
-
-
-
Using a spudger, gently pry up the connector near the left edge of the motherboard.
-
-
-
Use a spudger to gently pry off the small connection on the far left edge of the motherboard.
-
-
-
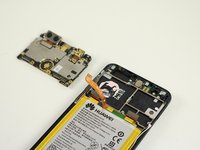
Use a spudger to pry up a corner of the motherboard.
-
Lift the motherboard to remove it from the body of the phone.
-
-
-
-
-
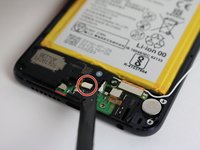
Using a spudger, pry off the small connection between the speaker and phone body located near the bottom of the device circled in red.
-
Gently pry up a corner of the speaker using a spudger.
-
Lift the speaker up and out of the phone body.
-
-
-
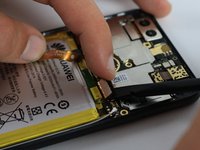
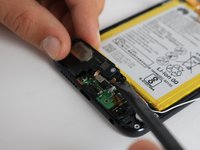
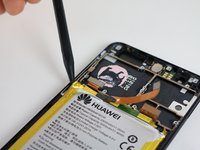
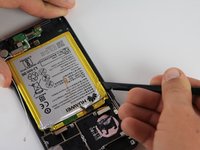
Insert the plastic spudger into the gap between the frame and the battery.
-
Move the spudger around the outside edge of the battery to remove the adhesive.
-
-
-
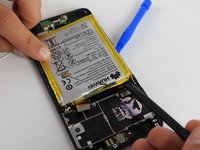
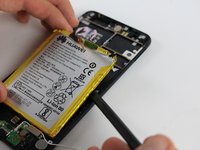
Once all the adhesive has been removed from the battery, use the spudger and plastic opening tools to gently pry the battery away from the frame.
-
-


To reassemble your device, follow these instructions in reverse order.
Отменить: Я не выполнил это руководство.
42 человек успешно провели ремонт по этому руководству.
Команда

Cal Poly, Team S18-G2, Forte Fall 2017 Участник Cal Poly, Team S18-G2, Forte Fall 2017
CPSU-FORTE-F17S18G2
4 членов
Автор 37 руководств
24 Комментарии к руководству
Where are the battery installation and reassembly instructions?
Just go back in reverse order, Einstein
I replaced the battery on my Huawei Honor 8 and after power up it doesn’t see the SIM card. There’s no way to install the sim card tray backwards or put the SIM card in wrong. Any ideas?
Never mind. I figured it out. The metal SIM card cage got distorted and the tray was sliding in behind it, not into it. I gently bent the cage back into shape and all is well.
Do I need to apply new adhesive ? or re-use what is already on the device?