Введение
Use this guide to remove the screen of the Huawei Honor 9.
Before disassembling your phone, discharge the battery below 25%. The battery can catch fire and/or explode if accidentally punctured, but the chances of that happening are much lower if discharged.
Note: This guide instructs you to replace only the screen while leaving the original frame and motherboard in place. However, some replacement screens for this phone come pre-installed in a new frame (a.k.a. chassis), which requires a very different procedure. Make sure you have the correct part before starting this guide.
This guide involves removing the rear glass cover and the battery—you will need replacement adhesive to reattach both and/or a new battery. If your replacement part does not come with adhesive, use a strong double-sided tape to secure it.
Выберете то, что вам нужно
-
-
Switch off your phone.
-
Heat an iOpener and apply it to the back of the phone for around two minutes. This will help soften the adhesive securing the rear glass.
-
You might need to reheat and reapply the iOpener several times during the rear glass removal.
-
-
-
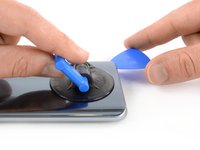
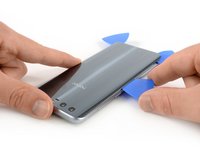
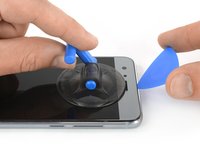
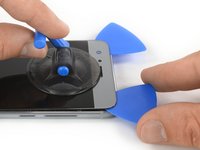
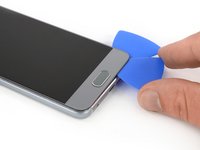
Secure a suction handle to the lower edge of the rear glass, as close to the edge as possible.
-
Lift the rear glass with the suction cup to create a gap between the glass and the frame.
-
Insert an opening pick into the gap.
-
-
-
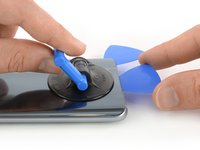
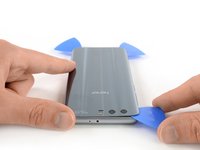
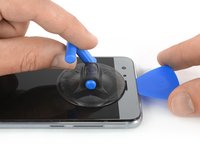
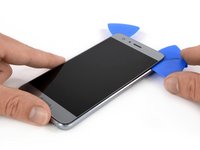
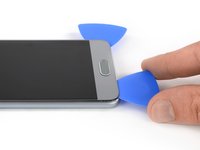
Slide the opening pick to the bottom right corner.
-
Insert a second opening pick and slide it to the bottom left corner.
-
Leave the opening picks in place to prevent the adhesive from resealing.
-
-
-
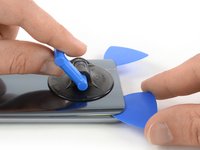
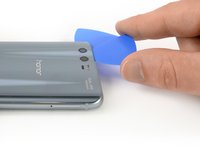
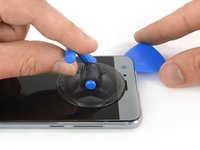
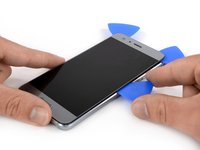
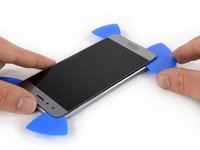
Insert a third opening pick at the bottom left corner.
-
Start to slide the tip of the opening pick from the bottom left corner along the side of the Huawei Honor 9 to cut the adhesive.
-
Leave the opening pick in its place at the top left corner to prevent the adhesive from resealing.
-
-
-
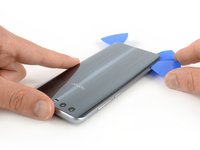
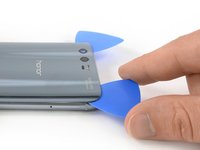
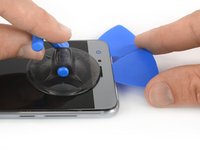
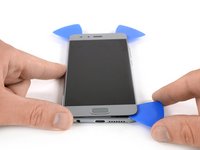
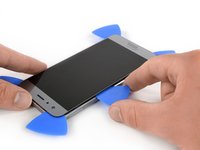
Insert a fourth opening pick under the top left corner of the rear glass.
-
Slide the opening pick along the top edge of the phone to cut the adhesive.
-
Leave the opening pick in the top right corner to prevent the adhesive from resealing.
-
-
-
Insert a fifth opening pick at the top right corner of the phone.
-
Slide the opening pick along the right side to cut the remaining adhesive.
-
-
Инструмент, используемый на этом этапе:Tesa 61395 Tape$5.99
-
Carefully lift the rear glass and remove it.
-
Secure the new rear glass with pre-cut adhesive or double-sided adhesive tape.
-
After installing the rear glass, apply strong, steady pressure to your phone for several minutes to help the adhesive form a good bond, such as by placing it under a stack of heavy books.
-
-
-
Remove the three Phillips #00 screws (3.45 mm length).
-
Remove the five Phillips #00 screws (2.9 mm length).
-
-
-
Carefully peel up the black thermal foil and remove it completely.
-
Remove the Phillips #00 screw that is located underneath the thermal foil at the bottom center of the motherboard.
-
-
-
Slide an opening pick under the right side of the motherboard shield.
-
Twist the opening pick sideways to release the clips that hold the shield in place.
-
Repeat the previous process and work your way around the motherboard shield until it pops out.
-
-
-
-
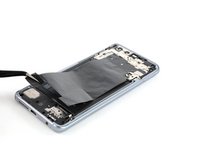
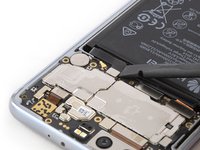
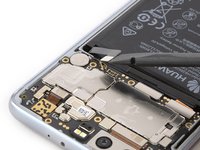
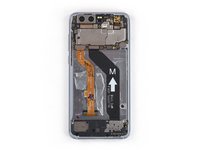
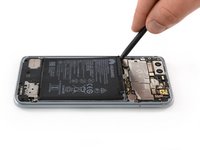
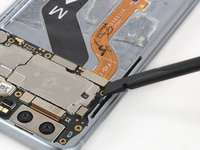
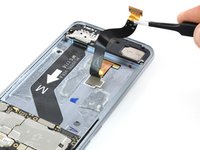
Use a spudger to pry up and disconnect the battery flex cable.
-
-
-
Apply an iOpener to the center of the display, to loosen the adhesive beneath the battery.
-
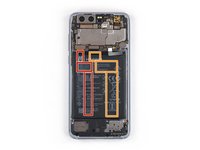
Display flex cable
-
Interconnect flex cable
-
-
-
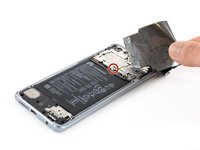
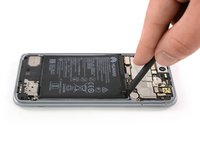
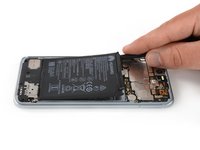
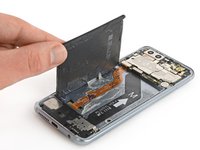
Insert the flat end of a spudger at the top right corner of the battery where the flex cable is located and start to pry the battery up.
-
Work your way down the right side of the battery and loosen the adhesive with the spudger.
-
-
-
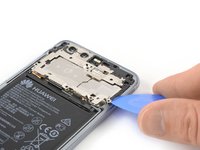
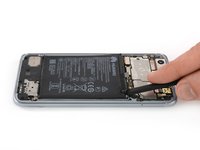
Insert the flat end of a spudger at the top left corner of the battery and pry the battery up.
-
-
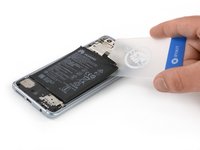
Инструмент, используемый на этом этапе:Plastic Cards$2.99
-
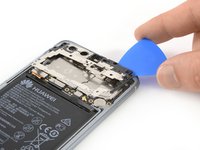
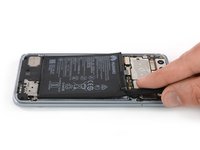
Insert an opening pick or plastic card between the frame and the battery.
-
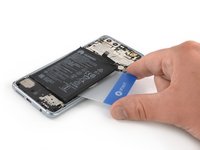
Cut any remaining adhesive underneath the battery.
-
Pry up the battery until you can get a good grip.
-
-
Инструмент, используемый на этом этапе:Tesa 61395 Tape$5.99
-
Remove the battery.
-
-
-
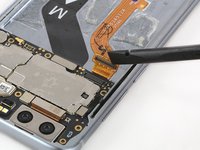
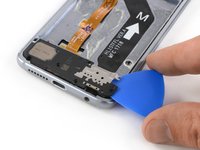
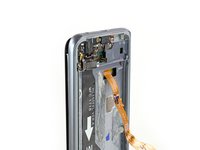
Use a spudger to pry up and disconnect the display flex cable.
-
-
Инструмент, используемый на этом этапе:Tweezers$4.99
-
Use a pair of tweezers to peel the display flex cable off the frame.
-
-
-
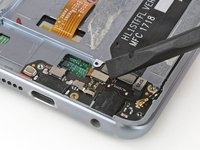
Remove the four Phillips #00 screws (3.2 mm length).
-
Remove the three Phillips #00 screws (2.9 mm length).
-
-
-
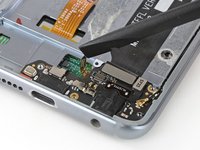
Apply an iOpener to the bottom end of the display to soften the adhesive beneath the loudspeaker.
-
-
-
Slide an opening pick under the loudspeaker and daughterboard cover.
-
Slide the opening pick to the right end of the cover and twist it sideways to lift the loudspeaker out of its recess.
-
-
-
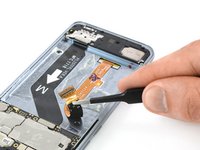
Use a spudger to pry up and disconnect the home button flex cable located at the bottom right of the phone.
-
-
-
Apply a heated iOpener to the display for around two minutes to soften the adhesive underneath.
-
-
-
Once the screen is warm to the touch, apply a suction cup near the top edge of the phone right under the earpiece speaker.
-
Pull up on the suction cup and insert the tip of an opening pick under the display near the earpiece speaker.
-
Slide the opening pick to the top left corner of the phone to cut the adhesive.
-
-
-
Insert a second opening pick and slide it to the top right corner of the phone.
-
-
-
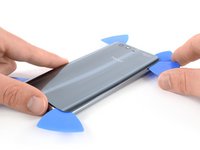
Insert a third opening pick at the top right corner of the screen.
-
Slide the opening pick from the top right corner down the right edge of the phone and cut the adhesive with it.
-
-
-
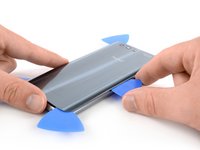
Insert a fourth opening pick at the bottom right corner of the screen.
-
Slide the tip of the opening pick along the bottom edge of the screen to cut the adhesive.
-
-
-
Insert a fifth opening pick at the bottom left corner of the screen.
-
Slide the opening pick along the left edge of the phone to cut the remaining adhesive.
-
-
-
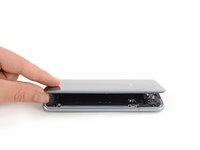
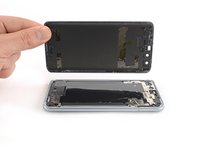
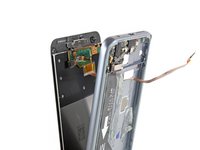
Make sure the display flex cable does not stick to the frame and carefully thread it through the gap at the bottom of the frame.
-
-
Инструмент, используемый на этом этапе:Tesa 61395 Tape$5.99
-
Remove the screen.
-


To reassemble your device, follow these instructions in reverse order.
Take your e-waste to an R2 or e-Stewards certified recycler.
Repair didn’t go as planned? Check out our Answers community for troubleshooting help.
To reassemble your device, follow these instructions in reverse order.
Take your e-waste to an R2 or e-Stewards certified recycler.
Repair didn’t go as planned? Check out our Answers community for troubleshooting help.
Отменить: Я не выполнил это руководство.
5 человек успешно провели ремонт по этому руководству.

