Введение
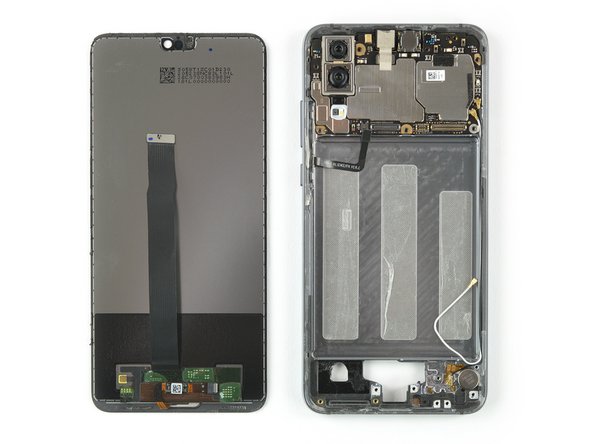
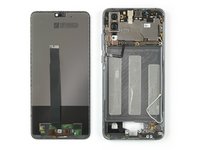
Use this guide to replace a broken or defective LCD Screen & Digitizer in your Huawei P20.
Note: This guide instructs you to replace only the screen while leaving the original frame and motherboard in place. However, some replacement screens for this phone come pre-installed in a new frame (a.k.a. chassis), which requires a very different procedure. Make sure you have the correct part before starting this guide.
Opening the Huawei P20 will damage the splash and dust protection seals on the device. If you do not replace the adhesive seals, your phone will function normally but will lose its protection.
Due to the phone’s design, we recommend removing the lithium-ion battery in order to remove the screen and have better access to the components. However, it is possible to remove the screen without removing the battery. Reusing a deformed battery after it has forcefully been removed, is a potential safety hazard. In this case, replace it with a new battery.
Before disassembling your phone, discharge the battery below 25%. The battery can catch fire and/or explode if accidentally punctured, but the chances of that happening are much lower if discharged.
You’ll need replacement adhesive to reattach components when reassembling the device.
Выберете то, что вам нужно
-
-
Before you begin, switch off your phone.
-
Apply a heated iOpener to the back of the phone to loosen the adhesive beneath the back cover. Apply the iOpener for at least two minutes.
-
-
-
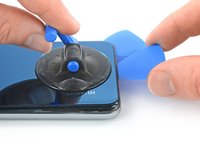
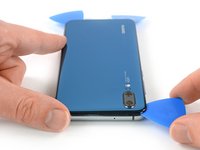
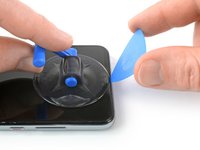
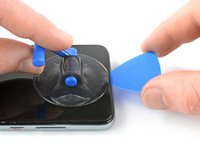
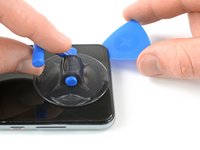
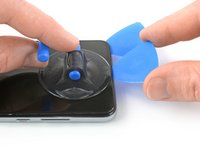
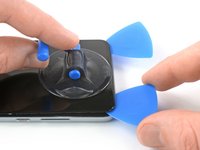
Secure a suction handle to the bottom of the back cover, as close to the edge as possible.
-
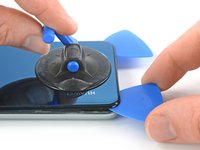
Lift the back cover with the suction handle to create a small gap between the cover and the frame.
-
Insert an opening pick into the gap.
-
If you have trouble, apply more heat to further soften the adhesive. Follow the iOpener instructions to avoid overheating.
-
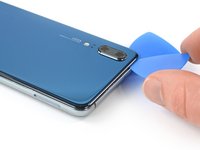
Slide the opening pick to the bottom right corner.
-
-
-
Insert a second opening pick and slide it to the bottom left corner to cut the adhesive.
-
Leave the opening picks in place to prevent the adhesive from resealing.
-
-
-
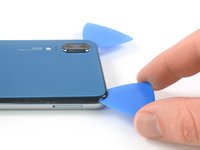
Insert a third opening pick at the bottom left corner.
-
Start to slide the tip of the opening pick from the bottom left corner along the side of the phone to cut the adhesive.
-
Leave the opening pick in its place at the top left corner to prevent the adhesive from resealing.
-
-
-
If the adhesive becomes hard to cut it most likely cooled down. Use your iOpener to reheat it.
-
Insert a fourth opening pick under the top left corner of the back cover.
-
Slide the opening pick along the top edge of the phone to cut the adhesive.
-
Leave the opening pick in the top right corner to prevent the adhesive from resealing.
-
-
-
Insert a fifth opening pick at the top right corner of the phone.
-
Slide the opening pick along the right side to cut the remaining adhesive.
-
-
-
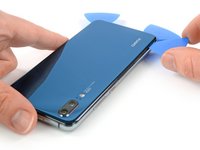
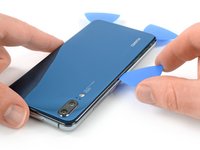
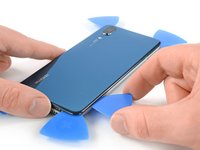
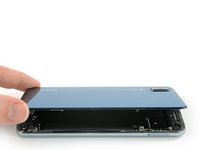
Lift and remove the back cover.
-
Before installing fresh adhesive and reassembling, remove any remaining adhesive from the phone, and clean the glued areas with isopropyl alcohol and a lint-free cloth.
-
-
Инструмент, используемый на этом этапе:Tweezers$4.99
-
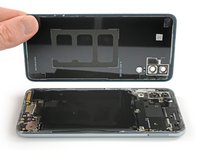
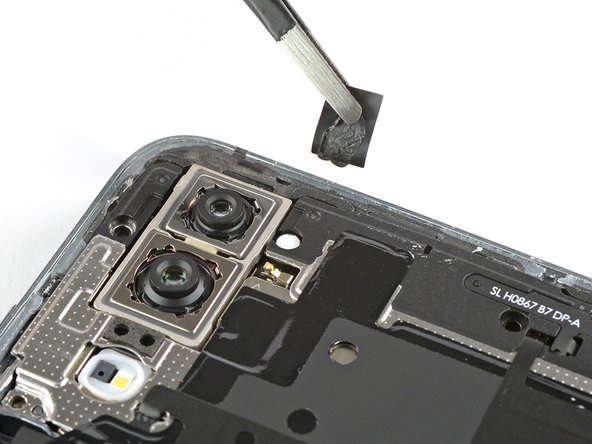
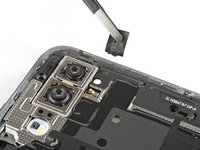
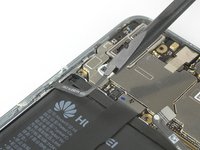
Use a pair of tweezers to peel the black tape next to the rear camera off the motherboard cover.
-
-
-
Use a pair of tweezers to peel the black foil at the bottom end of the phone off the loudspeaker.
-
-
-
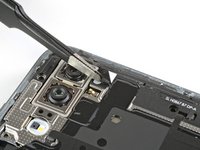
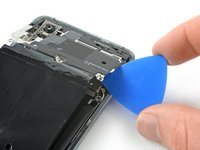
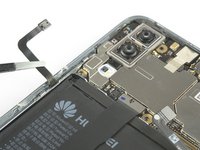
Slide an opening pick under the right side of the motherboard cover.
-
Rotate the opening pick slightly to pry up the motherboard cover.
-
-
-
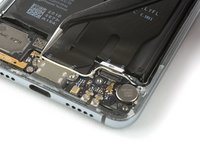
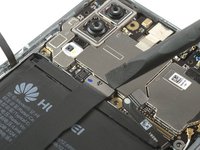
Use a spudger to pry up and disconnect the battery connector.
-
-
-
Инструмент, используемый на этом этапе:Tweezers$4.99
-
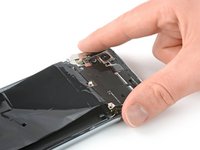
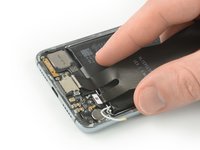
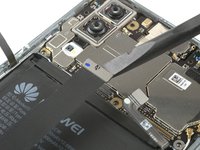
Use a pair of tweezers to remove the daughterboard cover.
-
-
-
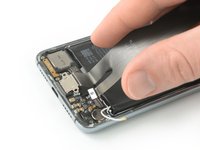
Remove the two Phillips #00 screws (3.2 mm length).
-
-
-
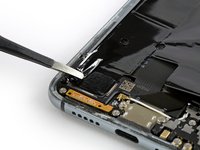
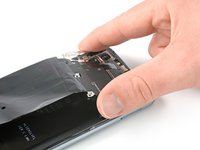
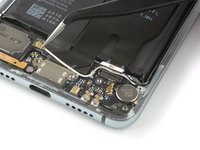
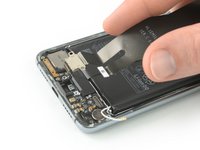
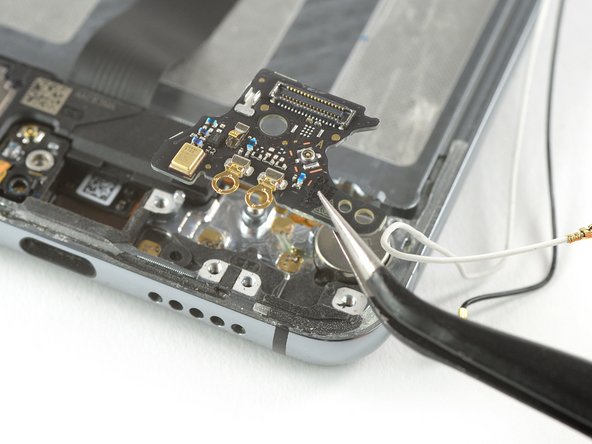
Use a spudger to pry up and disconnect the main daughterboard connector from the daughterboard.
-
-
Инструмент, используемый на этом этапе:Tweezers$4.99
-
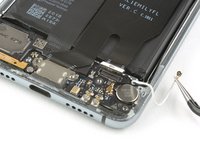
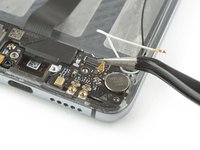
Use a pair of tweezers to pry up and disconnect the connector of the white coax cable from the motherboard.
-
Unroute the white coax cable from the metal clips on the daughterboard and fold it to the side.
-
-
-
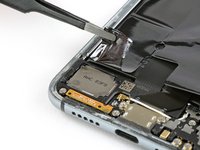
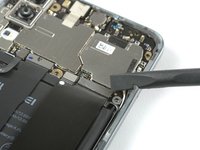
Use a spudger to disconnect the main flex cable connector from the motherboard.
-
-
-
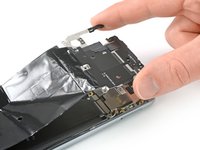
Remove the charging port and main flex cable by lifting it upwards and then pulling it in the direction of the motherboard.
-
-
-
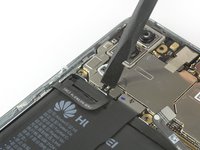
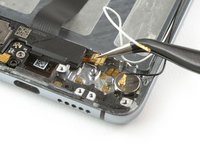
Use a spudger to pry up and disconnect the power and volume button flex connector.
-
-
-
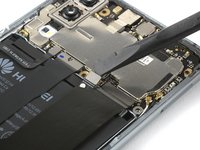
Use a spudger to pry up and disconnect the display flex connector and fold the display cable out of your way to remove the battery.
-
-
-
Apply a heated iOpener to the screen to loosen the adhesive beneath the battery. Apply the iOpener for at least two minutes.
-
-
Инструмент, используемый на этом этапе:Plastic Cards$2.99
-
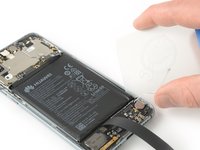
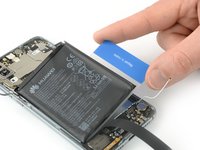
Start to slide a plastic card under the bottom right corner of the battery to cut the adhesive.
-
Slide the plastic card along the right side of the battery to further release the adhesive. Gently start to pry up the battery while doing so.
-
-
-
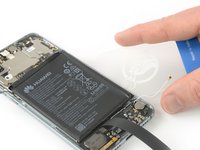
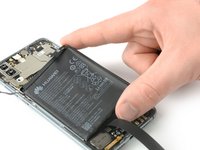
Slide the plastic card under the whole upper part of the battery and cut the adhesive with it.
-
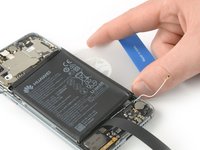
Slide the plastic card down to the bottom end of the battery to cut the remaining adhesive.
-
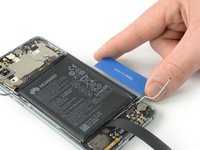
Use the plastic card to pry up the battery.
-
-
Инструмент, используемый на этом этапе:Tesa 61395 Tape$5.99
-
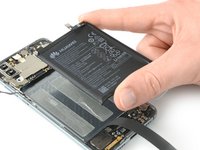
Remove the battery.
-
-
Инструмент, используемый на этом этапе:Tweezers$4.99
-
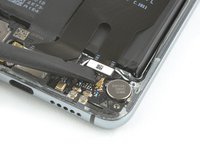
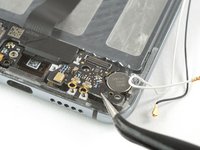
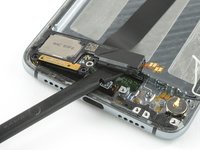
Use a pair of tweezers to disconnect the black coax cable and fold it out of your way.
-
-
-
Apply a heated iOpener to the bottom end of the screen to loosen the adhesive underneath the loudspeaker. Apply the iOpener for at least two minutes.
-
-
Инструмент, используемый на этом этапе:Tweezers$4.99
-
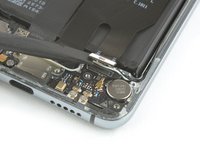
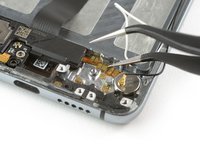
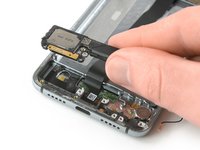
Use one arm of a pair of tweezers to peel up the contact cable of the loudspeaker.
-
-
-
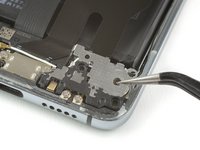
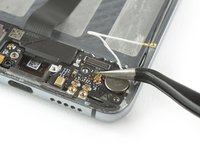
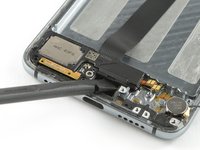
Insert a spudger between the midframe and the right side of the loudspeaker.
-
Use the spudger to pry up the loudspeaker.
-
-
-
Apply a heated iOpener to the screen and all edges of the phone to loosen the adhesive beneath the edges of the LCD screen and digitizer. Apply the iOpener for at least two minutes.
-
-
-
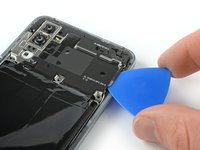
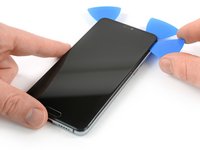
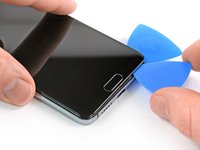
Once the screen is warm to the touch, apply a suction cup to the upper edge of the phone.
-
Pull the suction cup upwards and insert an opening pick in the gap between the display glass and the plastic bezel. Start to cut the adhesive by sliding the opening pick to the top left corner.
-
-
-
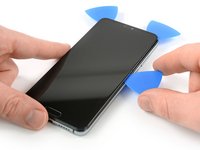
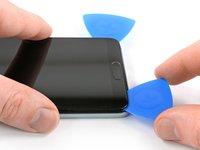
Insert a second opening pick and slide it to the top right corner of the phone.
-
Leave the picks in their place to prevent the adhesive from resealing.
-
-
-
Insert a third opening pick under the top right corner of the phone.
-
Slide the opening pick down to the bottom right corner to cut the adhesive. Leave it at the bottom right corner to prevent the adhesive from resealing.
-
If cutting becomes too difficult, reheat and reapply the iOpener.
-
-
-
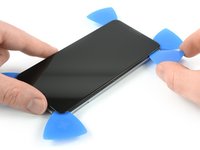
Insert the tip of a fourth opening pick at the bottom right corner.
-
Slide the opening pick along the bottom edge of the phone to cut the adhesive.
-
Leave the opening pick in the bottom left corner to prevent the adhesive from resealing.
-
-
-
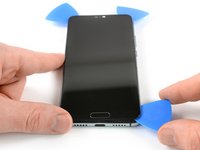
Insert a fifth opening pick and slide it along the left edge of the phone to cut the remaining adhesive.
-
-
-
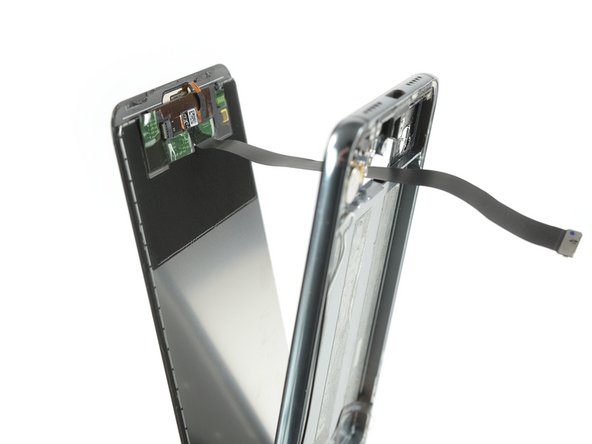
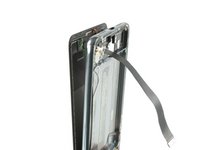
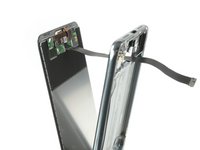
Thread the display flex cable through the gap in the midframe and remove the display.
-


If possible, turn on your phone and test your repair before installing new adhesive and resealing the phone.
To reassemble your device, follow these instructions in reverse order.
The best way to secure the new screen is with a sheet of custom-cut double-sided tape. Apply the tape to the back of the screen, then carefully feed the display cable through the frame. Align the screen and press it into place.
Take your e-waste to an R2 or e-Stewards certified recycler.
Repair didn’t go as planned? Check out our Answers community for troubleshooting help.
Отменить: Я не выполнил это руководство.
6 человек успешно провели ремонт по этому руководству.


3 Комментариев
What size tape do you use to reapply?
Hi Astrodoge,
that‘s right. However due to the phone’s design, we recommend removing the lithium-ion battery in order to remove the screen and have better access to the components. We mention this in the introduction of this guide.