Введение
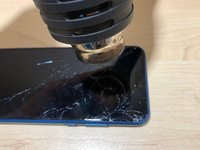
Steps to disassemble the device in order to replace the screen or other components.
Выберете то, что вам нужно
-
-
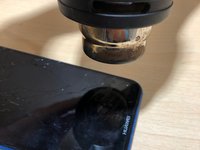
Heat up the Back glass generously.
-
BEWARE!! The back glass will be extremely hot, so be careful.
-
Remove the sim tray.
-
-
-
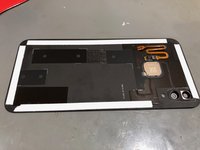
With some alcohol and a suction cup pry the back glass from the frame gently.
-
When you see a small gap, insert a spatula or pick to loosen up the adhesive.
-
Slide the pick around the device to loosen the back glass.
-
BE CAREFUL OF THE FINGERPRINT SENSOR FLEX!. The flex connects at the top right corner of the device so do not enter the pick in too deep.
-
-
-
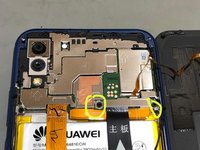
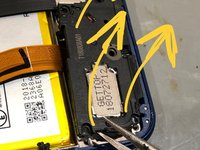
Flip the Back Glass to the right and then unscrew the two Phillips screws holding the plate in place.
-
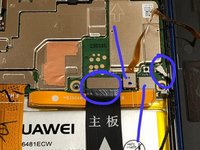
Disconnect the Sub board flex along with the sensor flex, coaxial cable and battery flex.
-
-
-
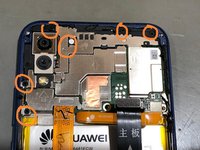
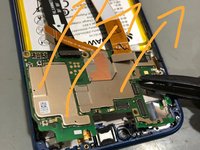
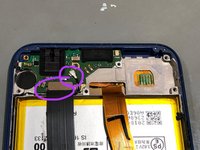
Remove all the screws visible keeping the plates in place.
-
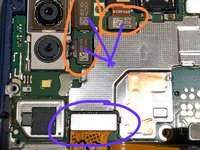
Carefully unplug the camera connectors along with the screen connector.
-
The cameras are loose and don't have any adhesive making them stick.
-
-
-
-
The main board does have some thermal paste making it hard and sticky to remove.
-
Heat up the front of the screen until it quite hot.
-
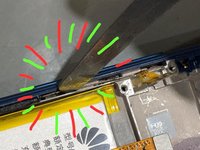
Gently pry and snap the main board out of the frame.
-
-
-
Remember to remove the ear speaker and side keys if they are not included with your new frame.
-
Gently remove the adhesive between the side key and the frame and lift up.
-
-
-
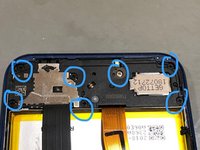
Remove all the screws.
-
The loud speaker unit does have some adhesive underneath it. Give it a good amount of heat to loosen up.
-
Gently unclip and lift the unit out from the frame.
-
Watch out for the flex cables running from underneath it!.
-
-
-
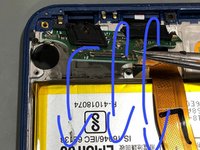
Disconnect the sub board flex and the coaxial cable.
-
Lift the sub board up and pull it towards you.
-
-
-
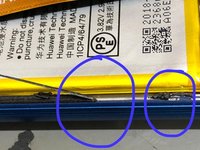
Apply a lot of heat from the front
-
Use alcohol to loosen up the adhesive.
-
Gently pry from underneath and slide until the battery is loose.
-
BE CAREFUL NOT TO BEND OR PUNCTURE THE BATTERY AS IT COULD LEAD TO AN EXPLOSION OR SMOKE EMITTING FROM THE BATTERY.
-
-
-
Apply new adhesive to the back glass.
-
If you are re-using the old frame make sure all the old adhesive is removed. Otherwise the back glass will not sit flush .
-
-
-
Follow all the disassembly steps to reassemble the device.
-
the last step would be to connect the fingerprint sensor and placing the plate covering the connectors back along with the two screws.
-


To reassemble your device, follow these instructions in reverse order.
Отменить: Я не выполнил это руководство.
33 человек успешно провели ремонт по этому руководству.

8 Комментарии к руководству
Where can I take my p20 lite for fixing the broken screen
Wäre super, wenn ein extriges Bild zur Demontage des Mainboards gemacht wird in welchem Winkel das Werkzeug angesetzt gehört.
An sonsten gute Anleitung.
So much parts you needn't to remove in this tutorial for a screen replacement ! Only move the sensor and screen flex by removing the three screws and metal parts at the back of the motherboard and the seven screws on the sub board with the black plastic part and its over ! Don't overmanipulate and dissambly your gear for nothing, you'll lose money and time.
Hi buddy. I believe you a referring to a situation where only the front panel is being replaced. In the tutorial the entire front assembly was being replaced. This includes the LCD and frame. The entire device had to be transferred. No shortcuts there.
If get you clear, you mean the screen alone can not be replaced? Meaning you have to replace the frame as well?