Введение
This guide will show how to remove a failing touchpad from the palm rest of an IBM Thinkpad T60. Remember to always power down the computer before attempting any installation/removal of any hardware components. Be sure to remove the AC adapter and all cables from the computer. If the computer has been on, wait several minutes before beginning the procedure to ensure all parts have cooled down.
Выберете то, что вам нужно
-
-
Turn the computer over to see the small tab on the battery located near the top of the Thinkpad.
-
Use your finger to slide the tab to the right to unlock the battery.
 Спросите у FixBot
-
-
-
Once the tab is in the unlocked position (far right), pull the battery outwards away from the Thinkpad.
-
The battery is now disconnected.
-
-
-
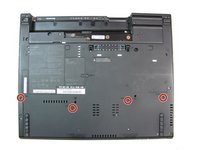
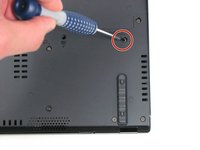
Using a #0 Phillips screwdriver, remove the four 17.0 mm screws.
-
-
-
Turn the computer back over, so the keyboard is facing upwards.
-
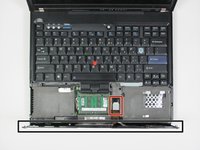
Open the display to access the palm rest. Apply pressure to the sides of the palm rest so that it bends upwards in the middle. Gently lift away from the computer.
-
-
-
-
Slightly lift the palm rest away from the computer.
-
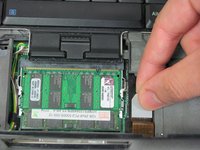
Detach the connector by pulling upwards on the white tab.
-
-
-
Turn the palm rest over to access the back of the touch pad.
-
-
-
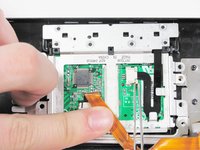
Using your fingers, remove the plastic film that covers the two connectors to the touchpad.
-
-
Инструмент, используемый на этом этапе:Tweezers$4.99
-
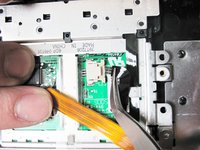
Identify the connector with the black cables.
-
In order to disengage the connector, use tweezers to pull out on the two grey tabs
-
Once the grey tabs have been disengaged, use tweezers to pull on the black cables and the connector will detach from the port.
-
-
-
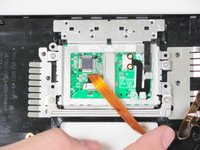
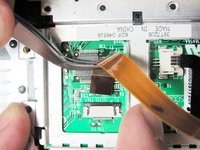
Identify the connector with the orange cables.
-
In order to disengage the connector use tweezers to pull the orange cable outward.
-
-
-
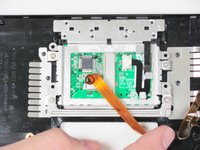
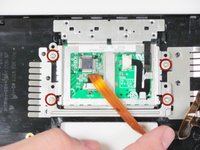
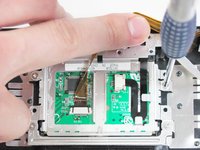
Use a #0 Phillips screwdriver to unscrew the four 3.4 mm screws circled in red.
-
-
-
Using your fingers, remove the metal framing surrounding the touch pad by pulling upwards on each of the four corners.
-
-
-
Remove the touch pad by lifting it out of the palm rest with your fingers.
-












To reassemble your device, follow these instructions in reverse order.
Отменить: Я не выполнил это руководство.
Еще один человек закончил это руководство.

Команда

Cal Poly, Team 7-9, Maness Winter 2013 Участник Cal Poly, Team 7-9, Maness Winter 2013
CPSU-MANESS-W13S7G9
4 членов
Автор 16 руководств
2 Комментарии к руководству
I bought mine used on eBay. and upgraded the HDD and RAM and it is working perfectly. But I recently noticed that the palm rest is not perfectly seated at the front edge and is raised by roughly 2mm. (⅛in.) I have tried refitting the palm rest, but it hasn’t made any different. It is possible that it was like that before I fitted the RAM and I just hadn’t notice, so it could be the result of an earlier intervention. The machine still works OK and the lid closes, so it isn’t a big deal, but it is a bit annoying that such a well engineered device doesn’t go back together exactly as it should. Any suggestions?
Sort of solved it . . . . . Get the left hand side located first and jiggle it about a bit and the palm rest will fit back neatly. But it isn’t immediately obvious how you shouls go about this.
