Перейти к основному содержанию
Присоединяйся к сообществу ремонтников - Создай аккаунт

Kindle Voyage Vibrator Replacement

Выберете то, что вам нужно

  1. Kindle Voyage Vibrator Replacement, Back Panel: шаг 1, изображение 1 из 2 Kindle Voyage Vibrator Replacement, Back Panel: шаг 1, изображение 2 из 2
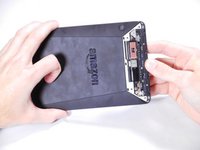
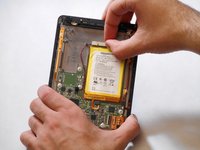
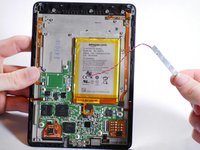
    • Insert a plastic opening tool between the plastic panel shown on the device.

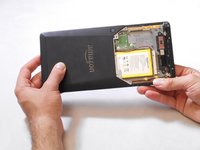
    • Use the tool to pry the plastic away from the device.

    • There will be adhesive holding this piece of plastic to the device. You may have to pull pretty hard to get it separated.

  2. Kindle Voyage Vibrator Replacement: шаг 2, изображение 1 из 1
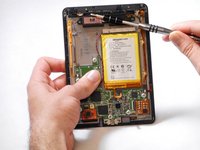
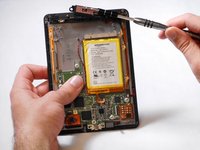
    • Use an aluminum driver attached with a Phillips head size #00 to remove the four 3mm screws shown in the picture. For reassembly, note that the top two and bottom two screws are different sizes.

  3. Kindle Voyage Vibrator Replacement: шаг 3, изображение 1 из 3 Kindle Voyage Vibrator Replacement: шаг 3, изображение 2 из 3 Kindle Voyage Vibrator Replacement: шаг 3, изображение 3 из 3
    • Once the screws are removed, the back panel can slide off the device.

  4. Kindle Voyage Vibrator Replacement: шаг 4, изображение 1 из 2 Kindle Voyage Vibrator Replacement: шаг 4, изображение 2 из 2
    • Remove the magnetic component with the magnetic head of the aluminum driver.

  5. Kindle Voyage Vibrator Replacement, Vibrator: шаг 5, изображение 1 из 2 Kindle Voyage Vibrator Replacement, Vibrator: шаг 5, изображение 2 из 2
    Инструмент, используемый на этом этапе:
    Tweezers
    $4.99
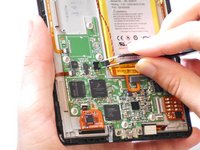
    • Use tweezers to pinch in the sides of the vibrator cable and slide it out of its housing.

  6. Kindle Voyage Vibrator Replacement: шаг 6, изображение 1 из 3 Kindle Voyage Vibrator Replacement: шаг 6, изображение 2 из 3 Kindle Voyage Vibrator Replacement: шаг 6, изображение 3 из 3
    • Gently peel the vibrator off of the device.

Заключение

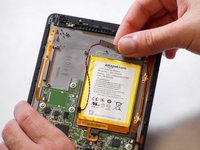
To reassemble your device, follow these instructions in reverse order.

Sean Yap

Участник с: 01/22/15

1 488 Репутация

Автор 6 руководств

Команда

Cal Poly, Team 19-12, Maness Winter 2015 Участник Cal Poly, Team 19-12, Maness Winter 2015

CPSU-MANESS-W15S19G12

5 членов

Автор 13 руководств

1 Комментарий к руководству

OK, the procedure seems straightforward enough, but you say “no parts required” when you actually *do* need to buy the replacement parts for the pieces that are no longer functioning. Where can you buy these parts?

Sharon Crowley - Ответить Поделиться

Добавить комментарий

Статистика просмотров:

За последние 24 часов: 1

За последние 7 дней: 10

За последние 30 дней: 55

За всё время: 1,586