Введение
If the image is broken or hazy when looking through the viewfinder of your Kodak Signet 35, then the beamsplitter may be broken or dirty. This guide will show you how to remove it for cleaning or replacing. Before following these steps, make sure you have all the necessary tools, as well as enough time to disassemble and reassemble the device with the proper care.
Выберете то, что вам нужно
-
-
Инструмент, используемый на этом этапе:Flathead 3/32" or 2.5 mm Screwdriver$5.49
-
Using the 2.5mm flathead screwdriver, remove both 2.8mm flathead screws that hold the wind and rewind dials in place. Then, remove the washer located underneath each dial.
 Спросите у FixBot
-
-
-
Using the Phillips head screwdriver, unscrew both 2.1mm Phillips #00 screws located on the top of the camera.
-
While holding the camera with one hand, use the other hand to remove the top of the camera.
-
-
-
-
Using the Phillips head screwdriver, remove the vertical-facing 2.1mm Phillips #00 screw that holds the metal bracket in place and set it aside.
-
With the 2.5mm flathead screwdriver, loosen the horizontal-facing 2.1mm flathead screw that holds the metal bracket in place and set it aside.
-
-
-
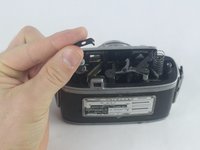
Remove the metal bracket that holds the beamsplitter in place and set it aside.
-
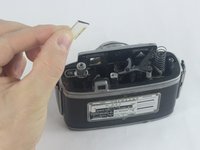
Remove the beamsplitter. It can now be cleaned or replaced.
-
-


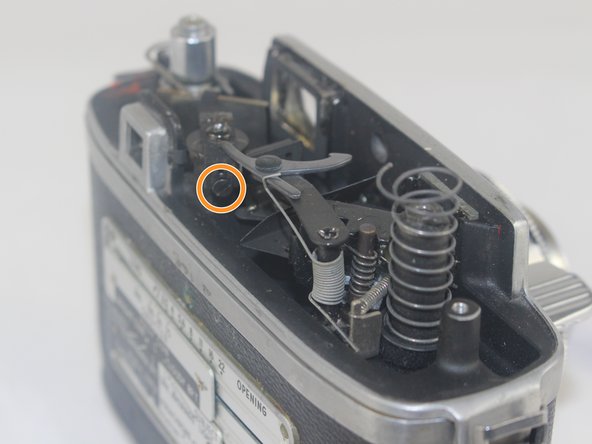

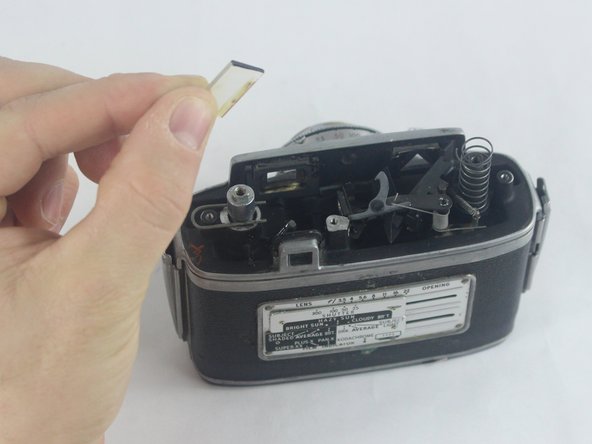
To reassemble your device, follow these instructions in reverse order.
Отменить: Я не выполнил это руководство.
2 человек успешно провели ремонт по этому руководству.

Команда

USF Tampa, Team 6-3, Remmell Fall 2016 Участник USF Tampa, Team 6-3, Remmell Fall 2016
USFT-REMMELL-F16S6G3
4 членов
Автор 9 руководств
1 Комментарий к руководству
I feel like the beamsplitter's position can change a great deal depending on how lose the arm is and after cleaning/repair it definitely shifts. How does one position it properly?
I just cleaned mine and now I see two triangles at the bottom of the viewfinder (used to see nothing because the glass elements were all very dirty).
