Перейти к основному содержанию
Присоединяйся к сообществу ремонтников - Создай аккаунт

Kurio Xtreme Touch Screen Replacement

Выберете то, что вам нужно

    1. Kurio Xtreme Touch Screen Replacement, Back Panel: шаг 1, изображение 1 из 1
      • Remove the rubber case by beginning to peel from one of the top corners and continue peeling until the cover is completely removed.

      Спросите у FixBot

      Добавить комментарий

    2. Kurio Xtreme Touch Screen Replacement: шаг 2, изображение 1 из 2 Kurio Xtreme Touch Screen Replacement: шаг 2, изображение 2 из 2
      • Unscrew the four 4 mm black screws using a Phillips #000 screw driver.

      • There are two screws on each side of the device (four total).

      Спросите у FixBot

      Добавить комментарий

    3. Kurio Xtreme Touch Screen Replacement: шаг 3, изображение 1 из 3 Kurio Xtreme Touch Screen Replacement: шаг 3, изображение 2 из 3 Kurio Xtreme Touch Screen Replacement: шаг 3, изображение 3 из 3
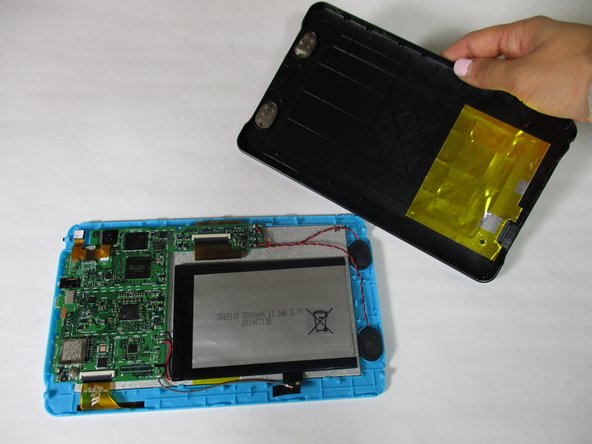
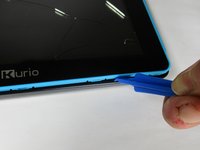
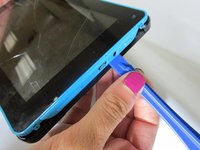
      • Insert the plastic opening tool in between the edges of the blue front casing and black back casing.

      • Slide the plastic opening tool around the perimeter of the device. This may require that you repeatedly run the opening tool up and down the edges of the device.

      • Be sure not to break any of the plastic clamps along the edges of the device when removing the back cover.

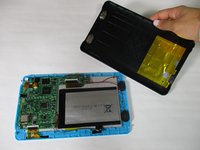
      • Carefully lift the back panel off of the rest of the device.

      Спросите у FixBot

      Добавить комментарий

    1. Kurio Xtreme Touch Screen Replacement, Touch Screen: шаг 4, изображение 1 из 1
      • Unscrew the three 4 mm screws with a Phillips #000 screwdriver.

      Спросите у FixBot

      Добавить комментарий

    2. Kurio Xtreme Touch Screen Replacement: шаг 5, изображение 1 из 2 Kurio Xtreme Touch Screen Replacement: шаг 5, изображение 2 из 2
      • Remove the orange data display ribbon wire above the battery by prying open the ZIF connector with the plastic opening tool.

      Спросите у FixBot

      Добавить комментарий

    3. Kurio Xtreme Touch Screen Replacement: шаг 6, изображение 1 из 2 Kurio Xtreme Touch Screen Replacement: шаг 6, изображение 2 из 2
      • Remove the orange data display ribbon wire to the left of the battery by prying open the ZIF connector with the plastic opening tool.

      Спросите у FixBot

      Добавить комментарий

    4. Kurio Xtreme Touch Screen Replacement: шаг 7, изображение 1 из 2 Kurio Xtreme Touch Screen Replacement: шаг 7, изображение 2 из 2
      Инструмент, используемый на этом этапе:
      Plastic Cards
      $2.99
      • Slide iFixit's Plastic Card tool or a credit card under the battery to remove the glue that is holding it in place.

      • Be patient and gentle. The glue is strong and may take up to 30 seconds to remove.

      • Carefully lift the battery out of the device and set it aside.

      • Be careful not to disconnect the black and red wires from the motherboard when setting the battery aside.

      Спросите у FixBot

      Добавить комментарий

    5. Kurio Xtreme Touch Screen Replacement: шаг 8, изображение 1 из 1
      • Carefully remove the speakers out of the plastic molds by lifting up the black and red wires. Set the speakers aside.

      • Be careful not to disconnect the black and red wires from the motherboard when setting the speakers aside.

      Спросите у FixBot

      Добавить комментарий

    6. Kurio Xtreme Touch Screen Replacement: шаг 9, изображение 1 из 2 Kurio Xtreme Touch Screen Replacement: шаг 9, изображение 2 из 2
      • Remove the motherboard by lifting it out of the casing and set it aside along with the battery and speakers.

      • The motherboard will still be connected to the battery, speakers, and the gray ground wire.

      Спросите у FixBot

      Добавить комментарий

    7. Kurio Xtreme Touch Screen Replacement: шаг 10, изображение 1 из 1
      • Carefully peel the ground wire tape off of the blue front screen panel.

      • It is not necessary to peel the tape off of the back of the silver LCD screen.

      Спросите у FixBot

      Добавить комментарий

    8. Kurio Xtreme Touch Screen Replacement: шаг 11, изображение 1 из 2 Kurio Xtreme Touch Screen Replacement: шаг 11, изображение 2 из 2
      • Pry open all 7 of the blue clamps by wedging the plastic opening tool under them and bending them backward.

      • The clamps will not "snap" open. This step requires you to actually bend the plastic back.

      Спросите у FixBot

      Добавить комментарий

    9. Kurio Xtreme Touch Screen Replacement: шаг 12, изображение 1 из 2 Kurio Xtreme Touch Screen Replacement: шаг 12, изображение 2 из 2
      • Remove the LCD display from the blue touch screen casing by gently shaking them apart in the palm of your hand.

      • This could be stuck on, so you need heat to loosen the glue.

      • Be careful when prying the digitzer from the plastic, if you bend it too much it can break the frame!

      Спросите у FixBot

      Добавить комментарий

Заключение

To reassemble your device, follow these instructions in reverse order.

Отменить: Я не выполнил это руководство.

3 человек успешно провели ремонт по этому руководству.

Mallory Myers

Участник с: 09/22/15

1 190 Репутация

Автор 7 руководств

Команда

Baylor, Team 6-10, Williams Fall 2015 Участник Baylor, Team 6-10, Williams Fall 2015

BU-WILLIAMS-F15S6G10

3 членов

Автор 14 руководств

2 Комментарии к руководству

Thanks - very good guide! For the investment of an iFixit toolset and less than 10 GBP for a replacement digitizer, I was able to restore my little boy's treasure!

Patrick Niessen - Ответить Поделиться

Thank you so much for the Guide!! Helped save Christmas!!! The steps were easy to follow and my kids tablets are back to new.

tdd82 - Ответить Поделиться

Добавить комментарий

Статистика просмотров:

За последние 24 часов: 1

За последние 7 дней: 8

За последние 30 дней: 40

За всё время: 4,006