Введение
After removing the motherboard, compare the replacement and original display assembly to determine which parts need to be transferred. Some steps may not apply to your replacement part.
Выберете то, что вам нужно
-
-
-
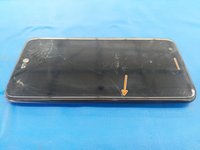
Remove the back cover by inserting a fingernail or opening pick here and disengaging the plastic clips.
-
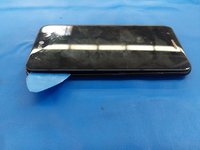
Lift battery up here
 Спросите у FixBot
-
-
-
-
-
Use fingernails or insert an opening pick into the gap between the digitizer and the midframe and pull the midframe outwards to disengage the plastic clips.
-
Carefully disengage the clips on the bottom as the headphone jack goes through the midframe.
-
Once all the clips have been disengaged, move the midframe outwards and downwards to disengage it from the headphone jack.
-
-
-
Инструмент, используемый на этом этапе:Halberd Spudger$2.99
-
Use a Halberd spudger or an opening pick to disconnect the front camera flex from its connector on the motherboard.
-
-
-
-
-
Инструмент, используемый на этом этапе:Halberd Spudger$2.99
-
Use an opening pick or a Halberd spudger to disconnect the front camera flex from its socket on the motherboard.
-
The front camera is held in by adhesive. Carefully pry between the camera and its bracket on the frame of the phone to remove it.
-
If you're having difficulty removing the front-facing camera, remove the motherboard to make more room.
-
-
-
-
-
Using the tip of a Halberd spudger or an opening pick, disconnect the display flex cable from its socket on the motherboard.
-
Starting from the bottom, insert an opening pick between the motherboard and frame and lever apart.
-
-
-
-
-
The volume button assembly is held onto the frame with fragile plastic tabs.
-
Use the tip of a spudger or similar tool to gently pry the plastic tabs upwards and outwards.
-
-
-
-
-
The vibrator motor is held in with strong adhesive.
-
Insert the tip of a metal spudger on the right side of the vibrator motor and pry it upwards.
-
-
-
-
-
The flex cable and speaker are held in with adhesive. Use heat to soften the adhesive.
-
Carefully insert a Jimmy between the flex cable and the frame and detach the cable from the adhesive.
-
Then use the tip of a metal spudger to continue carefully prying the ear speaker up out of its housing.
-
-
-
-
-
The headphone jack is adhered to the frame, and its flex cable is adhered to the frame and the strip of Kapton tape.
-
Use heat to soften the adhesive, then insert an opening pick here to separate the flex cable from the frame.
-
Use an opening pick to pry around the headphone jack to separate it from the adhesive in its housing.
-
-
-
-
-
For best results, transfer this piece of Kapton tape to the new display assembly, if necessary.
-
It is adhered under the bottom tab of the antenna contact cable. Use heat to soften the adhesive, then use an opening pick to gently pry the contact upwards.
-
-


To reassemble your device, follow these instructions in reverse order.
Отменить: Я не выполнил это руководство.
10 человек успешно провели ремонт по этому руководству.

5 Комментарии к руководству
You forgot to mention that the volume button flex needs to be transferred from the original unit.
Hi! my parent drop the LG K20 and now the charger cable is loose, and the volume buttons are in the same frame, the phone is not charging. I need that frame. that’s what my cousin told me ¿can I buy that part?
Thank you great job!!
Podia ser em português.
My screen is jumping around. How do I fix