Перейти к основному содержанию

LG VX5500 Screen Replacement

Выберете то, что вам нужно

  1. LG VX5500 Screen Replacement, Battery: шаг 1, изображение 1 из 3 LG VX5500 Screen Replacement, Battery: шаг 1, изображение 2 из 3 LG VX5500 Screen Replacement, Battery: шаг 1, изображение 3 из 3
    • Remove the battery cover by placing your thumb on the small ridge near the top of the phone back and push downward, exposing the battery.

    • Our device did not come with a battery cover so it is not shown here.

    • Remove the battery using your finger to pry it out of the battery housing.

  2. LG VX5500 Screen Replacement, Screen: шаг 2, изображение 1 из 2 LG VX5500 Screen Replacement, Screen: шаг 2, изображение 2 из 2
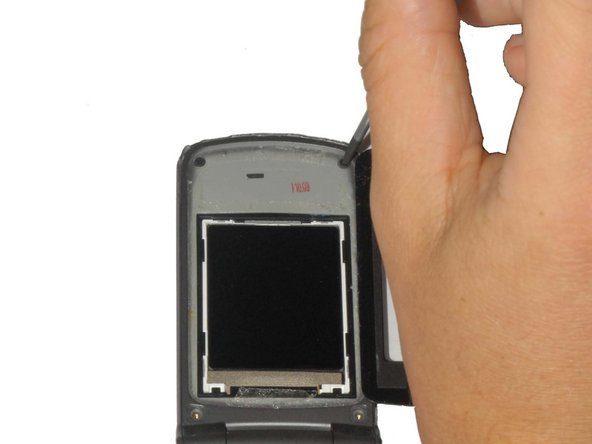
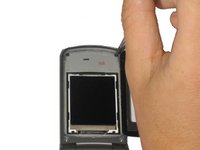
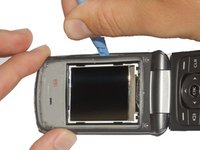
    • Carefully pry off the black plastic screen cover using the iSesamo tool or another thin, flat tool.

    • The screen cover is adhered to the phone and may take some effort to pry off. If it is too difficult to remove, heat the screen with a hair dryer on low for 30 seconds to soften the adhesive.

  3. LG VX5500 Screen Replacement: шаг 3, изображение 1 из 2 LG VX5500 Screen Replacement: шаг 3, изображение 2 из 2
    • Unscrew the (4) 3.6mm screws near each corner of the phone's display panel by using a #00 Phillips head screwdriver.

    • The bottom two screws may have small rubber covers that you can remove using tweezers.

  4. LG VX5500 Screen Replacement: шаг 4, изображение 1 из 3 LG VX5500 Screen Replacement: шаг 4, изображение 2 из 3 LG VX5500 Screen Replacement: шаг 4, изображение 3 из 3
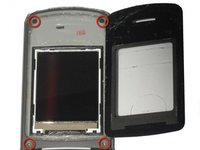
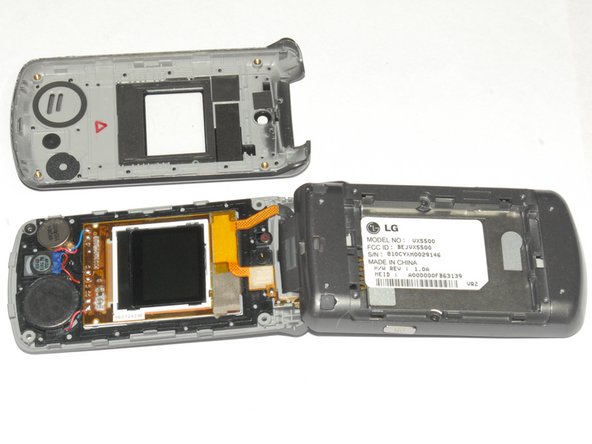
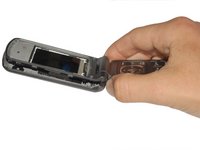
    • Pry off the front panel of the phone using a Plastic Opening Tool.

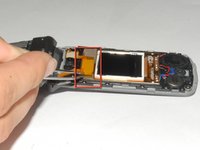
    • Push the tool into the crack along the side of the phone.

    • Slide the tool along the crack to detach the tabs holding the backing on the phone.

  5. LG VX5500 Screen Replacement: шаг 5, изображение 1 из 2 LG VX5500 Screen Replacement: шаг 5, изображение 2 из 2
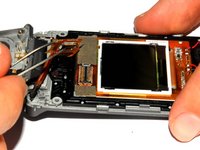
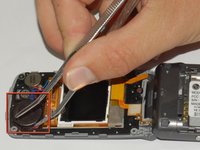
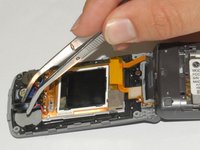
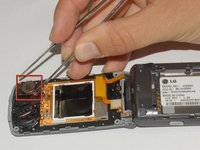
    • Use the tweezers to lift the display adapter off the screen component.

  6. LG VX5500 Screen Replacement: шаг 6, изображение 1 из 2 LG VX5500 Screen Replacement: шаг 6, изображение 2 из 2
    • Using tweezers remove the speaker from its casing.

    • The speaker is adhered to the phone casing so it will take a small amount of force to remove it.

  7. LG VX5500 Screen Replacement: шаг 7, изображение 1 из 2 LG VX5500 Screen Replacement: шаг 7, изображение 2 из 2
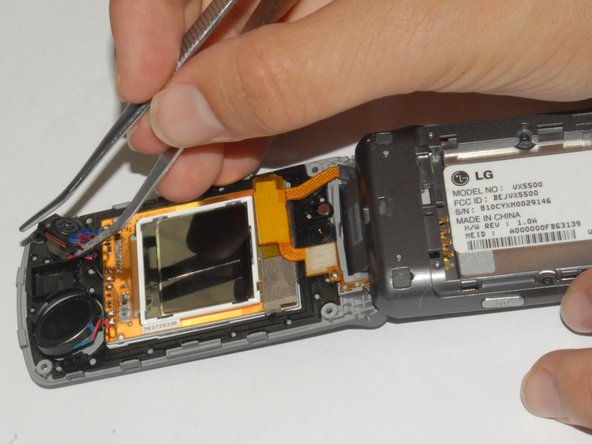
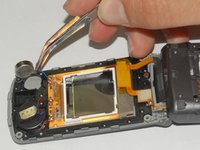
    • Remove the earpiece by lifting it out of the phone casing using tweezers.

    • The earpiece is adhered to the phone casing so it will take a small amount of force to remove it.

  8. LG VX5500 Screen Replacement: шаг 8, изображение 1 из 2 LG VX5500 Screen Replacement: шаг 8, изображение 2 из 2
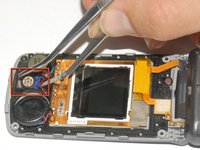
    • Remove the vibration motor by lifting it out of the phone casing using tweezers.

    • The motor is adhered to the phone casing so it will take a small amount of force to remove it.

  9. LG VX5500 Screen Replacement: шаг 9, изображение 1 из 1
    • Lift the screen components out of the phone.

Заключение

To reassemble your device, follow these instructions in reverse order.

3 участников успешно повторили данное руководство.

Henry

Участник с: 04/12/12

181 Репутация

Автор 3 руководств

Команда

Cal Poly, Team 7-33, Maness Spring 2012 Участник Cal Poly, Team 7-33, Maness Spring 2012

CPSU-MANESS-S12S7G33

4 членов

Автор 10 руководств

2 Комментариев

I have it apart know need to learn to solder!

Andy Fowler - Ответить

where can i purchase a replacement screen?

kalea dean - Ответить

Добавить комментарий

Просмотр статистики:

За последние 24часов: 0

За последние 7 дней: 1

За последние 30 дней: 5

За всё время: 3,744