Введение
How to replace the keyboard in a Lenovo ThinkPad Yoga 2013. This guide will help you to successfully replace your keyboard.
Выберете то, что вам нужно
-
-
Flip the laptop over so the bottom is facing you.
-
Remove the ten screws using a Phillips #1 screwdriver.
-
Using the plastic opening tool, pry the bottom cover off the laptop.
 Спросите у FixBot
-
-
-
Remove two screws from the battery using a Phillips #1 screwdriver.
-
Disconnect the battery connector from the motherboard.
-
Remove the battery from the laptop.
-
-
-
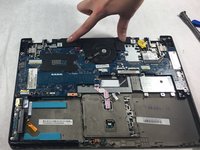
Disconnect connectors. Use fingers to pinch and pull the connector out.
-
-
-
-
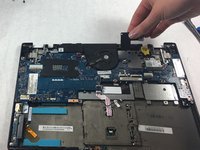
Remove the two screws from the retainer for the ports using a Phillips #1 screwdriver.
-
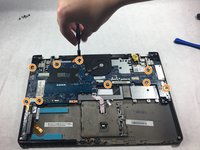
Remove the nine screws from the motherboard using a Phillips #1 screwdriver.
-
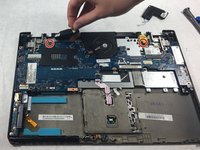
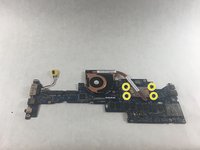
Remove the four screws from the fan under the motherboard using a Phillips #1 screwdriver.
-
Remove the fan from the motherboard.
-
-
-
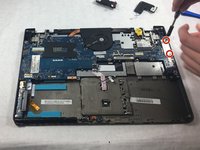
Remove twelve screws from the midframe using a Phillips #1 screwdriver.
-
-
-
Use a spudger to pry open the keyboard panel.
-
Continue to pry until the panel is loose enough to take off.
-


To reassemble your device, follow these instructions in reverse order.
Отменить: Я не выполнил это руководство.
2 человек успешно провели ремонт по этому руководству.
Команда

UMass Dartmouth, Team 4-4, Gulbrandsen Fall 2021 Участник UMass Dartmouth, Team 4-4, Gulbrandsen Fall 2021
UMASSD-GULBRANDSEN-F21S4G4
3 членов
Автор 10 руководств