Введение
Is your device experiencing problems with loading and saving while the computer is in use? Consider using this guide to replace the RAM in your device.
Выберете то, что вам нужно
-
-
-
Make sure to power down and turn off your device before proceeding with the repair.
-
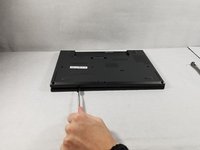
Flip your laptop over so that the backside is facing you.
 Спросите у FixBot
-
-
-
Using a Phillips #1 screwdriver, remove the eight screws securing the backplate.
-
Don’t try to force screws which won't come out. They are held in place by a stopper on the reverse side. This will not prevent you from removing the backplate.
-
-
-
-
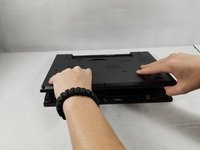
Using the metal spudger, wedge it in the seam where the backplate meets the front plate and run the tool along the seam to separate the backplate.
-
-
-
-
-
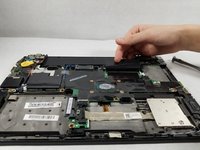
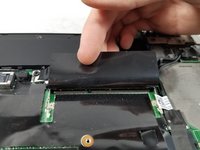
Right below the battery slot on the right half of the device is where you can access the RAM card Slot.
-
Remove the RAM by pulling it straight out of the device.
-
-




To reassemble your device, follow these instructions in reverse order.
Отменить: Я не выполнил это руководство.
7 человек успешно провели ремонт по этому руководству.

Команда

UMass Dartmouth, Team S1-G5, Simcock Fall 2018 Участник UMass Dartmouth, Team S1-G5, Simcock Fall 2018
UMASSD-SIMCOCK-F18S1G5
3 членов
Автор 80 руководств
1 Комментарий к руководству
I have a T460, very similar. A few points missing here… It’s imperative to take out the battery first. Most other tutorials mention disabling the internal battery in the BIOS before starting the process. Then screws don’t come out, they stay attached, which is very nice but better if you expect it. And one of them is right under the battery. The 460 has 2 memory slots, and they’re both functional. I had to swap my 4G card to the second slot, and put the 8G one in to replace it, I don’t know whether that’s mandatory or it was just bad seating initially.
