Перейти к основному содержанию
Присоединяйся к сообществу ремонтников - Создай аккаунт

Logitech Harmony 650 Battery Terminal Replacement

Выберете то, что вам нужно

  1. Logitech Harmony 650 Battery Terminal Replacement, Case: шаг 1, изображение 1 из 2 Logitech Harmony 650 Battery Terminal Replacement, Case: шаг 1, изображение 2 из 2
    • Remove the battery cover by applying pressure to the indented area and pushing the cover toward the rear of the device.

    Спросите у FixBot

    Добавить комментарий

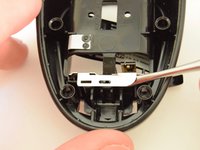
  2. Logitech Harmony 650 Battery Terminal Replacement: шаг 2, изображение 1 из 1
    • Remove the batteries using the silver pull tab.

    Спросите у FixBot

    Добавить комментарий

  3. Logitech Harmony 650 Battery Terminal Replacement: шаг 3, изображение 1 из 1
    • Using a J000 Philips head screwdriver remove the four 5mm screws around the rim of the battery chamber.

    Спросите у FixBot

    Добавить комментарий

  4. Logitech Harmony 650 Battery Terminal Replacement: шаг 4, изображение 1 из 1
    Инструмент, используемый на этом этапе:
    Flathead 3/32" or 2.5 mm Screwdriver
    $5.49
    • Remove the small plastic cover beneath the plastic LED housing by using a 3.0 flathead screwdriver and a spudger to pry it off. It is glued to the case. If you are having trouble removing it try applying some heat to loosen the glue.

    Спросите у FixBot

    Добавить комментарий

  5. Logitech Harmony 650 Battery Terminal Replacement: шаг 5, изображение 1 из 1
    • Remove the two 5mm screws located underneath the cover using a J000 Philips screwdriver bit.

    Спросите у FixBot

    Добавить комментарий

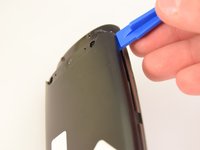
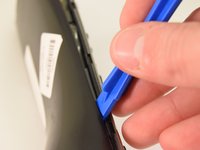
  6. Logitech Harmony 650 Battery Terminal Replacement: шаг 6, изображение 1 из 2 Logitech Harmony 650 Battery Terminal Replacement: шаг 6, изображение 2 из 2
    • Using a plastic opening tool, pry the case off starting from the top of the device (nearest the transmitter). There are 3 tabs along the side of the case and one at the back.

    • The top led protector plastic cover will also be freed once back is removed.

    Спросите у FixBot

    Добавить комментарий

  7. Logitech Harmony 650 Battery Terminal Replacement: шаг 7, изображение 1 из 1
    • Remove the rear cover.

    Спросите у FixBot

    Добавить комментарий

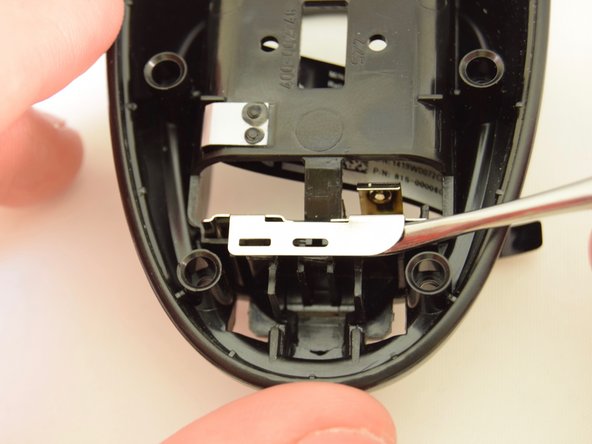
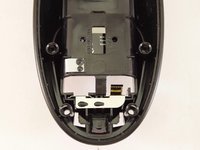
  8. Logitech Harmony 650 Battery Terminal Replacement, Battery Terminal: шаг 8, изображение 1 из 2 Logitech Harmony 650 Battery Terminal Replacement, Battery Terminal: шаг 8, изображение 2 из 2
    • Using the small end of a spudger, pry out the terminal from the interior of the case.

    Спросите у FixBot

    Добавить комментарий

  9. Logitech Harmony 650 Battery Terminal Replacement: шаг 9, изображение 1 из 1
    • Start from one side and work your way to the other side using the spudger.

    Спросите у FixBot

    Добавить комментарий

  10. Logitech Harmony 650 Battery Terminal Replacement: шаг 10, изображение 1 из 1
    • Remove the terminal.

    Спросите у FixBot

    Добавить комментарий

Заключение

To reassemble your device, follow these instructions in reverse order.

Отменить: Я не выполнил это руководство.

2 человек успешно провели ремонт по этому руководству.

Connor Gallagher

Участник с: 01/11/16

1 036 Репутация

Автор 5 руководств

Команда

Eastern Washington University, Team 1-2, Rowley Winter 2016 Участник Eastern Washington University, Team 1-2, Rowley Winter 2016

EWU-ROWLEY-W16S1G2

4 членов

Автор 5 руководств

0 Комментарии к руководству

Добавить комментарий

Статистика просмотров:

За последние 24 часов: 3

За последние 7 дней: 10

За последние 30 дней: 31

За всё время: 3,779