Выберете то, что вам нужно
-
-
Unscrew the Phillips #1 screw in the battery compartment after removing the battery.
-
Some mice have a smaller screw, directly down and to the side of the on/off slider. The rest of the disassembly is the same.
-
-
-
-
Wiggle the grey part of the top to remove it by pulling it towards you(away from the scroll wheel).
-
Reasoning by Jacob Hickey "because in the internal top part of the mouse where the buttons/scroll wheel is, there’s hinges-like “tooth” that’ll snap if you do pull on it. It’s like opening a jewelry box that has a hinge on one end of the box… if that makes sense…"
-
-
-
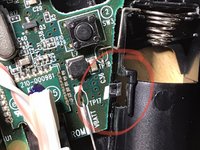
Push back small black clips to release the circuit board.
-
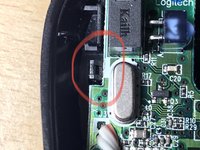
Slide up the metal battery connectors to free them from the casing. (Note that these are soldered to the circuit board.)
-
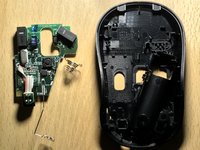
Fully remove the circuit board with the battery connectors and image sensor still attached.
-
-
-
Working from back to front (left to right in the first image) unclip the first two pairs of black plastic clips.
-
Slide the black upper casing forwards over the mouse wheel whilst applying pressure the two front clips to release them.
-
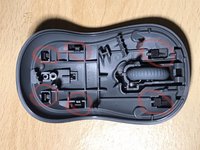
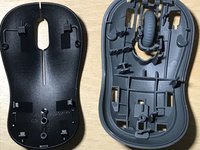
Separate the two casing layers fully.
-


To reassemble your device, follow these instructions in reverse order.
Отменить: Я не выполнил это руководство.
42 человек успешно провели ремонт по этому руководству.

12 Комментарии к руководству
Thank you Karmanyaah Malhotra for takin’ the time to do this for everybody like me :-)
were can i buy these iems telll mee please
TElll me now or else
I will be sad