Перейти к основному содержанию
Присоединяйся к сообществу ремонтников - Создай аккаунт

Logitech MBJ58 Mouse Resistance Spring Replacement

Выберете то, что вам нужно

  1. Logitech MBJ58 Mouse Resistance Spring Replacement, Top cover: шаг 1, изображение 1 из 1
    • Hold the mouse so that the bottom is facing up.

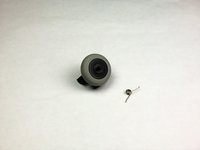
    • Remove the single Phillips #1 screw from the bottom half of the mouse.

    Спросите у FixBot

    Добавить комментарий

  2. Logitech MBJ58 Mouse Resistance Spring Replacement: шаг 2, изображение 1 из 2 Logitech MBJ58 Mouse Resistance Spring Replacement: шаг 2, изображение 2 из 2
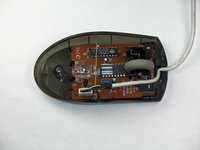
    • Place the mouse so that the bottom is resting against a hard surface.

    • Lift the top cover of the mouse gently, and remove it.

    Спросите у FixBot

    Добавить комментарий

  3. Logitech MBJ58 Mouse Resistance Spring Replacement, Removing the Logitech MBJ58 Mouse Scroll Wheel: шаг 3, изображение 1 из 3 Logitech MBJ58 Mouse Resistance Spring Replacement, Removing the Logitech MBJ58 Mouse Scroll Wheel: шаг 3, изображение 2 из 3 Logitech MBJ58 Mouse Resistance Spring Replacement, Removing the Logitech MBJ58 Mouse Scroll Wheel: шаг 3, изображение 3 из 3
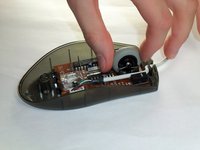
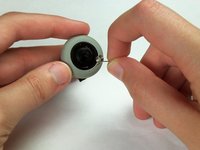
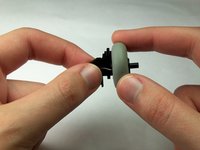
    • Locate the scroll wheel on the mouse.

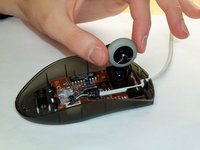
    • Grab the scroll wheel with your thumb and index finger.

    • Gently lift up, to remove the scroll wheel from the mouse.

    Спросите у FixBot

    Добавить комментарий

  4. Logitech MBJ58 Mouse Resistance Spring Replacement, Support Spring: шаг 4, изображение 1 из 2 Logitech MBJ58 Mouse Resistance Spring Replacement, Support Spring: шаг 4, изображение 2 из 2
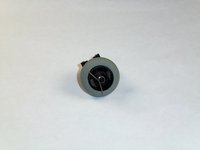
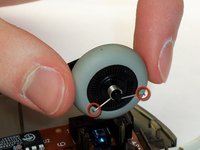
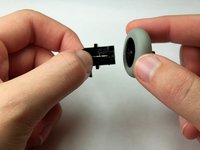
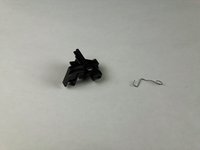
    • Locate the spring on the scroll wheel, and carefully remove the spring.

    Спросите у FixBot

    Добавить комментарий

  5. Logitech MBJ58 Mouse Resistance Spring Replacement, Attaching the New Spring: шаг 5, изображение 1 из 2 Logitech MBJ58 Mouse Resistance Spring Replacement, Attaching the New Spring: шаг 5, изображение 2 из 2
    • Place the replacement spring on the correct side of the wheel (shown in the images) with the prongs pointing down.

    Спросите у FixBot

    Добавить комментарий

  6. Logitech MBJ58 Mouse Resistance Spring Replacement, Disassembling Logitech MBJ58 Mouse Scroll wheel from mount: шаг 6, изображение 1 из 3 Logitech MBJ58 Mouse Resistance Spring Replacement, Disassembling Logitech MBJ58 Mouse Scroll wheel from mount: шаг 6, изображение 2 из 3 Logitech MBJ58 Mouse Resistance Spring Replacement, Disassembling Logitech MBJ58 Mouse Scroll wheel from mount: шаг 6, изображение 3 из 3
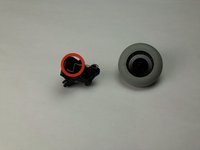
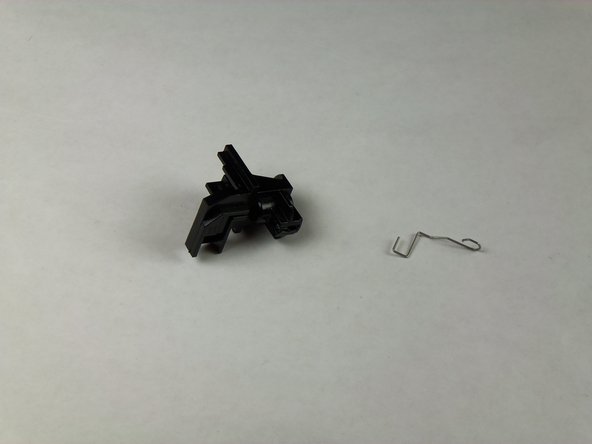
    • Use the images to locate where the resistance spring is.

    • This spring will easily fall off.

    • Grab the scroll wheel and its mount and gently pull them apart.

    Спросите у FixBot

    Добавить комментарий

  7. Logitech MBJ58 Mouse Resistance Spring Replacement, Resistance Spring: шаг 7, изображение 1 из 2 Logitech MBJ58 Mouse Resistance Spring Replacement, Resistance Spring: шаг 7, изображение 2 из 2
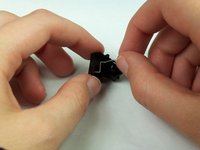
    • Grasp the top of the resistance spring and pull it towards yourself, letting the hook slide out of its hole.

    Спросите у FixBot

    Добавить комментарий

  8. Logitech MBJ58 Mouse Resistance Spring Replacement: шаг 8, изображение 1 из 1
    • Insert the hooked section of the replacement spring into the corresponding hole on the mount.

    Спросите у FixBot

    Добавить комментарий

Заключение

To reassemble your device, follow these instructions in reverse order.

Отменить: Я не выполнил это руководство.

15 человек успешно провели ремонт по этому руководству.

Maximilian Betkowski

Участник с: 01/11/13

238 Репутация

Автор 4 руководств

Команда

Cal Poly, Team 5-14, Forte Winter 2013 Участник Cal Poly, Team 5-14, Forte Winter 2013

CPSU-FORTE-W13S5G14

5 членов

Автор 23 руководств

10 Комментарии к руководству

This mouse was also available from Dell as an OEM device under the model name "M-UVDEL1". Hopefully the Google juice will help folks repair their devices. I know I would have spent far more time than I did if it weren't for the photos on how to put the spring back. Thanks Maximilian!

Bastien Nocera - Ответить Поделиться

The spring installation details were lifesavers. Thank you!

LB

byard - Ответить Поделиться

thank you! could not have done it without your help.

taiyo_yuden_dvd - Ответить Поделиться

Brilliant. Thanks. Easy once you know how. The springs were the hard part.

Charles Thomson - Ответить Поделиться

Thank you so much!! You made it very easy and quick!

vulcanmeister - Ответить Поделиться

Добавить комментарий

Статистика просмотров:

За последние 24 часов: 2

За последние 7 дней: 22

За последние 30 дней: 93

За всё время: 13,393