Перейти к основному содержанию
Присоединяйся к сообществу ремонтников - Создай аккаунт

Logitech MX Master 3 pairing problem solving

Выберете то, что вам нужно

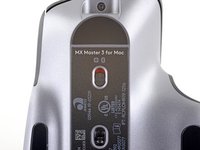
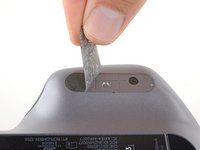
    1. Logitech MX Master 3 pairing problem solving, Soften the mouse feet adhesive: шаг 1, изображение 1 из 3 Logitech MX Master 3 pairing problem solving, Soften the mouse feet adhesive: шаг 1, изображение 2 из 3 Logitech MX Master 3 pairing problem solving, Soften the mouse feet adhesive: шаг 1, изображение 3 из 3
      • Flip the mouse's power switch into the OFF position, unplug any cables, and flip it over so the feet are facing up.

      • The unique shape of some mice can prevent them from laying flat. If you need to, lay your mouse on a soft towel to prevent wobble.

      • If you're planning to reuse your existing mouse feet, note that the adhesive needs to be thoroughly heated for them to be cleanly removed.

      • Heat an iOpener and apply it to each of the mouse feet for about one minute each.

      • Alternatively, you can use a hair dryer to soften the mouse feet adhesive.

      • When using a hair dryer, don't heat the feet for more than a couple seconds at a time—anything hotter than just warm to the touch risks melting or warping the plastic lower case.

      • The information sticker adhesive may soften during this step, but you don't need to remove it.

      Спросите у FixBot

      Добавить комментарий

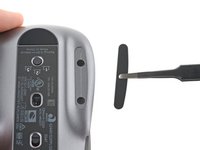
    2. Logitech MX Master 3 pairing problem solving, Separate the mouse foot adhesive: шаг 2, изображение 1 из 3 Logitech MX Master 3 pairing problem solving, Separate the mouse foot adhesive: шаг 2, изображение 2 из 3 Logitech MX Master 3 pairing problem solving, Separate the mouse foot adhesive: шаг 2, изображение 3 из 3
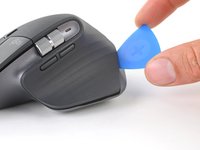
      • Slide an opening pick under an edge of the left mouse foot.

      • Go slowly, and make sure the pick slides underneath both the foot and its adhesive pad. These layers separate easily.

      • If you plan on reusing your mouse feet, be careful not to crease them or separate them from their adhesive pads.

      • If the foot feels stuck, apply more heat before continuing.

      • Slide your pick under the foot to separate its adhesive until you can grab it with your fingers.

      • Peel up and remove the left mouse foot.

      Спросите у FixBot

      Добавить комментарий

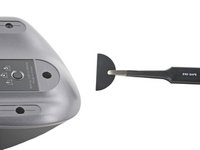
    3. Logitech MX Master 3 pairing problem solving, Remove the right and rear mouse feet: шаг 3, изображение 1 из 2 Logitech MX Master 3 pairing problem solving, Remove the right and rear mouse feet: шаг 3, изображение 2 из 2
      • Repeat the previous two steps to remove the right and the rear mouse feet.

      Спросите у FixBot

      Добавить комментарий

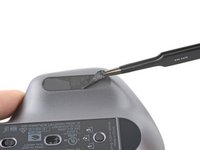
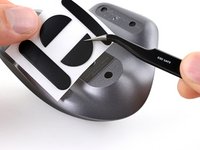
    4. Logitech MX Master 3 pairing problem solving, Reassembly information: шаг 4, изображение 1 из 3 Logitech MX Master 3 pairing problem solving, Reassembly information: шаг 4, изображение 2 из 3 Logitech MX Master 3 pairing problem solving, Reassembly information: шаг 4, изображение 3 из 3
      Инструмент, используемый на этом этапе:
      Tweezers
      $4.99
      • If the adhesive separated from the foot:

      • Slide the flat end of a spudger under an edge of the adhesive. If the adhesive seems stuck, you may need to heat the adhesive further.

      • Use a pair of tweezers or a spudger to remove any large chunks of leftover adhesive.

      • For installing new mouse feet or reusing your old ones:

      • Thoroughly clean the bottom of the mouse with isopropyl alcohol and a lint-free of microfiber cloth. Allow the surface to dry completely.

      • Peel your new mouse feet away from their adhesive liners and press them firmly into place.

      Спросите у FixBot

      Добавить комментарий

    1. Logitech MX Master 3 pairing problem solving, Remove the case screws: шаг 5, изображение 1 из 1
      • Use a Phillips screwdriver to remove the five 4.3 mm-long screws securing the lower half of the lower case.

      • Use a T5 Torx driver to remove the one 4.2 mm‑long screw securing the upper half of the lower case.

      Спросите у FixBot

      Добавить комментарий

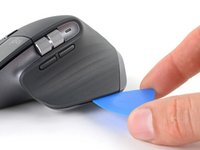
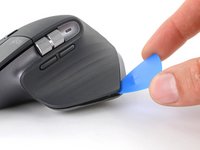
    2. Logitech MX Master 3 pairing problem solving, Release the left clips: шаг 6, изображение 1 из 3 Logitech MX Master 3 pairing problem solving, Release the left clips: шаг 6, изображение 2 из 3 Logitech MX Master 3 pairing problem solving, Release the left clips: шаг 6, изображение 3 из 3
      • Insert your opening pick into the seam between the thumb rest and the lower case.

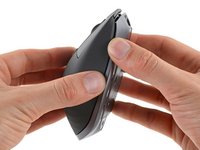
      • Slide your pick right, towards the rear of the upper shell and pry upward to release the left clips.

      Спросите у FixBot

      Добавить комментарий

    3. Logitech MX Master 3 pairing problem solving, Release the right clips: шаг 7, изображение 1 из 2 Logitech MX Master 3 pairing problem solving, Release the right clips: шаг 7, изображение 2 из 2
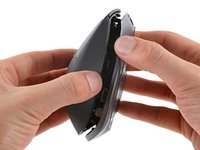
      • Gently pry the upper shell and lower case apart to release the clips on the right side of the mouse.

      • Don't try to fully remove the top shell just yet—another clip and a delicate cable connect the upper shell to the lower case.

      Спросите у FixBot

      Добавить комментарий

    4. Logitech MX Master 3 pairing problem solving, Release the final clip: шаг 8, изображение 1 из 3 Logitech MX Master 3 pairing problem solving, Release the final clip: шаг 8, изображение 2 из 3 Logitech MX Master 3 pairing problem solving, Release the final clip: шаг 8, изображение 3 из 3
      • Lay your mouse down onto your work surface, making sure none of the clips re-engage.

      • Grasp the upper shell and partially lift up the right edge.

      • Pull the upper shell up and back to release the final clip and separate the upper shell from the lower case.

      • Still keep the two halves close together—a cable is still tethered to the upper shell.

      • To reinstall the upper shell, slide the front edge into place first, then press down around the perimeter of the upper shell to engage the remaining clips.

      Спросите у FixBot

      Добавить комментарий

    5. Logitech MX Master 3 pairing problem solving, Disconnect the interconnect cable: шаг 9, изображение 1 из 3 Logitech MX Master 3 pairing problem solving, Disconnect the interconnect cable: шаг 9, изображение 2 из 3 Logitech MX Master 3 pairing problem solving, Disconnect the interconnect cable: шаг 9, изображение 3 из 3
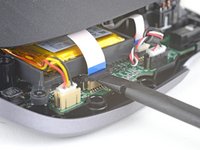
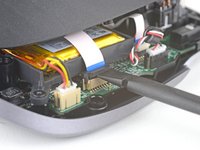
      • Be careful not to strain the cable connecting the upper shell to the lower case.

      • Use the flat end of a spudger to gently lift up the black sliding lock on the interconnect cable socket.

      • Slide the cable straight out of its socket on the motherboard.

      • During reassembly, insert the cable into the socket with its blue tab facing out, then push down the sliding lock to secure the cable.

      Спросите у FixBot

      Добавить комментарий

    6. Logitech MX Master 3 pairing problem solving, Remove the top half of the mouse: шаг 10, изображение 1 из 1
      • Remove the upper shell from the lower case.

      Спросите у FixBot

      Добавить комментарий

    1. Logitech MX Master 3 pairing problem solving, Test the lower part of your mouse: шаг 11, изображение 1 из 1
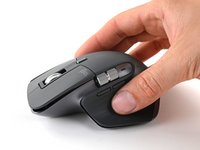
      • Put only the lower part of the mouse on and test its pairing reliability. If it works fine, the lower part is functioning correctly.

      Спросите у FixBot

      Добавить комментарий

    2. Logitech MX Master 3 pairing problem solving, Connect the upper part: шаг 12, изображение 1 из 1
      • Connect the upper part of the mouse using the flat flexible cable only, then retest to see if the pairing issue reappears.

      Спросите у FixBot

      Добавить комментарий

    3. Logitech MX Master 3 pairing problem solving, If the problem reappears: шаг 13, изображение 1 из 3 Logitech MX Master 3 pairing problem solving, If the problem reappears: шаг 13, изображение 2 из 3 Logitech MX Master 3 pairing problem solving, If the problem reappears: шаг 13, изображение 3 из 3
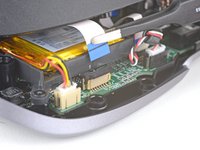
      • Clean the first end of the flat flexible cable and test if the pairing problem disappears. If the issue is resolved, reassemble your mouse and enjoy a reliable connection. If not, proceed to clean the next end of the cable in sequence until the problem is fixed.

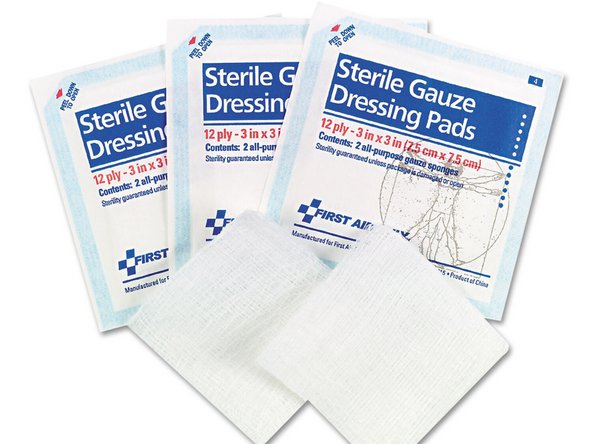
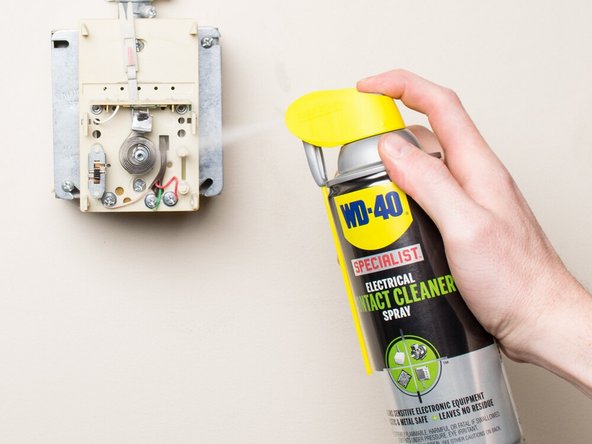
      • Use a gauze pad dipped in an electrical cleaning solution to clean the ends of the flat flexible cable (FFC).

      Спросите у FixBot

      Добавить комментарий

Заключение

This method resolved the issue for me, but pairing problems can also stem from other causes such as interference, USB issues, software problems, and more.

Отменить: Я не выполнил это руководство.

Bacem Jarraya

Участник с: 07/22/24

97 Репутация

1 руководство автора

0 Комментарии к руководству

Добавить комментарий

Статистика просмотров:

За последние 24 часов: 6

За последние 7 дней: 32

За последние 30 дней: 163

За всё время: 4,853