Перейти к основному содержанию

Mac mini Late 2014 Antenna Plate Replacement

Выберете то, что вам нужно

  1. Mac mini Late 2014 Antenna Plate Replacement, Bottom Cover: шаг 1, изображение 1 из 1
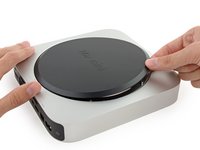
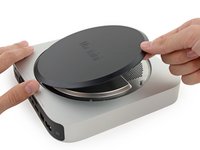
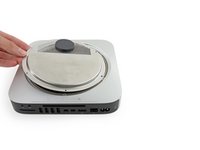
    • The bottom cover is clipped onto three screw posts.

    • Pry near, but not right on the screw posts.

  2. Mac mini Late 2014 Antenna Plate Replacement: шаг 2, изображение 1 из 3 Mac mini Late 2014 Antenna Plate Replacement: шаг 2, изображение 2 из 3 Mac mini Late 2014 Antenna Plate Replacement: шаг 2, изображение 3 из 3
    • Use the plastic opening tool to pry the bottom cover up off of the Mac mini.

  3. Mac mini Late 2014 Antenna Plate Replacement: шаг 3, изображение 1 из 2 Mac mini Late 2014 Antenna Plate Replacement: шаг 3, изображение 2 из 2
    • Lift and remove the bottom cover.

  4. Mac mini Late 2014 Antenna Plate Replacement, Antenna Plate: шаг 4, изображение 1 из 1
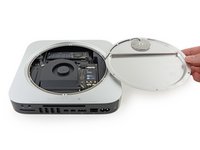
    • Remove the following TR6 screws from the antenna plate:

    • Three 4.1 mm screws

    • Three 1.9 mm screws

  5. Mac mini Late 2014 Antenna Plate Replacement: шаг 5, изображение 1 из 2 Mac mini Late 2014 Antenna Plate Replacement: шаг 5, изображение 2 из 2
    • Do not completely remove the antenna plate; it is still connected to the Mac mini by an antenna cable.

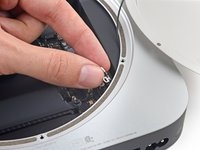
    • With the I/O ports facing you, flip the antenna plate to the right to allow access to the antenna cable connector.

  6. Mac mini Late 2014 Antenna Plate Replacement: шаг 6, изображение 1 из 1
    • Remove the single 3.4 mm T6 screw and washer from the antenna cable.

    • Be careful not to lose the washer when removing the screw.

  7. Mac mini Late 2014 Antenna Plate Replacement: шаг 7, изображение 1 из 2 Mac mini Late 2014 Antenna Plate Replacement: шаг 7, изображение 2 из 2
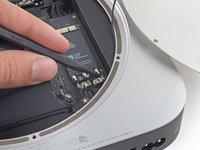
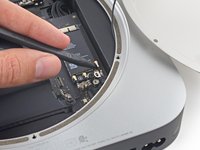
    • Use the point of a spudger to lift the antenna connector straight up off its socket on the airport card.

  8. Mac mini Late 2014 Antenna Plate Replacement: шаг 8, изображение 1 из 2 Mac mini Late 2014 Antenna Plate Replacement: шаг 8, изображение 2 из 2
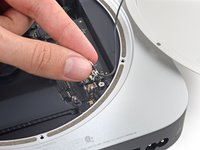
    • Carefully pull the antenna cable out from the gap between the power supply and case.

  9. Mac mini Late 2014 Antenna Plate Replacement: шаг 9, изображение 1 из 1
    • Remove the antenna plate from the Mac mini.

Заключение

To reassemble your device, follow these instructions in reverse order.

10 участников успешно повторили данное руководство.

Sam Goldheart

Участник с: 10/18/12

465 252 Репутация

Автор 538 руководств

Команда

iFixit Участник iFixit

Staff

136 членов

Автор 16 573 руководств

Один комментарий

Hello

I had really a problem with this instructions! The T6H Screw-Driver in the fixit-kit doesn’t fit in the holes of the 6 screws who hold the cover? Has Apple changes the screws of the macmini 2014, or has the T6H Screw-Driver has to much tolerance while produced!

I need to replace the HDD of the fusion drive! I will need to buy, HighEnd Tools to open my Cover ?!?

Gerard Dirks - Ответить

Добавить комментарий

Просмотр статистики:

За последние 24часов: 1

За последние 7 дней: 23

За последние 30 дней: 95

За всё время: 12,993