Введение
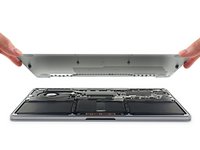
Use this guide to replace the display assembly on your MacBook Pro 13" 2022 (M2).
If your battery is swollen, take appropriate precautions.
Some photos in this guide are from a different model and may contain slight visual discrepancies, but they won't affect the procedure.
Выберете то, что вам нужно
-
-
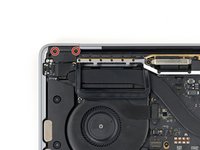
Unplug all cables and fully shut down your MacBook.
-
Close the lid and flip your MacBook over. Keep the lid closed until you've physically disconnected the battery.
-
-
Инструмент, используемый на этом этапе:FixMat$31.41
-
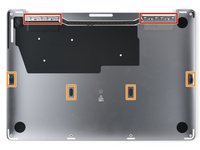
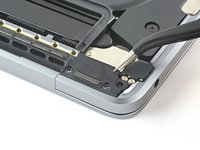
Use a P5 Pentalobe driver to remove the six screws securing the lower case:
-
Two 6.8 mm screws
-
Two 5.3 mm screws
-
Two 3.4 mm screws
-
-
-
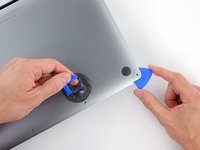
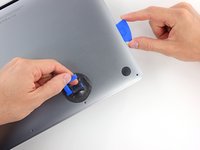
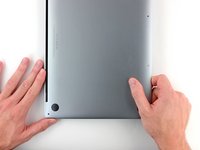
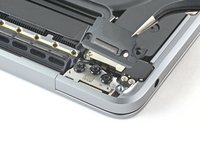
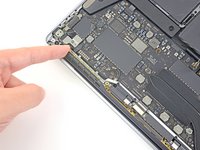
Apply a suction handle near the front edge of the lower case, between the screw holes.
-
Pull up on the suction handle to create a gap between the lower case and the frame.
-
-
-
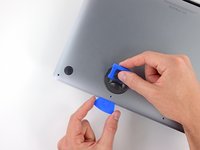
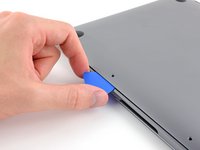
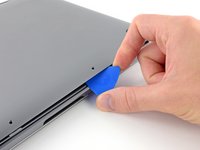
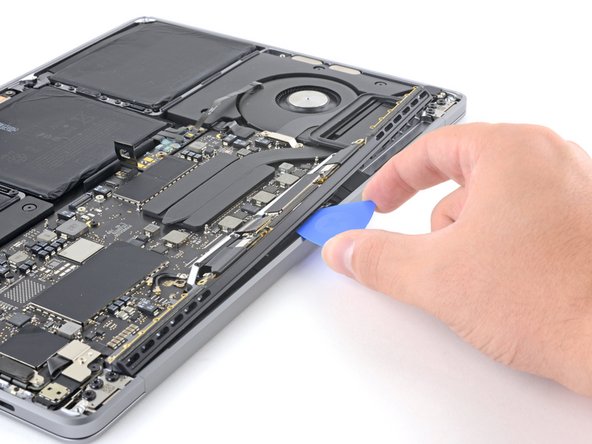
Insert an opening pick between the lower case and the frame.
-
Slide the pick around the left corner to release the first set of clips.
-
-
-
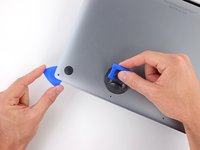
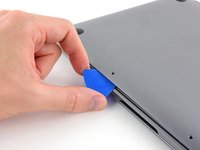
Slide your opening pick around the right corner to release the second set of clips securing the lower case.
-
-
-
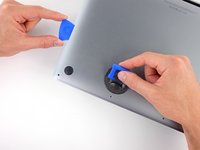
Insert your opening pick between the lower case and the frame near the middle left screw hole.
-
Firmly twist the pick until the clip releases.
-
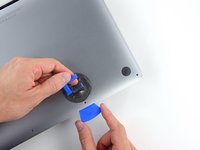
Repeat this procedure for the clip near the middle right screw hole.
-
-
-
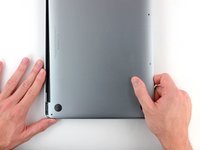
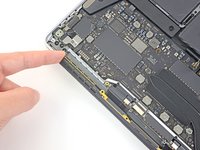
Firmly pull the lower case away from the screen hinges to release the last clips securing it to the frame.
-
-
-
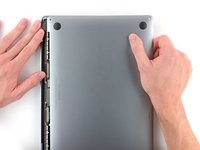
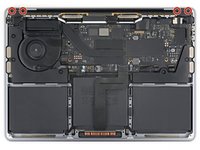
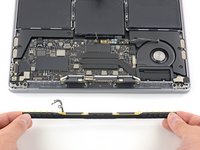
Remove the lower case.
-
Set it in place and align the sliding clips near the display hinges. Press down and slide the lower case toward the hinges.
-
Once the lower case is secured near the hinges, press down firmly to engage the remaining four clips.
-
-
Инструмент, используемый на этом этапе:Tweezers$4.99
-
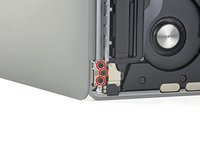
Use blunt nose tweezers or your fingers to peel and remove the cover from the battery board, just above the middle battery cell.
-
-
-
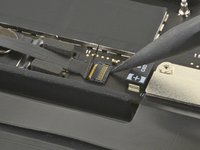
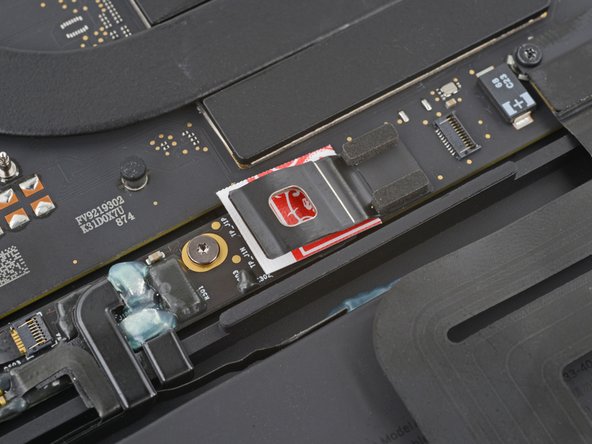
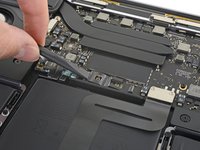
Use blunt nose tweezers to gently peel back the pull tab covering the battery data connector.
-
-
-
-
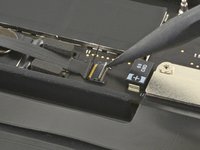
Use the point of a spudger to flip up the small locking tab securing the battery data connector.
-
-
-
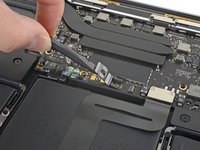
Use blunt nose tweezers or your fingers to grab the battery data cable pull tab and slide it straight out of its socket.
-
Move the cable to the left, out of the way of the battery board.
-
-
-
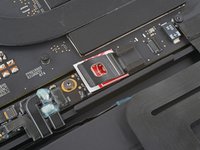
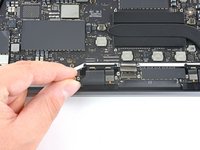
Use a T5 Torx driver to remove the 3.7 mm screw securing the battery connector.
-
-
-
Use the flat end of your spudger to slightly lift the battery connector away from the battery board.
-
-
-
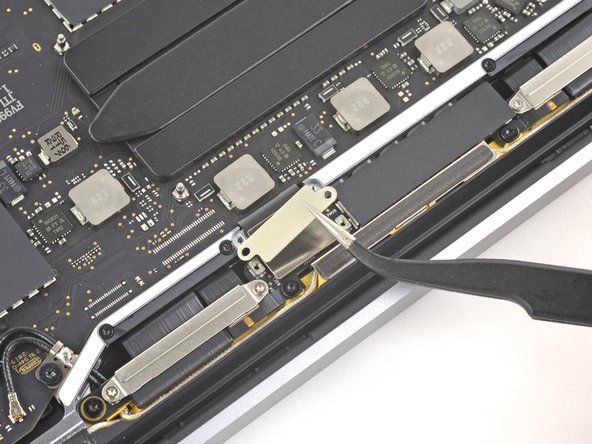
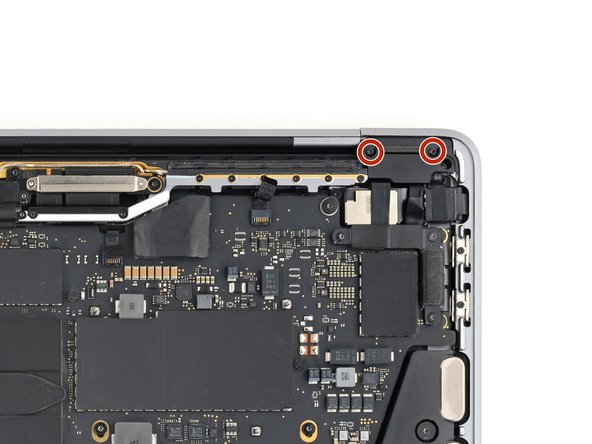
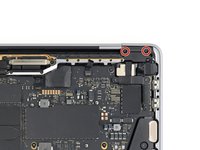
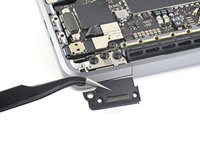
Use a T3 Torx driver to remove the two 3.1 mm screws securing the display cable retaining bracket.
-
Remove the bracket.
-
-
-
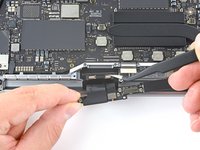
Use your T3 Torx driver to remove the two 1.7 mm screws securing the display cable cover.
-
Remove the cover.
-
-
-
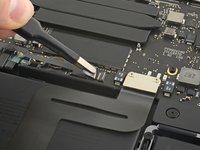
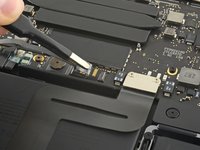
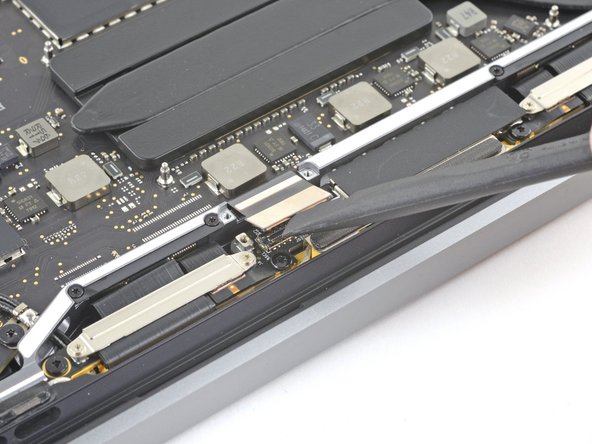
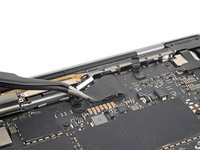
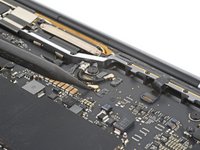
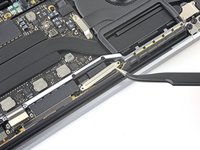
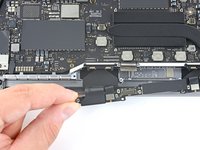
Use the flat end of your spudger to pry up and disconnect the display cable from the display board.
-
-
-
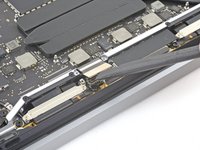
Use your T3 Torx driver to remove the four 3.3 mm screws securing the plastic covers to the screen hinges, one on each side.
-
-
-
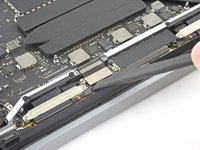
Peel and remove the plastic cover from the antenna cables.
-
-
-
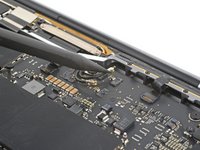
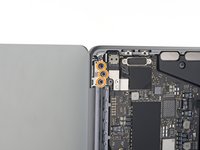
Use the point of your spudger to pry up and disconnect the antenna cables from the logic board.
-
-
-
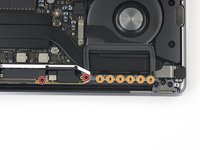
Use your T3 Torx driver to remove the four 1.5 mm screws securing the two display board cable covers.
-
Remove the covers.
-
-
-
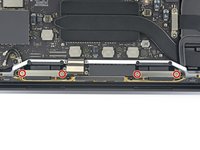
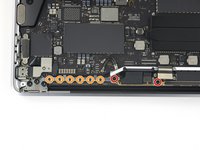
Remove the sixteen screws securing the antenna bar:
-
Four 3.3 mm T5 Torx screws, two on each side
-
Twelve 1.1 mm P2 Pentalobe screws, six on each side
-
-
-
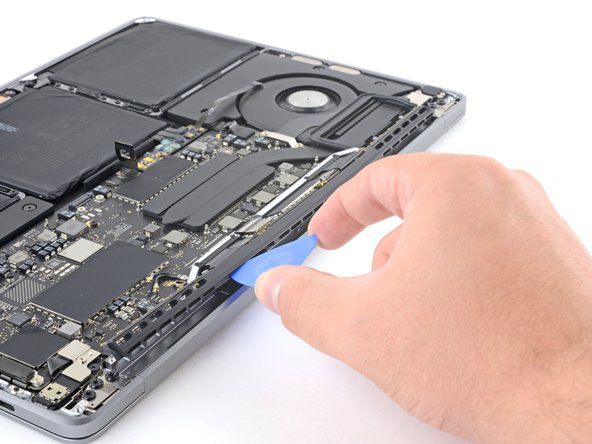
Use your T5 Torx driver to remove the 3.4 mm screw securing the antenna cables to the logic board.
-
-
-
Insert your opening pick between the antenna bar and the frame.
-
Pry at different spots along the length of the antenna bar to free it from its recess in the frame.
-
-
-
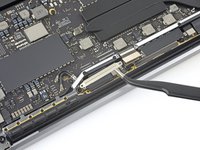
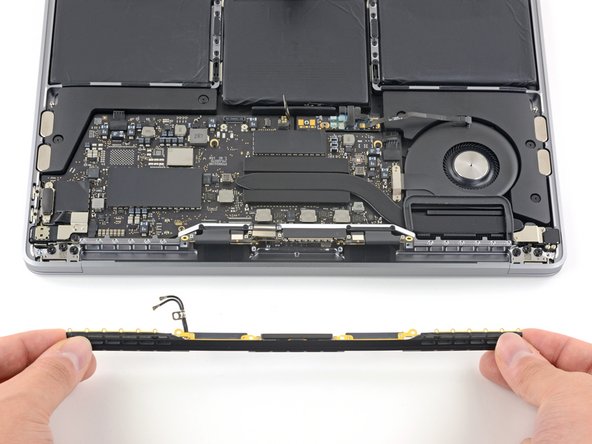
Pull the left edge of the antenna bar away from the frame and feed its two antenna cables out from underneath the cutouts in the frame.
-
Remove the antenna bar.
-
-
-
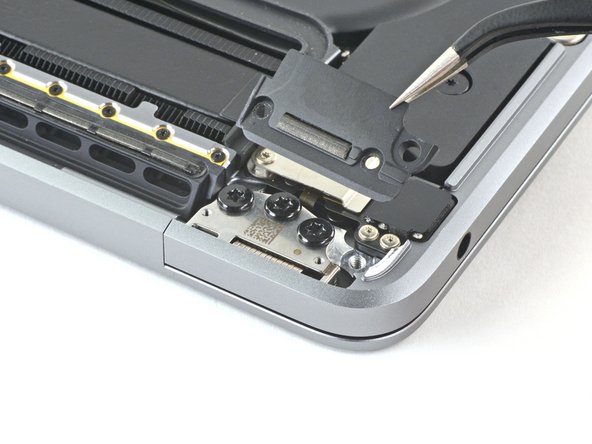
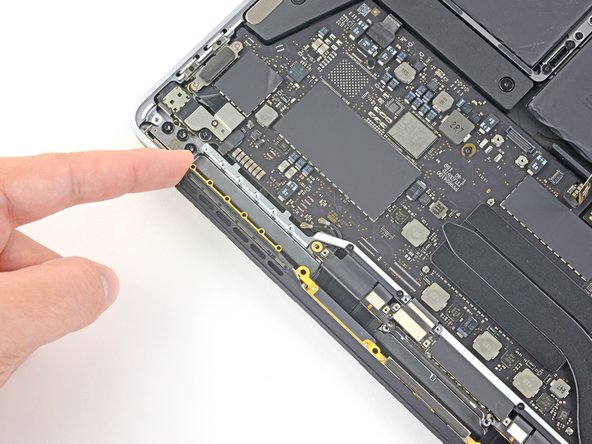
Use your T3 Torx driver to remove the four 3.9 mm screws securing the cable spring hinges.
-
-
Инструмент, используемый на этом этапе:Tweezers$4.99
-
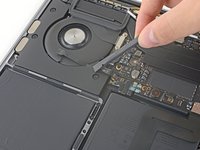
Grab and pull the left side of the display cable assembly away from the spring hinge.
-
Use tweezers to pull the spring hinge out of its recess.
-
Repeat this step for the right spring hinge.
-
-
-
Open the screen of your MacBook and prop it on its side with its screen facing away from you.
-
Use your T8 Torx driver to remove the three 4.4 mm screws securing the bottom hinge.
-
Remove the three 4.4 mm screws securing the top hinge.
-
-
-
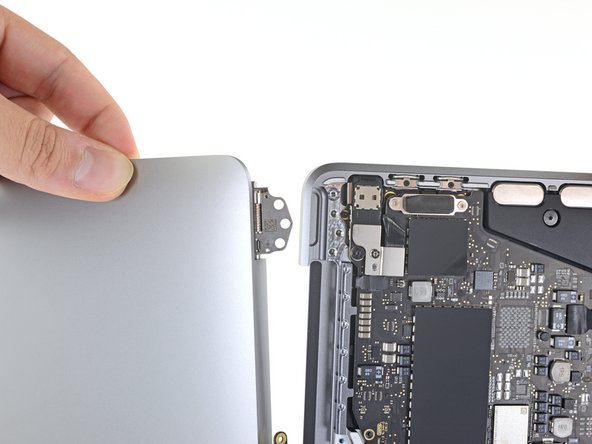
Push both halves of the MacBook together so that the hinge brackets can be lifted clear of their recesses in the chassis.
-
Push the main body of the MacBook away from you while pulling the display toward you to separate it.
-
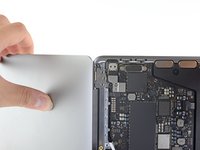
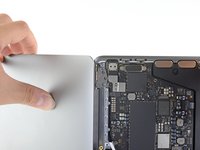
Remove the display assembly, being careful not to snag it on any cables.
-
Install the hinge screws loosely and adjust the display until each hinge is centered. Finally, tighten down the screws.
-


Compare your new replacement part to the original part—you may need to transfer remaining components or remove adhesive backings from the new part before installing.
To reassemble your device, follow these instructions in reverse order.
Take your e-waste to an R2 or e-Stewards certified recycler.
Repair didn’t go as planned? Try some basic troubleshooting or search our Answers community for help.
Отменить: Я не выполнил это руководство.
11 человек успешно провели ремонт по этому руководству.

Команда

7 Комментарии к руководству
What a well written and detailed guide. I recently purchased a replacement display assembly from ifixit. proud to say that my MacBook is back in business. Thanks Clay, great job.
We're so glad to have helped!
Hello, I will be repairing this model soon, I wanted to ask Do i need to solder the IC or Transfer anything from the old board
If the part is not iCloud Locked or reported as stolen, you should be able to use the Repair Assistant to restore this functionality: https://support.apple.com/en-gb/123128
Great breakdown! Did you have any issues similar to the 2023 version where the screen wouldn’t fall asleep, true color didn’t work and a couple transparent rectangles showed near the top of the screen?