Перейти к основному содержанию
Присоединяйся к сообществу ремонтников - Создай аккаунт
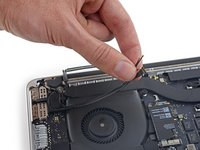
MacBook Pro 15" Retina Display Mid 2015 Display Assembly Replacement

Выберете то, что вам нужно

    1. MacBook Pro 15" Retina Display Mid 2015 Display Assembly Replacement, Lower Case: шаг 1, изображение 1 из 1
      • Remove the following P5 pentalobe screws securing the lower case to the MacBook Pro:

      • Eight 3.1 mm

      • Two 2.3 mm

      Спросите у FixBot

      Добавить комментарий

    2. MacBook Pro 15" Retina Display Mid 2015 Display Assembly Replacement: шаг 2, изображение 1 из 2 MacBook Pro 15" Retina Display Mid 2015 Display Assembly Replacement: шаг 2, изображение 2 из 2
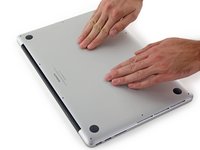
      • Lifting from the edge nearest the clutch cover, lift the lower case off the MacBook Pro.

      Спросите у FixBot

      Добавить комментарий

    3. MacBook Pro 15" Retina Display Mid 2015 Display Assembly Replacement: шаг 3, изображение 1 из 3 MacBook Pro 15" Retina Display Mid 2015 Display Assembly Replacement: шаг 3, изображение 2 из 3 MacBook Pro 15" Retina Display Mid 2015 Display Assembly Replacement: шаг 3, изображение 3 из 3
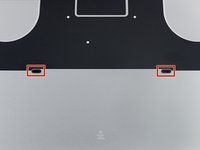
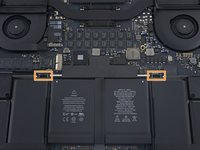
      • The lower case has two plastic pegs (red) that fit into plastic clips in the upper case (orange).

      • During reassembly, gently push down the center of the lower case to reattach the case to its two plastic clips.

      Спросите у FixBot

      Добавить комментарий

    1. MacBook Pro 15" Retina Display Mid 2015 Display Assembly Replacement, Battery Connector: шаг 4, изображение 1 из 1
      • Peel back the sticker covering the battery connector.

      Спросите у FixBot

      Добавить комментарий

    2. MacBook Pro 15" Retina Display Mid 2015 Display Assembly Replacement: шаг 5, изображение 1 из 3 MacBook Pro 15" Retina Display Mid 2015 Display Assembly Replacement: шаг 5, изображение 2 из 3 MacBook Pro 15" Retina Display Mid 2015 Display Assembly Replacement: шаг 5, изображение 3 из 3
      • Gently lift each side of the battery connector to pry the connector out of its socket on the logic board.

      • Bend the connector back toward the battery, ensuring that the battery connector doesn't accidentally make contact with the logic board.

      Спросите у FixBot

      Добавить комментарий

    1. MacBook Pro 15" Retina Display Mid 2015 Display Assembly Replacement, AirPort/Camera Cables: шаг 6, изображение 1 из 3 MacBook Pro 15" Retina Display Mid 2015 Display Assembly Replacement, AirPort/Camera Cables: шаг 6, изображение 2 из 3 MacBook Pro 15" Retina Display Mid 2015 Display Assembly Replacement, AirPort/Camera Cables: шаг 6, изображение 3 из 3
      Инструмент, используемый на этом этапе:
      Tweezers
      $4.99
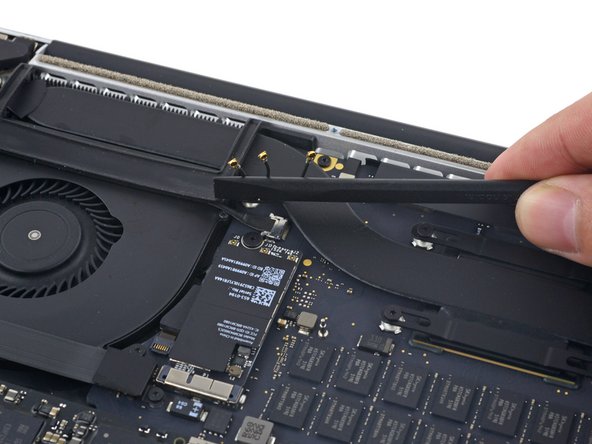
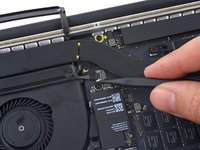
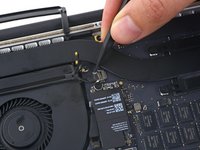
      • Use a spudger or tweezers to pry the three AirPort antenna cables straight up off of their sockets on the AirPort board, and bend them up and out of the way.

      • The cable connection points are very fragile. Be careful to lift only on the connector, and not on the socket or cable.

      • To reconnect, align the connector carefully into position over the socket, and press it down firmly with the flat of your spudger.

      Спросите у FixBot

      Добавить комментарий

    2. MacBook Pro 15" Retina Display Mid 2015 Display Assembly Replacement: шаг 7, изображение 1 из 2 MacBook Pro 15" Retina Display Mid 2015 Display Assembly Replacement: шаг 7, изображение 2 из 2
      • Peel the right rubber cover up off the fan and fold it out of the way.

      Спросите у FixBot

      Добавить комментарий

    3. MacBook Pro 15" Retina Display Mid 2015 Display Assembly Replacement: шаг 8, изображение 1 из 2 MacBook Pro 15" Retina Display Mid 2015 Display Assembly Replacement: шаг 8, изображение 2 из 2
      • Use the tip of a spudger to push the camera cable connector out of its socket on the logic board.

      • Be sure to push parallel to the board, pushing first on one side, then the other to "walk" the connector out of its socket.

      Спросите у FixBot

      Добавить комментарий

    4. MacBook Pro 15" Retina Display Mid 2015 Display Assembly Replacement: шаг 9, изображение 1 из 3 MacBook Pro 15" Retina Display Mid 2015 Display Assembly Replacement: шаг 9, изображение 2 из 3 MacBook Pro 15" Retina Display Mid 2015 Display Assembly Replacement: шаг 9, изображение 3 из 3
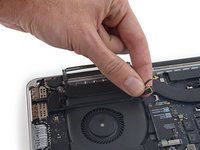
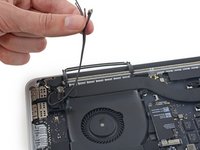
      • Use your fingers to pull the AirPort/Camera cables up off the fan.

      • The cables are adhered to the fan, so peel them up carefully to avoid damaging them.

      • Carefully de-route the cables from the plastic cable guide.

      • On reassembly, there should be enough adhesive still on these cables to stick them back down to the fan.

      Спросите у FixBot

      Добавить комментарий

    1. MacBook Pro 15" Retina Display Mid 2015 Display Assembly Replacement, Display Assembly: шаг 10, изображение 1 из 3 MacBook Pro 15" Retina Display Mid 2015 Display Assembly Replacement, Display Assembly: шаг 10, изображение 2 из 3 MacBook Pro 15" Retina Display Mid 2015 Display Assembly Replacement, Display Assembly: шаг 10, изображение 3 из 3
      • Use the tip of a spudger to flip up the display data cable lock and rotate it toward the MagSafe 2 power port side of the computer.

      • Pull the display data cable straight out of its socket on the logic board.

      • Do not lift up on the display data cable, as its socket is very fragile. Pull the cable parallel to the face of the logic board.

      • Do not touch the contacts on the data connector or its socket with your fingers or any tools, as you may deposit oils or damage the pins.

      Спросите у FixBot

      Добавить комментарий

    2. MacBook Pro 15" Retina Display Mid 2015 Display Assembly Replacement: шаг 11, изображение 1 из 2 MacBook Pro 15" Retina Display Mid 2015 Display Assembly Replacement: шаг 11, изображение 2 из 2
      • Remove the two rubber hinge covers.

      Спросите у FixBot

      Добавить комментарий

    3. MacBook Pro 15" Retina Display Mid 2015 Display Assembly Replacement: шаг 12, изображение 1 из 2 MacBook Pro 15" Retina Display Mid 2015 Display Assembly Replacement: шаг 12, изображение 2 из 2
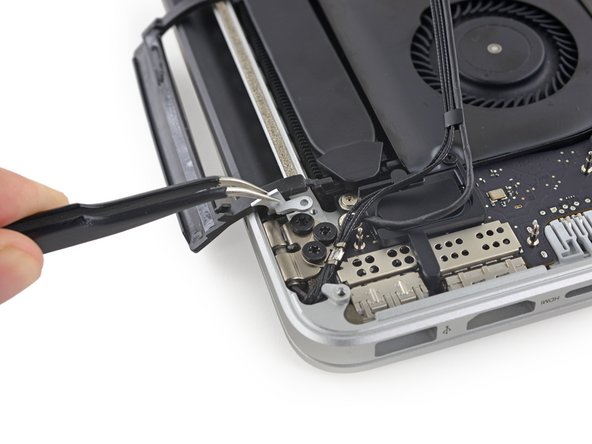
      • Remove the two 3.2 mm T5 Torx screws securing the aluminum hinge covers to the upper case.

      Спросите у FixBot

      Добавить комментарий

    4. MacBook Pro 15" Retina Display Mid 2015 Display Assembly Replacement: шаг 13, изображение 1 из 3 MacBook Pro 15" Retina Display Mid 2015 Display Assembly Replacement: шаг 13, изображение 2 из 3 MacBook Pro 15" Retina Display Mid 2015 Display Assembly Replacement: шаг 13, изображение 3 из 3
      • Remove the two aluminum hinge covers from the MacBook Pro.

      Спросите у FixBot

      Добавить комментарий

    5. MacBook Pro 15" Retina Display Mid 2015 Display Assembly Replacement: шаг 14, изображение 1 из 2 MacBook Pro 15" Retina Display Mid 2015 Display Assembly Replacement: шаг 14, изображение 2 из 2
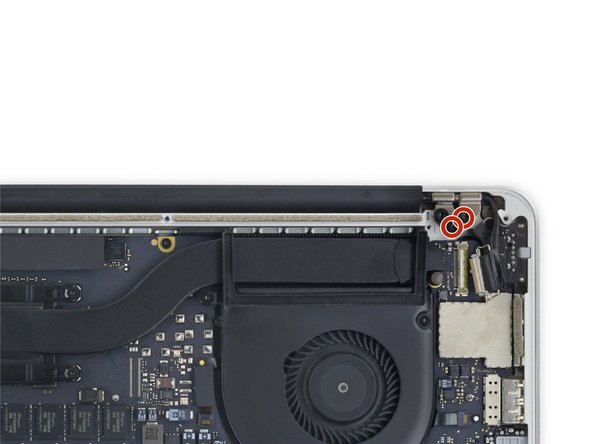
      • Remove four out of the six 5.3 mm T8 Torx screws securing the display to the upper case.

      • Leave the innermost screws (one from each hinge) in place.

      • When reassembling, be sure the two screws going back into the hinge on the left go back through the webcam/AirPort cable bracket.

      Спросите у FixBot

      Добавить комментарий

    6. MacBook Pro 15" Retina Display Mid 2015 Display Assembly Replacement: шаг 15, изображение 1 из 1
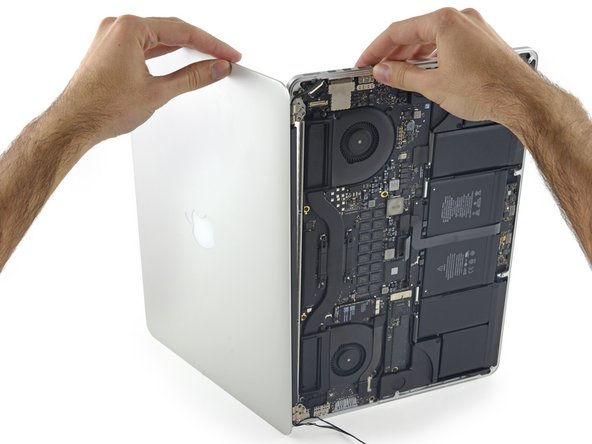
      • Open the MacBook Pro approximately 110 degrees, and place it sideways on the table, as shown.

      Спросите у FixBot

      Добавить комментарий

    7. MacBook Pro 15" Retina Display Mid 2015 Display Assembly Replacement: шаг 16, изображение 1 из 1
      • While holding the display and upper case together with your left hand, remove the remaining T8 Torx screw from the lower (closer to the table) display bracket.

      Спросите у FixBot

      Добавить комментарий

    8. MacBook Pro 15" Retina Display Mid 2015 Display Assembly Replacement: шаг 17, изображение 1 из 1
      • Be sure to hold the display and upper case together with your left hand. Failure to do so may cause the freed display/upper case to fall, potentially damaging each component.

      • While holding the display and upper case together with your left hand, remove the remaining T8 Torx screw from the upper display bracket.

      Спросите у FixBot

      Добавить комментарий

    9. MacBook Pro 15" Retina Display Mid 2015 Display Assembly Replacement: шаг 18, изображение 1 из 3 MacBook Pro 15" Retina Display Mid 2015 Display Assembly Replacement: шаг 18, изображение 2 из 3 MacBook Pro 15" Retina Display Mid 2015 Display Assembly Replacement: шаг 18, изображение 3 из 3
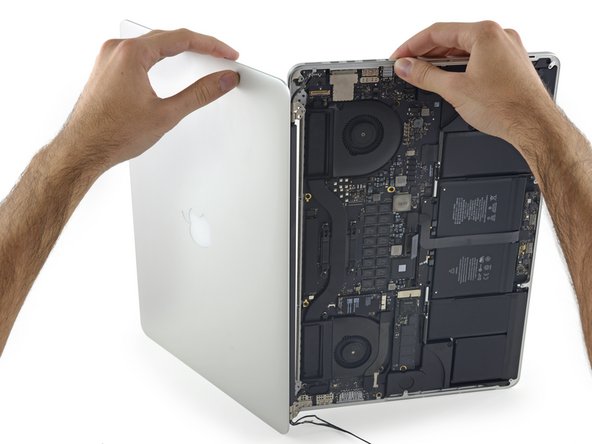
      • Grip both halves of the device, one in each hand.

      • Gently push forward on the bottom half of the device to detach it from the display assembly.

      • Carefully set each component aside, making sure to set down the bottom half keyboard-side down to avoid damaging internal components.

      • Replacement displays may not have their hinges adjusted to the correct angle. Use needle nose pliers to gently adjust them to match the hinges on the display being replaced.

      Спросите у FixBot

      Добавить комментарий

Заключение

To reassemble your device, follow these instructions in reverse order.

Отменить: Я не выполнил это руководство.

161 человек успешно провели ремонт по этому руководству.

Andrew Optimus Goldheart

Участник с: 10/17/09

515 517 Репутация

Автор 406 руководств

Команда

iFixit Участник iFixit

Staff

123 членов

Автор 64 632 руководств

58 Комментарии к руководству

Can the clutch be replaced in the 2015 15" Retina MacBook Pro?

Thomas Taggart - Ответить Поделиться
Successfully replaced screen and everything is working great. One mechanical exception - the black clutch cover is loose on one side (the left side looking at the keyboard). i can "lift it" towards myself. it wasn't obvious while i was in there that there was a step to "hook it" into anything. what has it let go from and how do i go about ensuring that it's secure when it's flipped? Anyone know?

Thnaks!

J Allard - Ответить Поделиться

It was a perfect job! Thanks!

Mike Mell - Ответить Поделиться

Thank you! These instructions couldn't be better.

Devin Fredericks - Ответить Поделиться

Do you have any intention of releasing a guide for the new A1707 2016 pro retina model with touch bar? Thanks for your help.

Michael Moore - Ответить Поделиться

Добавить комментарий

Статистика просмотров:

За последние 24 часов: 27

За последние 7 дней: 171

За последние 30 дней: 608

За всё время: 252,804