Перейти к основному содержанию
Присоединяйся к сообществу ремонтников - Создай аккаунт

Macintosh PowerBook 165c Lower Case Replacement

Выберете то, что вам нужно

    1. Macintosh PowerBook 165c Lower Case Replacement, Battery: шаг 1, изображение 1 из 1
      • Orient the computer so the battery is facing you.

      • Slide the gray plastic battery cover to the right.

      Спросите у FixBot

      Добавить комментарий

    2. Macintosh PowerBook 165c Lower Case Replacement: шаг 2, изображение 1 из 1
      • Pull the battery toward yourself until it is fully detached.

      Спросите у FixBot

      Добавить комментарий

    1. Macintosh PowerBook 165c Lower Case Replacement, Input/Output Door: шаг 3, изображение 1 из 1
      • Orient the computer right side up with the rear facing you.

      • Open the Input/Output (I/O) door.

      Спросите у FixBot

      Добавить комментарий

    2. Macintosh PowerBook 165c Lower Case Replacement: шаг 4, изображение 1 из 1
      • Carefully bend the door into an arch until one of the pins releases from its slot.

      • Once one of the pins is free, remove the I/O door from the computer.

      Спросите у FixBot

      Добавить комментарий

    1. Macintosh PowerBook 165c Lower Case Replacement, Lower Case: шаг 5, изображение 1 из 1
      • Orient the computer with the bottom facing up and rear facing you. You should be able to read the Macintosh label in this position.

      Спросите у FixBot

      Добавить комментарий

    2. Macintosh PowerBook 165c Lower Case Replacement: шаг 6, изображение 1 из 1
      • Use a T8 torx screwdriver to remove the 6.8mm long screw above and to the right of the modem jack.

      • Twist counter clockwise to remove the screw.

      Спросите у FixBot

      Добавить комментарий

    3. Macintosh PowerBook 165c Lower Case Replacement: шаг 7, изображение 1 из 1
      • Use a T10 torx screwdriver to remove the four, 18mm long screws from the lower case.

      Спросите у FixBot

      Добавить комментарий

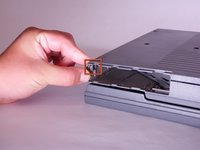
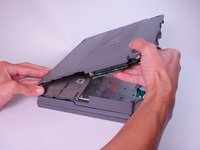
    4. Macintosh PowerBook 165c Lower Case Replacement: шаг 8, изображение 1 из 2 Macintosh PowerBook 165c Lower Case Replacement: шаг 8, изображение 2 из 2
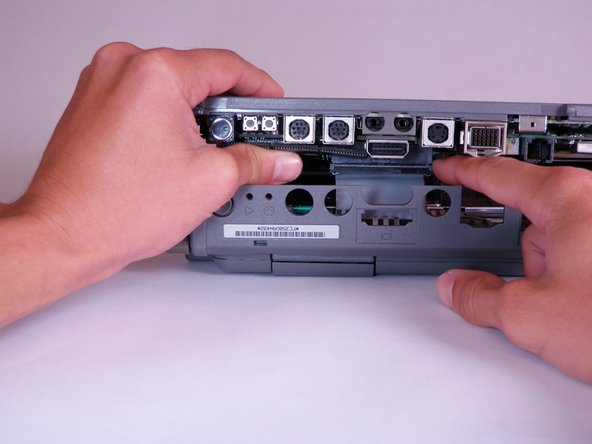
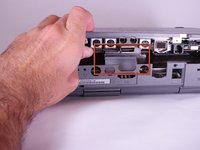
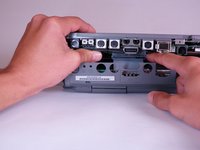
      • Place your hands on the lower case, just above the I/O panel, and slowly lift the lower case a few inches above the main body of the computer.

      • Release the large, gray interconnect ribbon cable just behind the I/O panel.

      • Caution: Lower case cannot be fully removed until two plastic clips in the front corners are released. See the following step for details.

      Спросите у FixBot

      Добавить комментарий

    5. Macintosh PowerBook 165c Lower Case Replacement: шаг 9, изображение 1 из 2 Macintosh PowerBook 165c Lower Case Replacement: шаг 9, изображение 2 из 2
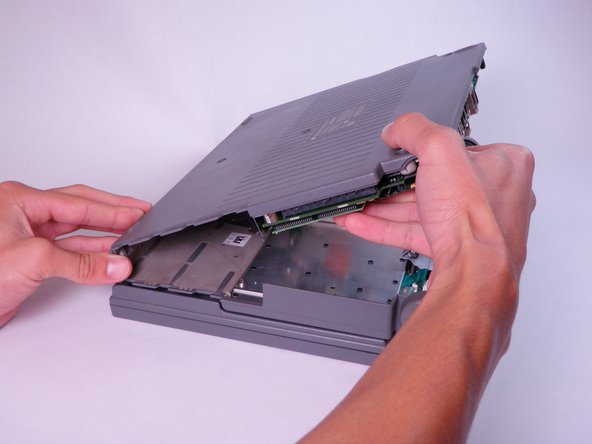
      • Place your thumb on the upper case, inside the empty battery slot, and your index finger near your thumb on the left side of the lower case.

      • Pinch your thumb and index finger towards each other to release the clip. Without releasing pressure on the pinch grip, use your index finger to push the lower case upwards.

      • Lift the lower case to remove it.

      Спросите у FixBot

      Добавить комментарий

Заключение

To reassemble your device, follow these instructions in reverse order.

Отменить: Я не выполнил это руководство.

Jason

Участник с: 10/12/11

110 Репутация

Автор 4 руководств

Команда

Cal Poly, Team 6-3, Regan Fall 2011 Участник Cal Poly, Team 6-3, Regan Fall 2011

CPSU-REGAN-F11S6G3

4 членов

Автор 95 руководств

0 Комментарии к руководству

Добавить комментарий

Статистика просмотров:

За последние 24 часов: 0

За последние 7 дней: 5

За последние 30 дней: 31

За всё время: 1,524