Этот перевод был сделан машиной и пока не проверен человеком. Говорите на этом языке? Просмотрите его.
Введение
Ваш Marshall Woburn стал плохо воспроизводить низкие частоты? Если это так, воспользуйтесь данным руководством по извлечению двух сабвуферов. Вам понадобится только стандартная крестовая отвертка Phillips №1, чтобы открутить винты, необходимые для этой замены.
Выберете то, что вам нужно
-
-
-
Положите устройство на ровную поверхность передней решеткой вниз.
-
С помощью крестовой отвертки №1 (#1) открутите десять внешних винтов длиной 28,6 мм, отмеченных красным.
-
Открутите восемь внутренних винтов длиной 28,6 мм с помощью той же крестовой отвертки №1 (#1).
 Спросите у FixBot
-
-
-
Слегка приподнимите заднюю плату ввода над задней панелью.
-
Поверните плату ввода так, чтобы её можно было вставить в отверстие в задней панели, из которого она была извлечена.
-
Полностью проденьте плату ввода через заднюю панель и аккуратно установите её внутрь колонки.
-
-
-
Возьмитесь за панель через большое отверстие и приподнимите одну сторону, пока не сможете просунуть под нее руку.
-
Полностью снимите заднюю панель с остальной части корпуса рукой.
-
-
-
-
-
-
Отсоедините 5 проводов, обведенных красным, от задней входной платы.
-
-
-
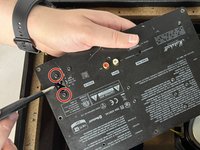
Выкрутите два винта длиной 12,7 мм, отмеченных красным цветом, с передней стороны задней панели ввода с помощью отвертки Phillips #1.
-
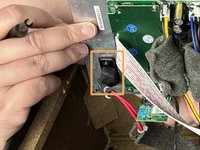
Отсоедините силовой кабель от задней стороны панели.
-
-
-
Полностью извлеките плату ввода-вывода и прикрепленную к ней пластину.
-
-
-
-
-
С помощью отвертки Phillips #1 выкрутите восемь винтов длиной 15,8 мм, которыми сабвуферы крепятся к раме.
-
-
-
Приподнимите каждый сабвуфер и извлеките их из корпуса вместе.
-
-




Для сборки устройства выполните эти действия в обратном порядке.

Команда

UMass Dartmouth, Team 2-4, Gulbrandsen Fall 2023 Участник UMass Dartmouth, Team 2-4, Gulbrandsen Fall 2023
UMASSD-GULBRANDSEN-F23S2G4
3 членов
Автор 54 руководств
