Введение
Removal and replacement of Hard Drive.
Выберете то, что вам нужно
-
-
Use a metal spudger or Zune opening tool to remove the small silver plastic cap on top of the device.
 Спросите у FixBot
-
-
-
There are two T3 screws under the cap. Remove both with a T3 screwdriver.
-
-
-
-
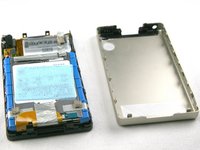
Using a metal spudger or Zune opening tool, remove the aluminum backing starting from the top. There are 5 clips on each side and two on the bottom.
-
-
-
Remove the silver tape from the bottom center and the top right. This allows access to the hard drive and the battery.
-
-
-
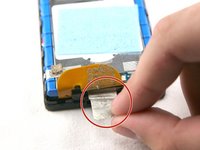
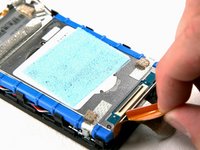
Unclick the black bar connecting the orange hard drive cable to the bottom of the hard drive. Gently push towards the bottom of the device on the black bar until you hear a click sound, it is now disengaged from the hard drive.
-
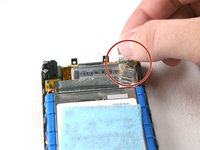
Now gently pull the orange hard drive cable to remove it from the hard drive.
-
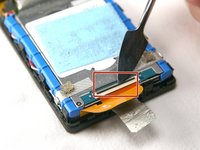
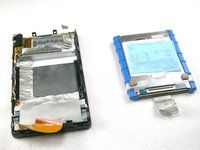
Lift the hard drive from the device.
-
Hard Drive Replacement Only: Check to make sure the hard drive cable is in good condition and then connect the new hard drive in the same place, following the steps in reverse order.
-


To reassemble your device, follow these instructions in reverse order.
Отменить: Я не выполнил это руководство.
8 человек успешно провели ремонт по этому руководству.
Команда

Cal Poly, Team 6-5, Maness Fall 2009 Участник Cal Poly, Team 6-5, Maness Fall 2009
CPSU-MANESS-F09S6G5
5 членов
Автор 8 руководств
1 Комментарий к руководству
what model hard drive did you utilize during its replacement?
thanksss