Перейти к основному содержанию

Midiman Oxygen 8 Power Port Replacement

Выберете то, что вам нужно

  1. Midiman Oxygen 8 Power Port Replacement, Midiman Oxygen 8 Backplate Disassembly: шаг 1, изображение 1 из 2 Midiman Oxygen 8 Power Port Replacement, Midiman Oxygen 8 Backplate Disassembly: шаг 1, изображение 2 из 2
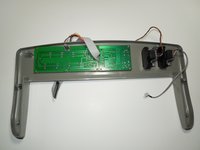
    • Remove the 8 mm M3 Phillips head self tapping machine screws.

    • Several of the screws are in narrow, deep sockets; make sure to use an appropriate screw driver to remove them so as not to damage the cover during removal.

    • Remove all 13 of the back plate screws.

  2. Midiman Oxygen 8 Power Port Replacement: шаг 2, изображение 1 из 2 Midiman Oxygen 8 Power Port Replacement: шаг 2, изображение 2 из 2
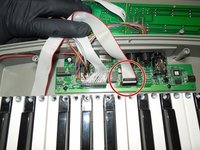
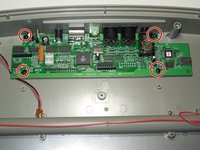
    • Remove the two highlighted 10 mm M3 galvanized machine screws using the J1 head fro the iFixit Tool Kit or a comparable tool.

  3. Midiman Oxygen 8 Power Port Replacement: шаг 3, изображение 1 из 3 Midiman Oxygen 8 Power Port Replacement: шаг 3, изображение 2 из 3 Midiman Oxygen 8 Power Port Replacement: шаг 3, изображение 3 из 3
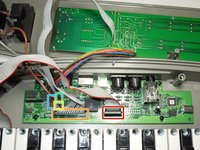
    • Removal of Ribbon Cables

    • Prior to removal, note, mark, or take photo’s of the position of all connectors. Specifically note the side that the red wire is on, as ribbon cables are polarized cables that must be re-installed correctly. Installing the cables backwards may cause damage to the device or significantly hinder the troubleshooting process.

    • To separate the back plate, remove all five cables that connect to the motherboard but do not originate from the back plate; the key assembly, LCD circuit, rotor tuning circuit, and the pitch and modulator circuits. None of these cables require tools to remove, simply apply firm upward pressure to remove them.

  4. Midiman Oxygen 8 Power Port Replacement: шаг 4, изображение 1 из 2 Midiman Oxygen 8 Power Port Replacement: шаг 4, изображение 2 из 2
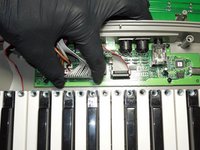
    • Remove the key assembly from the key board.

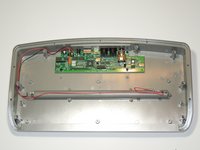
    • What remains is the back plate and the top plate assemblies.

  5. Midiman Oxygen 8 Power Port Replacement, Power Port: шаг 5, изображение 1 из 1
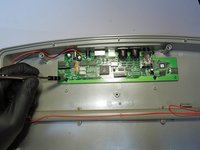
    • The power plug port in soldered onto the motherboard, and screwed onto the back plate.

  6. Midiman Oxygen 8 Power Port Replacement: шаг 6, изображение 1 из 1
    • The battery power cord must be detached and removed from the motherboard prior to it being unsecured from the back plate.

    • Using the point tip of the black spudger tool, press into the gap between the plug and retaining clip in the socket, then gently pull on the plug wires to remove it from the socket.

  7. Midiman Oxygen 8 Power Port Replacement: шаг 7, изображение 1 из 2 Midiman Oxygen 8 Power Port Replacement: шаг 7, изображение 2 из 2
    • There are 4 M1.5 x 3 screws that must be removed to separate the motherboard from the back plate.

  8. Midiman Oxygen 8 Power Port Replacement: шаг 8, изображение 1 из 1
    • There are 3 solder points that connect the power socket to the motherboard, 2 electrical and 1 to secure the housing.

    • De-Solder the three connections to remove the old power port.

    • Solder on the new power port to complete the replacement.

Заключение

To reassemble your device, follow these instructions in reverse order.

Scott Miller

Участник с: 10/04/16

437 Репутация

Автор 4 руководств

Команда

USF Tampa, Team 1-6, Sullivan Fall 2016 Участник USF Tampa, Team 1-6, Sullivan Fall 2016

USFT-SULLIVAN-F16S1G6

4 членов

Автор 6 руководств

0 Комментариев

Добавить комментарий

Просмотр статистики:

За последние 24часов: 1

За последние 7 дней: 2

За последние 30 дней: 5

За всё время: 482