Перейти к основному содержанию
Присоединяйся к сообществу ремонтников - Создай аккаунт

Motorola Defy XT Screen Replacement

Выберете то, что вам нужно

    1. Motorola Defy XT Screen Replacement, Battery: шаг 1, изображение 1 из 1
      • Wedge the plastic opening tool in between the back cover and the body of the phone in the opening denoted by the arrow.

      Спросите у FixBot

      Добавить комментарий

    2. Motorola Defy XT Screen Replacement: шаг 2, изображение 1 из 1
      • Once wedged in the opening, slide the opening tool sideways around the sides of the phone.

      • Remove the back cover and set it aside.

      Спросите у FixBot

      Добавить комментарий

    3. Motorola Defy XT Screen Replacement: шаг 3, изображение 1 из 1
      • Insert the opening tool between the battery and the battery holder and wedge the battery out.

      Спросите у FixBot

      Добавить комментарий

    1. Motorola Defy XT Screen Replacement, SD Card: шаг 4, изображение 1 из 1
      • Open the plastic cover with your finger, exposing the SD card.

      • Use the opening tool to grab the edge of the SD card and pull it straight out.

      Спросите у FixBot

      Добавить комментарий

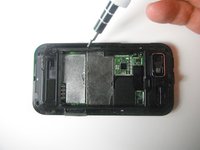
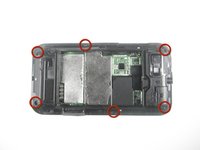
    1. Motorola Defy XT Screen Replacement, Screen: шаг 5, изображение 1 из 2 Motorola Defy XT Screen Replacement, Screen: шаг 5, изображение 2 из 2
      • Use the Torx T4 screwdriver to remove the six 3 mm screws from the back case.

      Спросите у FixBot

      Добавить комментарий

    2. Motorola Defy XT Screen Replacement: шаг 6, изображение 1 из 1
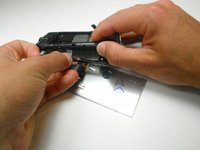
      • Use the plastic opening tool to pop the volume buttons off from the side of the phone.

      Спросите у FixBot

      Добавить комментарий

    3. Motorola Defy XT Screen Replacement: шаг 7, изображение 1 из 1
      • Wedge the plastic opening tool between the plastic layer and the shiny front cover.

      Спросите у FixBot

      Добавить комментарий

    4. Motorola Defy XT Screen Replacement: шаг 8, изображение 1 из 1
      • Slide the plastic opening tool along the edge, wedging the the two pieces apart.

      • Potential for device damage: Do not completely separate the two pieces; there are still internal components that need to be disconnected.

      Спросите у FixBot

      Добавить комментарий

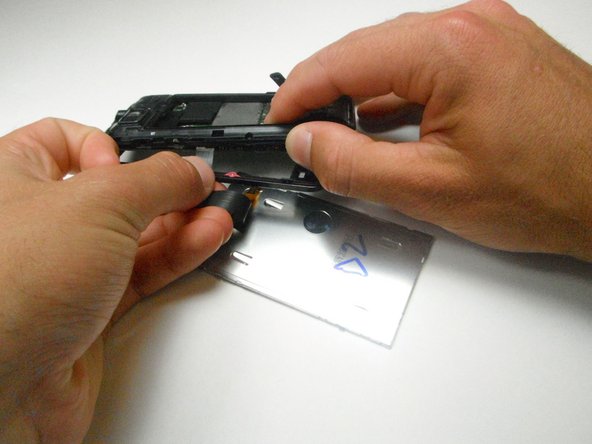
    5. Motorola Defy XT Screen Replacement: шаг 9, изображение 1 из 2 Motorola Defy XT Screen Replacement: шаг 9, изображение 2 из 2
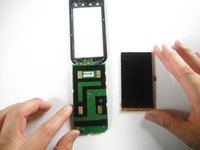
      • Slide the screen out and disconnect the ribbon cable connecting the display to the motherboard by pulling straight outward.

      • Potential for device damage: Be careful when sliding out the screen because the front case and the motherboard are still connected by two other ribbon cables.

      Спросите у FixBot

      Добавить комментарий

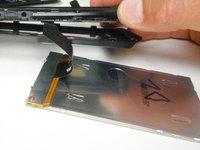
    6. Motorola Defy XT Screen Replacement: шаг 10, изображение 1 из 2 Motorola Defy XT Screen Replacement: шаг 10, изображение 2 из 2
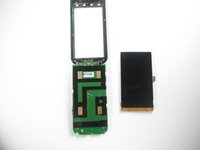
      • Set the old screen aside and replace it with your new screen.

      Спросите у FixBot

      Добавить комментарий

Заключение

To reassemble your device, follow these instructions in reverse order.

Отменить: Я не выполнил это руководство.

2 человек успешно провели ремонт по этому руководству.

Oscar Camacho

Участник с: 04/19/13

89 Репутация

1 руководство автора

Команда

Cal Poly, Team 2-22, Maness Spring 2013 Участник Cal Poly, Team 2-22, Maness Spring 2013

CPSU-MANESS-S13S2G22

3 членов

Автор 36 руководств

0 Комментарии к руководству

Добавить комментарий

Статистика просмотров:

За последние 24 часов: 0

За последние 7 дней: 6

За последние 30 дней: 42

За всё время: 3,652