Перейти к основному содержанию

Motorola Moto G60S Fingerprint Sensor Replacement

Выберете то, что вам нужно

  1. Motorola Moto G60S Fingerprint Sensor Replacement, Prepare your phone for disassembly: шаг 1, изображение 1 из 2 Motorola Moto G60S Fingerprint Sensor Replacement, Prepare your phone for disassembly: шаг 1, изображение 2 из 2
    • Before you begin, discharge your battery below 25%, as a charged lithium-ion battery can be dangerous if accidentally punctured.

    • Power off your phone and unplug any cables.

  2. Motorola Moto G60S Fingerprint Sensor Replacement, Remove the SIM card tray: шаг 2, изображение 1 из 3 Motorola Moto G60S Fingerprint Sensor Replacement, Remove the SIM card tray: шаг 2, изображение 2 из 3 Motorola Moto G60S Fingerprint Sensor Replacement, Remove the SIM card tray: шаг 2, изображение 3 из 3
    • Insert a SIM eject tool, bit, or straightened paperclip into the SIM card tray hole on the left edge of the phone.

    • Push the SIM eject tool into the hole to eject the SIM card tray.

    • Remove the SIM card tray.

  3. Motorola Moto G60S Fingerprint Sensor Replacement, Heat the right edge: шаг 3, изображение 1 из 1
    • Heat an iOpener and apply it to the back cover's right edge for two minutes.

    • A hair dryer, heat gun, or hot plate may also be used, but be careful not to overheat the phone—the display and internal battery are both susceptible to heat damage.

  4. Motorola Moto G60S Fingerprint Sensor Replacement, Insert an opening pick: шаг 4, изображение 1 из 2 Motorola Moto G60S Fingerprint Sensor Replacement, Insert an opening pick: шаг 4, изображение 2 из 2
    • Flip your phone over so the display is facing up.

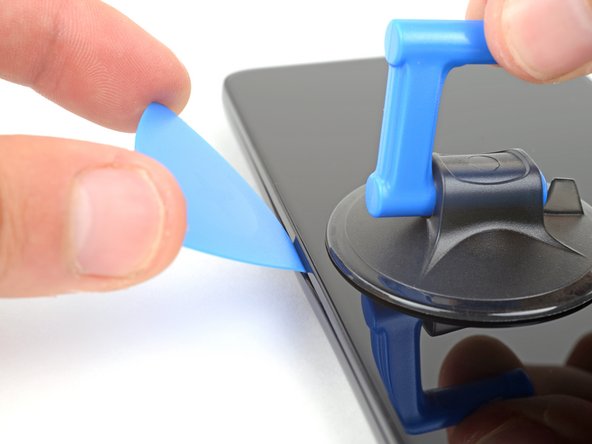
    • Apply a suction handle to the middle of the display's left edge, as close to the edge as possible.

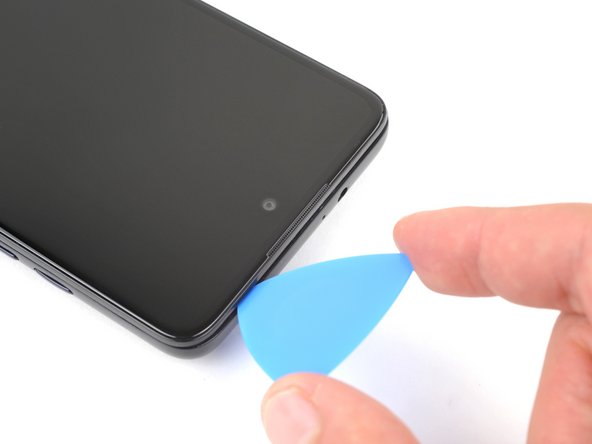
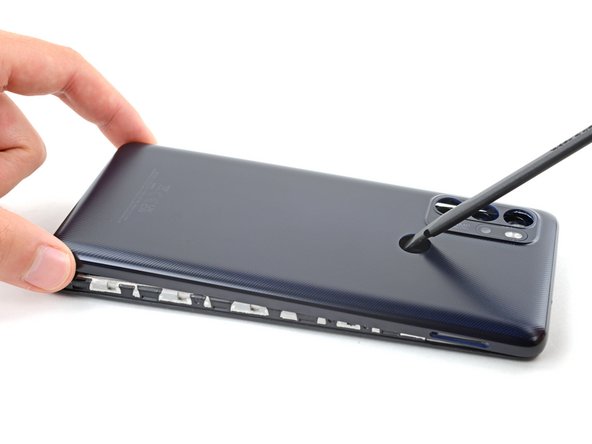
    • Place the tip of an opening pick in the small gap between the back cover and the display.

    • Pull up on the suction cup with a strong, steady force and push the opening pick down at a 45 degree angle until it slides into the gap between the back cover and the display.

    • If you're having a hard time inserting the pick, reheat the adhesive with an iOpener and try again.

  5. Motorola Moto G60S Fingerprint Sensor Replacement, Slice the left adhesive: шаг 5, изображение 1 из 3 Motorola Moto G60S Fingerprint Sensor Replacement, Slice the left adhesive: шаг 5, изображение 2 из 3 Motorola Moto G60S Fingerprint Sensor Replacement, Slice the left adhesive: шаг 5, изображение 3 из 3
    • Both adhesive and clips secure the back cover.

    • During steps that involve sliding the opening pick, keep it angled down at a 45 degree angle.

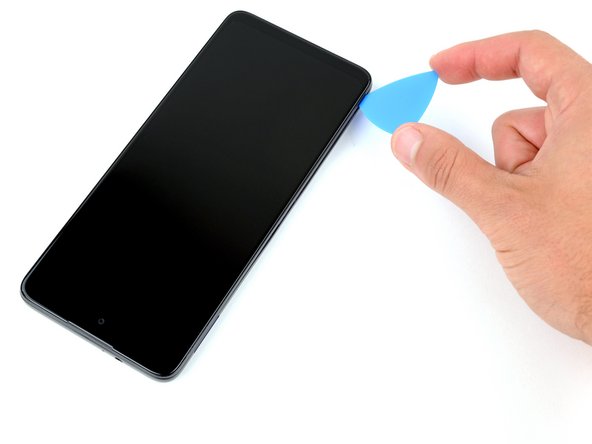
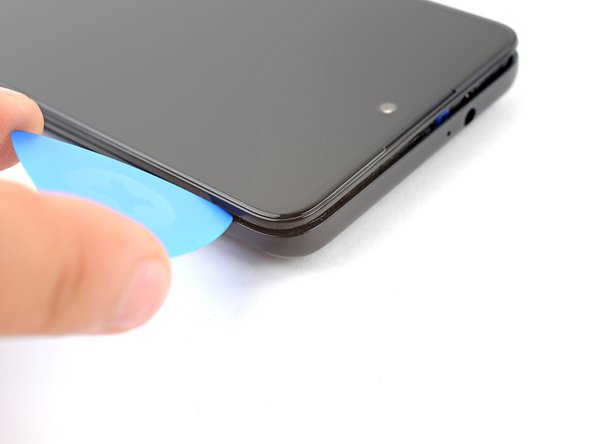
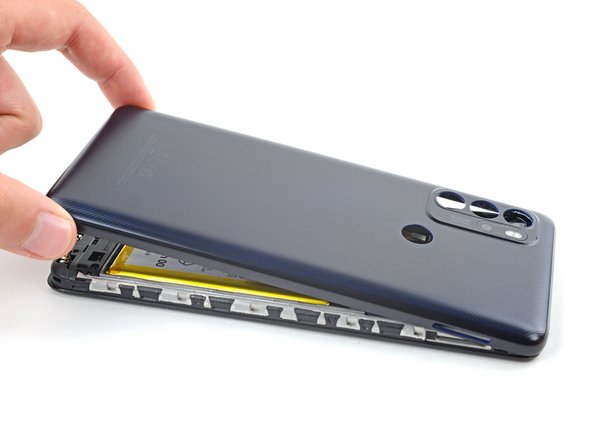
    • Slide the pick along the left edge down to the bottom left corner, and then up to the top left corner, to release the clips and slice the adhesive.

    • Leave the pick inserted in the top left corner to prevent the adhesive from resealing.

  6. Motorola Moto G60S Fingerprint Sensor Replacement, Heat the top edge: шаг 6, изображение 1 из 1
    • Flip your phone over and apply a heated iOpener to the back cover's top edge for two minutes.

  7. Motorola Moto G60S Fingerprint Sensor Replacement: шаг 7, изображение 1 из 2 Motorola Moto G60S Fingerprint Sensor Replacement: шаг 7, изображение 2 из 2
    • Flip your phone over and rotate the pick around the top left corner.

  8. Motorola Moto G60S Fingerprint Sensor Replacement: шаг 8, изображение 1 из 2 Motorola Moto G60S Fingerprint Sensor Replacement: шаг 8, изображение 2 из 2
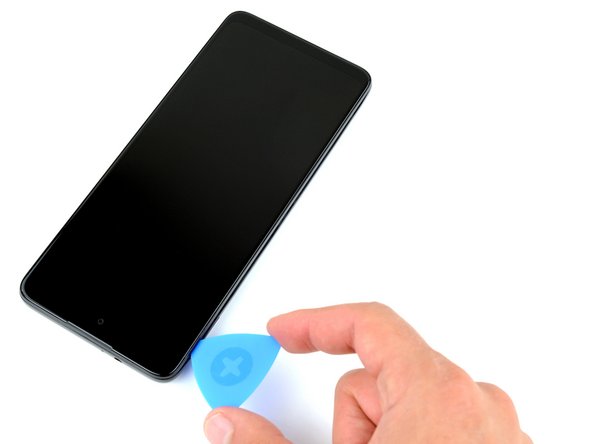
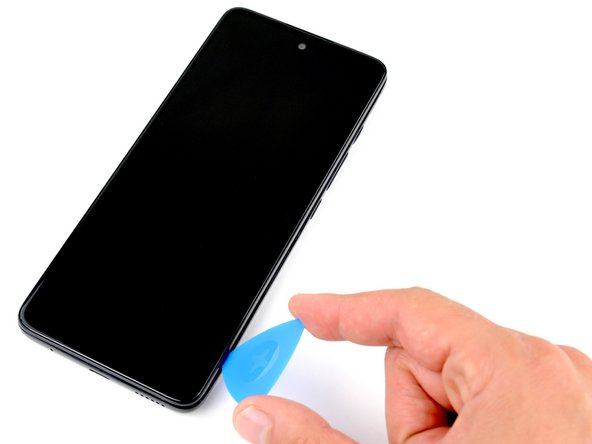
    • Slide the pick along the top edge to release the clips and slice the adhesive.

    • Leave the pick inserted in the top right corner.

  9. Motorola Moto G60S Fingerprint Sensor Replacement: шаг 9, изображение 1 из 1
    • Flip your phone over and apply a heated iOpener to the back cover's left edge for two minutes.

  10. Motorola Moto G60S Fingerprint Sensor Replacement: шаг 10, изображение 1 из 2 Motorola Moto G60S Fingerprint Sensor Replacement: шаг 10, изображение 2 из 2
    • Flip your phone over and rotate the pick around the top right corner.

  11. Motorola Moto G60S Fingerprint Sensor Replacement: шаг 11, изображение 1 из 2 Motorola Moto G60S Fingerprint Sensor Replacement: шаг 11, изображение 2 из 2
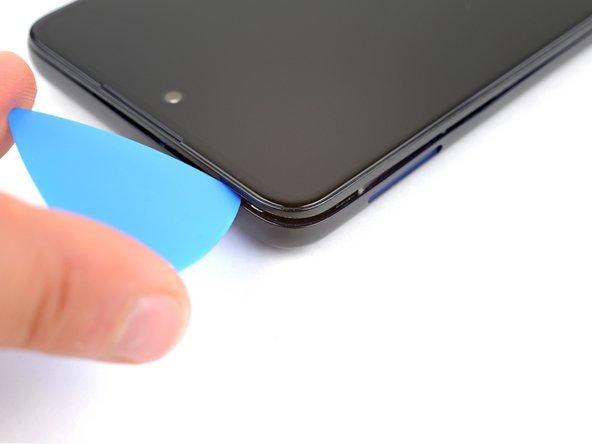
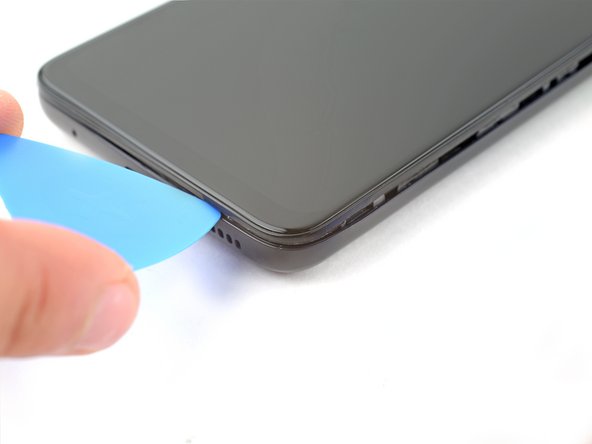
    • Slide the pick along the right edge to release the clips and slice the adhesive.

    • Leave the pick inserted in the bottom right corner to prevent the adhesive from resealing.

  12. Motorola Moto G60S Fingerprint Sensor Replacement: шаг 12, изображение 1 из 1
    • Flip your phone over and apply a heated iOpener to the back cover's bottom edge for two minutes.

  13. Motorola Moto G60S Fingerprint Sensor Replacement: шаг 13, изображение 1 из 2 Motorola Moto G60S Fingerprint Sensor Replacement: шаг 13, изображение 2 из 2
    • Flip your phone over and rotate the pick around the bottom right corner.

  14. Motorola Moto G60S Fingerprint Sensor Replacement: шаг 14, изображение 1 из 2 Motorola Moto G60S Fingerprint Sensor Replacement: шаг 14, изображение 2 из 2
    • Slide the opening pick along the bottom edge to release the clips and slice the adhesive.

  15. Motorola Moto G60S Fingerprint Sensor Replacement: шаг 15, изображение 1 из 2 Motorola Moto G60S Fingerprint Sensor Replacement: шаг 15, изображение 2 из 2
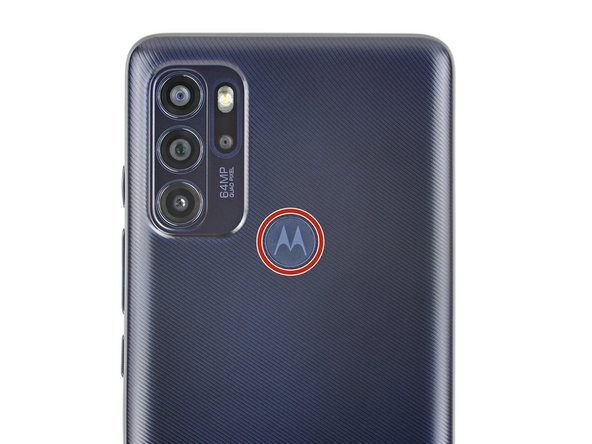
    • Flip your phone over and apply a heated iOpener to the fingerprint sensor on the back cover for two minutes.

  16. Motorola Moto G60S Fingerprint Sensor Replacement, Detach the fingerprint sensor: шаг 16, изображение 1 из 3 Motorola Moto G60S Fingerprint Sensor Replacement, Detach the fingerprint sensor: шаг 16, изображение 2 из 3 Motorola Moto G60S Fingerprint Sensor Replacement, Detach the fingerprint sensor: шаг 16, изображение 3 из 3
    • Adhesive secures the fingerprint sensor to the back case.

    • A fragile cable secures the fingerprint sensor to the motherboard. Be very careful during this step to avoid damaging the cable.

    • Press down on the fingerprint sensor with the flat end of a spudger or your finger.

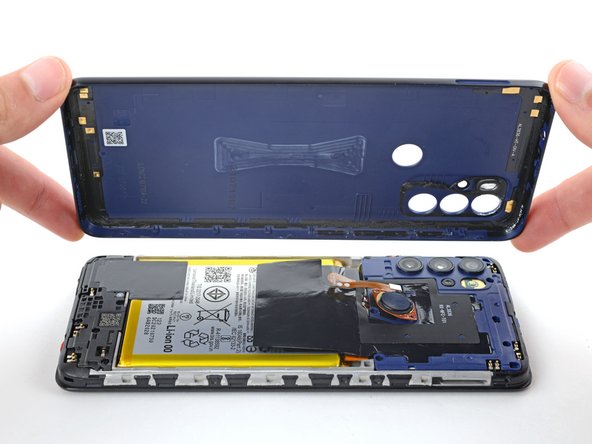
    • While pressing down on the fingerprint sensor, gently pull up the bottom edge of the back cover until the sensor detaches.

  17. Motorola Moto G60S Fingerprint Sensor Replacement, Remove the back cover: шаг 17, изображение 1 из 3 Motorola Moto G60S Fingerprint Sensor Replacement, Remove the back cover: шаг 17, изображение 2 из 3 Motorola Moto G60S Fingerprint Sensor Replacement, Remove the back cover: шаг 17, изображение 3 из 3
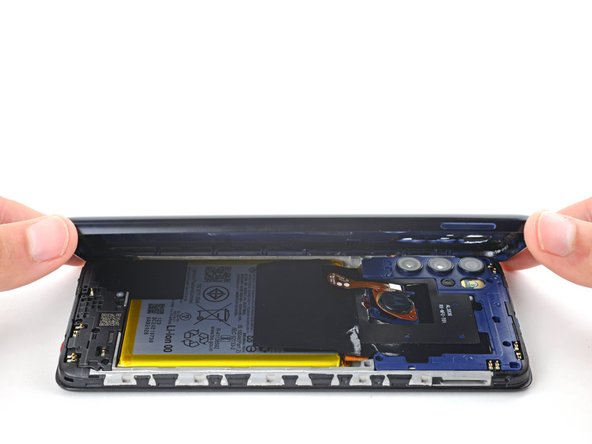
    • Lift the back cover up and remove it.

    • If the back cover is still stuck to the frame, slide an opening pick around the entire perimeter until the cover separates completely.

    • During reassembly:

    • This is a good point to test your phone's functionality before sealing it up. Use this guide to run a hardware test. Be sure to power your phone back down completely before you continue working.

    • Apply new adhesive to the perimeter of the underside of the back cover after cleaning the relevant areas with isopropyl alcohol (>90%) and a micro-fiber cloth.

  18. Motorola Moto G60S Fingerprint Sensor Replacement, Detach the fingerprint sensor: шаг 18, изображение 1 из 2 Motorola Moto G60S Fingerprint Sensor Replacement, Detach the fingerprint sensor: шаг 18, изображение 2 из 2
    • The fingerprint reader is secured to the motherboard cover with light adhesive.

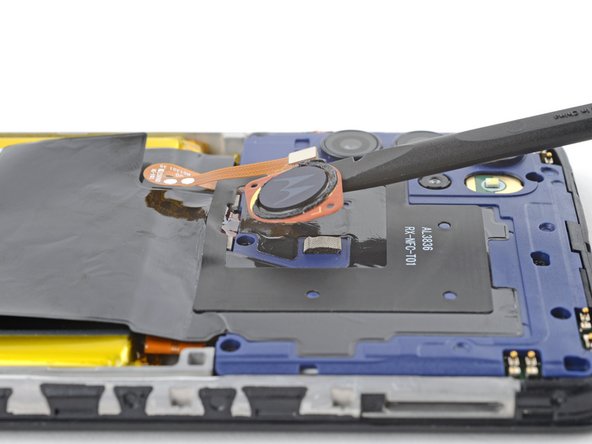
    • Insert the flat end of a spudger under the fingerprint sensor.

    • Gently pry up and detach the fingerprint sensor from the motherboard cover.

    • Don't try to remove the fingerprint sensor yet, as it's still attached to the motherboard by a delicate ribbon cable.

  19. Motorola Moto G60S Fingerprint Sensor Replacement, Unfasten the motherboard cover: шаг 19, изображение 1 из 2 Motorola Moto G60S Fingerprint Sensor Replacement, Unfasten the motherboard cover: шаг 19, изображение 2 из 2
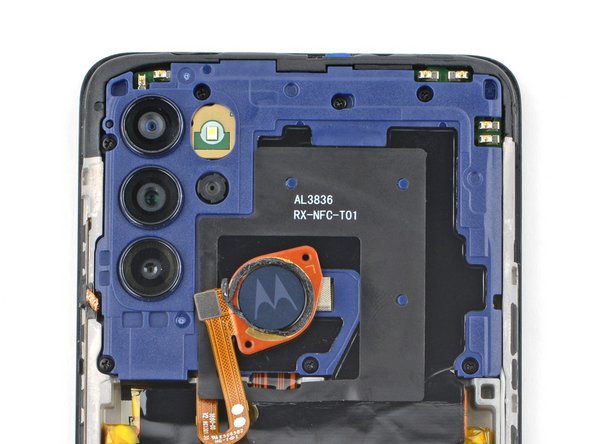
    • Use a Phillips screwdriver to remove the seven 3.9 mm screws securing the motherboard cover.

  20. Motorola Moto G60S Fingerprint Sensor Replacement, Unclip the motherboard cover: шаг 20, изображение 1 из 2 Motorola Moto G60S Fingerprint Sensor Replacement, Unclip the motherboard cover: шаг 20, изображение 2 из 2
    • The motherboard cover is secured with tight clips.

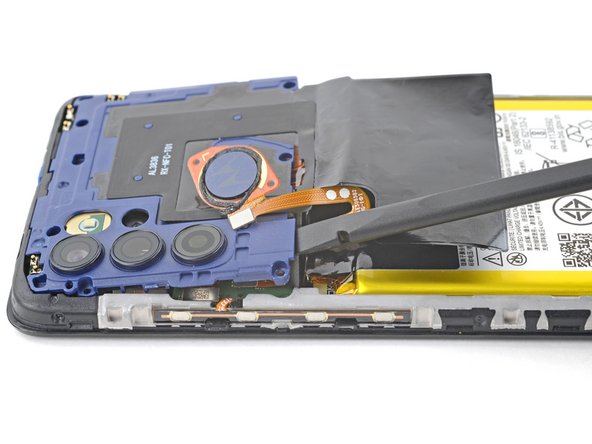
    • Insert the flat end of a spudger in the gap between the frame and the bottom left corner of the motherboard cover.

    • Lift straight up with the spudger to release the clips securing the motherboard.

    • Don't pry against the battery, as this could damage it.

    • This may take take a few attempts. It you're having trouble, try gripping the spudger closer to the flat end.

    • During reassembly, press down around the perimeter of the motherboard cover to engage the clips.

  21. Motorola Moto G60S Fingerprint Sensor Replacement, Remove the motherboard cover: шаг 21, изображение 1 из 2 Motorola Moto G60S Fingerprint Sensor Replacement, Remove the motherboard cover: шаг 21, изображение 2 из 2
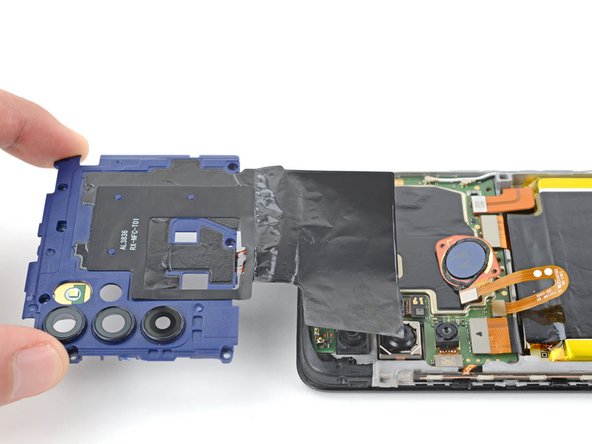
    • Pull the motherboard cover towards the top of the phone to remove it.

    • Make sure to avoid the fingerprint sensor cable when removing the cover, as it can easily rip.

  22. Motorola Moto G60S Fingerprint Sensor Replacement, Disconnect the battery: шаг 22, изображение 1 из 2 Motorola Moto G60S Fingerprint Sensor Replacement, Disconnect the battery: шаг 22, изображение 2 из 2
    • Use the flat end of a spudger to pry up and disconnect the battery cable's press connector.

    • To re-attach press connectors like this one, carefully align and press down on one side until it clicks into place, then repeat on the other side. Don't press down on the middle. If the connector is misaligned, the pins can bend and cause permanent damage.

  23. Motorola Moto G60S Fingerprint Sensor Replacement, Remove the fingerprint sensor: шаг 23, изображение 1 из 3 Motorola Moto G60S Fingerprint Sensor Replacement, Remove the fingerprint sensor: шаг 23, изображение 2 из 3 Motorola Moto G60S Fingerprint Sensor Replacement, Remove the fingerprint sensor: шаг 23, изображение 3 из 3
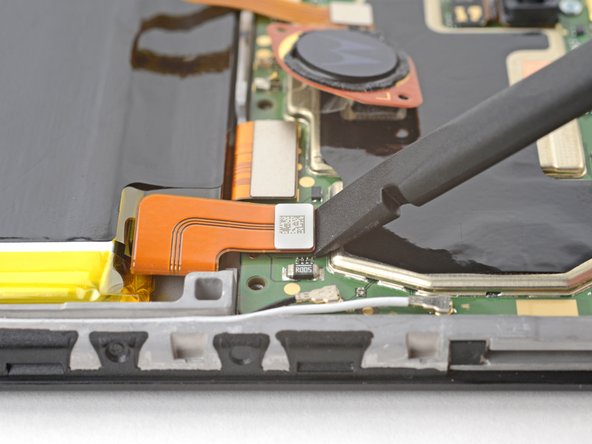
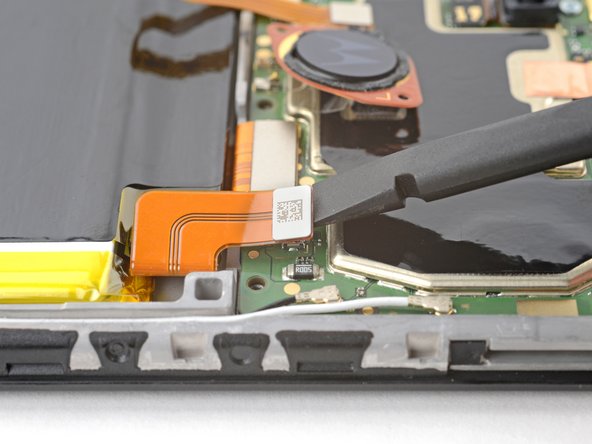
    • Use the pointed end of a spudger to pry up and disconnect the fingerprint sensor's press connector.

    • There's no adhesive securing the fingerprint sensor to the motherboard. Be careful disconnecting the press connector, as it may eject the fingerprint sensor.

    • Use tweezers or your fingers to remove the fingerprint sensor.

Заключение

To reassemble your device, follow the instructions in reverse order.

Take your e-waste to an R2 or e-Stewards certified recycler.

Repair didn’t go as planned? Try some basic troubleshooting, or ask our Answers community for help.

Spencer Day

Участник с: 09/14/22

53 178 Репутация

Автор 389 руководств

Команда

iFixit Участник iFixit

Staff

135 членов

Автор 16 820 руководств

0 Комментариев

Добавить комментарий

Просмотр статистики:

За последние 24часов: 0

За последние 7 дней: 4

За последние 30 дней: 5

За всё время: 73