Перейти к основному содержанию
Присоединяйся к сообществу ремонтников - Создай аккаунт

Nikon Coolpix 995 LCD Replacement

Выберете то, что вам нужно

    1. Nikon Coolpix 995 LCD Replacement, LCD: шаг 1, изображение 1 из 2 Nikon Coolpix 995 LCD Replacement, LCD: шаг 1, изображение 2 из 2
      • Turn the lens/flash assembly 90 degrees, until you see the two Phillips #00 screws,

      • Remove the two screws with a Phillips #00 screwdriver.

      • Flip the flash so that you can access the remaining two screws. Remove these screws following the same method as before.

      • Refer to the second image to locate the second set of screws. The relevant screws are highlighted in red.

      Спросите у FixBot

      Добавить комментарий

    2. Nikon Coolpix 995 LCD Replacement: шаг 2, изображение 1 из 1
      • Flip the camera up-side down.

      • Remove the two Phillips #00 screws located near the battery compartment.

      Спросите у FixBot

      Добавить комментарий

    3. Nikon Coolpix 995 LCD Replacement: шаг 3, изображение 1 из 1
      • Open the memory card compartment cover.

      • You can now see four screws under the cover. Remove all four screws.

      • Refer to the image to locate the four screws. Make sure that you remove only the four screws identified in the image.

      Спросите у FixBot

      Добавить комментарий

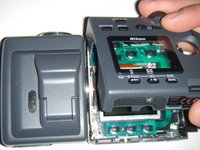
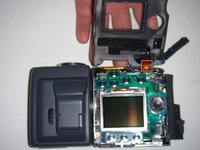
    4. Nikon Coolpix 995 LCD Replacement: шаг 4, изображение 1 из 2 Nikon Coolpix 995 LCD Replacement: шаг 4, изображение 2 из 2
      • Use your thumb to carefully lift the bottom side of the casing near the battery.

      • Pay attention to a cable located at the top of the assembly, as it is prone to breakage. Refer to the second image to locate the cable.

      Спросите у FixBot

      Добавить комментарий

    5. Nikon Coolpix 995 LCD Replacement: шаг 5, изображение 1 из 1
      • Use a spudger to flip the tabs that hold the screen.

      • Refer to the image for more details. The tabs are circled in red.

      Спросите у FixBot

      Добавить комментарий

    6. Nikon Coolpix 995 LCD Replacement: шаг 6, изображение 1 из 1
      • Carefully lift the LCD from the bottom. It should come out fairly easily.

      Спросите у FixBot

      Добавить комментарий

Заключение

To reassemble your device, follow these instructions in reverse order.

Отменить: Я не выполнил это руководство.

Cory Layman

Участник с: 10/04/11

93 Репутация

Автор 3 руководств

Команда

UW Stout, Team 1-5, Zhou Fall 2011 Участник UW Stout, Team 1-5, Zhou Fall 2011

UWSTOUT-ZHOU-F11S1G5

5 членов

Автор 7 руководств

0 Комментарии к руководству

Добавить комментарий

Статистика просмотров:

За последние 24 часов: 0

За последние 7 дней: 5

За последние 30 дней: 42

За всё время: 3,137