Перейти к основному содержанию
Присоединяйся к сообществу ремонтников - Создай аккаунт

Nikon Coolpix B700 Flash Unit Replacement

Выберете то, что вам нужно

    1. Nikon Coolpix B700 Flash Unit Replacement, Back Frame Assembly: шаг 1, изображение 1 из 1
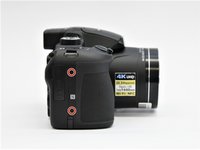
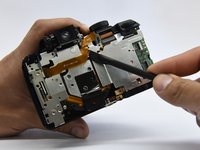
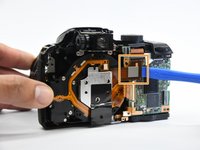
      • Use the Phillips screwdriver to remove the two 5.5 mm screws on the left side of the camera.

      Спросите у FixBot

      Добавить комментарий

    2. Nikon Coolpix B700 Flash Unit Replacement: шаг 2, изображение 1 из 1
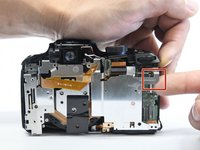
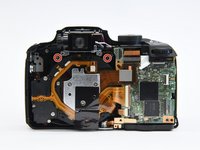
      • Use the Phillips screwdriver to remove seven 5.5 mm screws from the bottom of the camera.

      Спросите у FixBot

      Добавить комментарий

    3. Nikon Coolpix B700 Flash Unit Replacement: шаг 3, изображение 1 из 2 Nikon Coolpix B700 Flash Unit Replacement: шаг 3, изображение 2 из 2
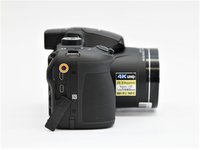
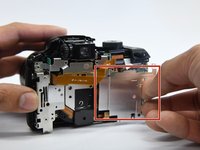
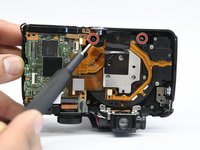
      • Use the Phillips screwdriver to remove the two 5.5mm screws on the right side of the camera.

      • Open the HDMI flap to remove a 5.5mm screw.

      • Don't forget to replace the hidden screw under the HDMI flap during reassembly.

      Спросите у FixBot

      Добавить комментарий

    4. Nikon Coolpix B700 Flash Unit Replacement: шаг 4, изображение 1 из 1
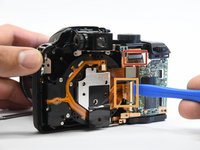
      • Use the Phillips screwdriver to remove the two 5.5mm screws under the LCD panel.

      Спросите у FixBot

      Добавить комментарий

    5. Nikon Coolpix B700 Flash Unit Replacement: шаг 5, изображение 1 из 3 Nikon Coolpix B700 Flash Unit Replacement: шаг 5, изображение 2 из 3 Nikon Coolpix B700 Flash Unit Replacement: шаг 5, изображение 3 из 3
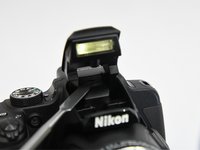
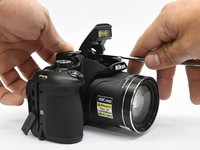
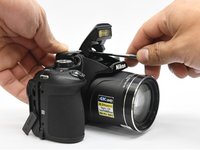
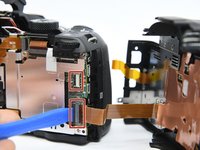
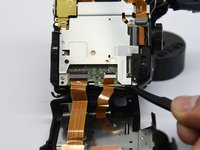
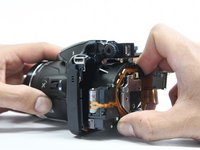
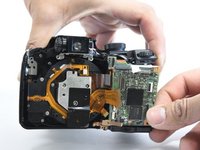
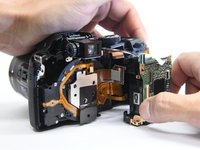
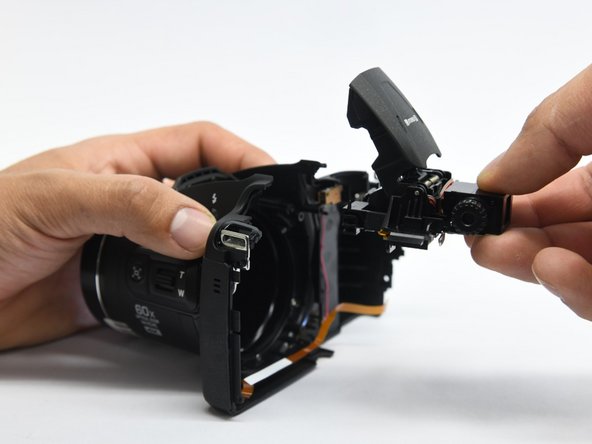
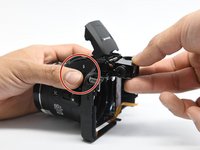
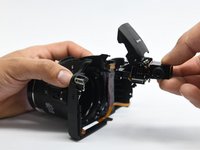
      • Open the flash assembly and insert the spudger into the slot under the flash unit and twist.

      • While twisting, pry apart the shell to split the camera in half.

      Спросите у FixBot

      Добавить комментарий

    6. Nikon Coolpix B700 Flash Unit Replacement: шаг 6, изображение 1 из 1
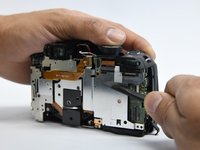
      • Be careful not to damage the ribbons that connect the halves together.

      Спросите у FixBot

      Добавить комментарий

    7. Nikon Coolpix B700 Flash Unit Replacement: шаг 7, изображение 1 из 2 Nikon Coolpix B700 Flash Unit Replacement: шаг 7, изображение 2 из 2
      • Place the pry tool under the black latch. Lift gently until the latch flips up.

      • Gently pull the ribbon away from the latch.

      • Be gentle when taking ribbons out and apart because they are fragile.

      Спросите у FixBot

      Добавить комментарий

    1. Nikon Coolpix B700 Flash Unit Replacement, Internal Bracket: шаг 8, изображение 1 из 1
      • Use the Phillips screwdriver to remove the remaining five 5.55mm screws.

      • Remove the single 6mm screw.

      Спросите у FixBot

      Добавить комментарий

    2. Nikon Coolpix B700 Flash Unit Replacement: шаг 9, изображение 1 из 1
      • Insert the pry tool under the latch and gently lift up to remove the ribbon.

      Спросите у FixBot

      Добавить комментарий

    3. Nikon Coolpix B700 Flash Unit Replacement: шаг 10, изображение 1 из 1
      • Move the ribbon out of the way to reveal the hidden screw.

      Спросите у FixBot

      Добавить комментарий

    4. Nikon Coolpix B700 Flash Unit Replacement: шаг 11, изображение 1 из 1
      • Lift the button assembly gently to give access to remove the 4mm screw.

      Спросите у FixBot

      Добавить комментарий

    5. Nikon Coolpix B700 Flash Unit Replacement: шаг 12, изображение 1 из 1
      • On the top of the camera, remove the 6mm screw.

      Спросите у FixBot

      Добавить комментарий

    6. Nikon Coolpix B700 Flash Unit Replacement: шаг 13, изображение 1 из 2 Nikon Coolpix B700 Flash Unit Replacement: шаг 13, изображение 2 из 2
      • With the spudger tool gently pry off the white tap holding in the bracket.

      • Use the same tool to remove the glued-on ribbon.

      Спросите у FixBot

      Добавить комментарий

    7. Nikon Coolpix B700 Flash Unit Replacement: шаг 14, изображение 1 из 2 Nikon Coolpix B700 Flash Unit Replacement: шаг 14, изображение 2 из 2
      • Gently lift up the button assembly to slide the bracket out.

      Спросите у FixBot

      Добавить комментарий

    8. Nikon Coolpix B700 Flash Unit Replacement: шаг 15, изображение 1 из 2 Nikon Coolpix B700 Flash Unit Replacement: шаг 15, изображение 2 из 2
      • With the pry tool gently lift up the latch and pull the cable toward the lens assembly.

      • Use the pry tool again and place it under the ribbon and lift straight up to disconnect the ribbon.

      Спросите у FixBot

      Добавить комментарий

    1. Nikon Coolpix B700 Flash Unit Replacement, Lens Assembly: шаг 16, изображение 1 из 2 Nikon Coolpix B700 Flash Unit Replacement, Lens Assembly: шаг 16, изображение 2 из 2
      • Use the Phillips screwdriver to remove the four 6 mm screw that hold on the bracket housing.

      Спросите у FixBot

      Добавить комментарий

    2. Nikon Coolpix B700 Flash Unit Replacement: шаг 17, изображение 1 из 1
      • Remove the tripod mount from it's slot.

      Спросите у FixBot

      Добавить комментарий

    3. Nikon Coolpix B700 Flash Unit Replacement: шаг 18, изображение 1 из 3 Nikon Coolpix B700 Flash Unit Replacement: шаг 18, изображение 2 из 3 Nikon Coolpix B700 Flash Unit Replacement: шаг 18, изображение 3 из 3
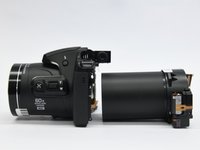
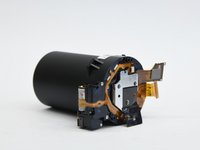
      • Now you just have to slide the lens assembly out of the housing.

      Спросите у FixBot

      Добавить комментарий

    1. Nikon Coolpix B700 Flash Unit Replacement, Motherboard: шаг 19, изображение 1 из 1
      • Use the metal spudger to open the latch to remove the ribbon.

      Спросите у FixBot

      Добавить комментарий

    2. Nikon Coolpix B700 Flash Unit Replacement: шаг 20, изображение 1 из 1
      • Use the Phillips screwdriver to remove the single 6 mm screw.

      Спросите у FixBot

      Добавить комментарий

    3. Nikon Coolpix B700 Flash Unit Replacement: шаг 21, изображение 1 из 2 Nikon Coolpix B700 Flash Unit Replacement: шаг 21, изображение 2 из 2
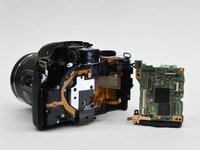
      • Gently lift the button assembly. Slide the motherboard out from the shell.

      Спросите у FixBot

      Добавить комментарий

    4. Nikon Coolpix B700 Flash Unit Replacement: шаг 22, изображение 1 из 2 Nikon Coolpix B700 Flash Unit Replacement: шаг 22, изображение 2 из 2
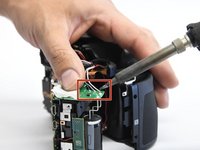
      • Desolder the black, gray, and white wires from the motherboard.

      • The motherboard is labeled with the wire colors.

      Спросите у FixBot

      Добавить комментарий

    1. Nikon Coolpix B700 Flash Unit Replacement, Flash Unit: шаг 23, изображение 1 из 1
      • Using a Phillips screwdriver, remove the two 6 mm screws that hold the flash assembly.

      Спросите у FixBot

      Добавить комментарий

    2. Nikon Coolpix B700 Flash Unit Replacement: шаг 24, изображение 1 из 2 Nikon Coolpix B700 Flash Unit Replacement: шаг 24, изображение 2 из 2
      • Now while pushing the flash button slide out the flash assembly from the housing.

      • The flash button could fall out when the assembly is removed.

      • During reassembly, insert the flash unit assembly first, then reconnect the flash button.

      Спросите у FixBot

      Добавить комментарий

Заключение

To reassemble your device, follow these instructions in reverse order.

Отменить: Я не выполнил это руководство.

Еще один человек закончил это руководство.

Carlos Salgado

Участник с: 02/27/19

1 456 Репутация

Автор 7 руководств

Команда

Purdue University Northwest, Team S4-G5, Hingst Spring 2019 Участник Purdue University Northwest, Team S4-G5, Hingst Spring 2019

PNW-HINGST-S19S4G5

4 членов

Автор 14 руководств

0 Комментарии к руководству

Добавить комментарий

Статистика просмотров:

За последние 24 часов: 0

За последние 7 дней: 5

За последние 30 дней: 30

За всё время: 873