Введение
Replacing the touchscreen assembly is difficult because it requires removing the motherboard. Don't take this task on lightly. There are many delicate ribbon cables, so be careful and go slow. The home button is held in by the touchscreen assembly. Be sure not to lose that assembly.
Выберете то, что вам нужно
-
-
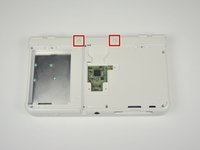
Unscrew the two 3mm Phillips #1 head screws along the top edge of the device.
 Спросите у FixBot
-
-
-
Pull the top corner tabs of the front face plate outward and towards you.
-
Pull the faceplate up and out of the slots at the bottom of the device.
-
Set aside the back faceplate.
-
-
-
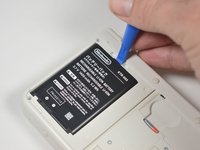
Insert a plastic opening tool into the notch at the top of the battery.
-
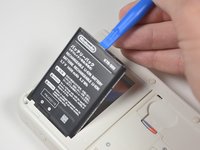
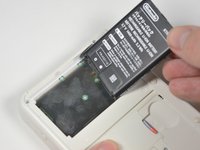
Pry the battery up with the plastic opening tool.
-
-
-
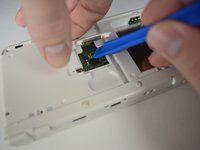
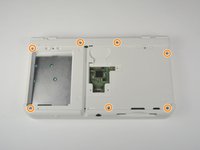
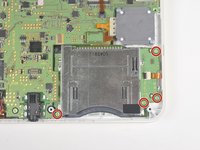
Unscrew the three 3mm Y0 screws along the right and bottom of the SD card reader.
-
-
-
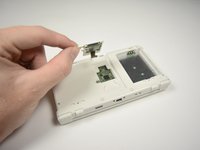
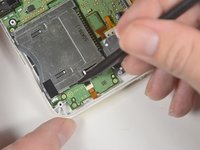
Pull the SD card reader from the edge with two holes gently to free the tab at the top of the SD card reader.
-
Reorient the device so that the power jack faces you.
-
-
-
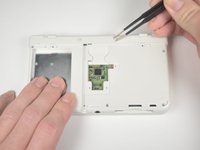
Lift the SD card reader gently.
-
Use a plastic opening tool to pry the SD card ribbon cable off the socket on the motherboard.
-
Lift the SD card reader out off of the lower casing.
-
-
Инструмент, используемый на этом этапе:Tweezers$4.99
-
Reorient the device so that the game slot now faces you.
-
Remove the two rubber bumpers along the top of the device using tweezers.
-
Unscrew the seven 6mm Phillips #00 screws along the top and bottom of the 3DS.
-
-
-
-
Lift the top edge of the lower case slightly off on the 3DS.
-
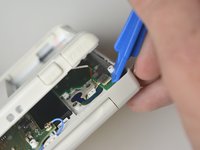
Pry the ribbon cable socket under the right trigger using a plastic opening tool.
-
Pry the ribbon cable socket under the infrared receiver cover using a plastic opening tool.
-
-
-
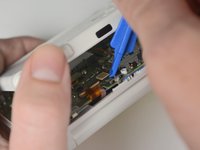
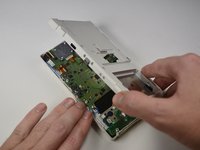
Open the device slowly from its top edge. Be careful not to tug the ribbon cable connected near the bottom edge of the device.
-
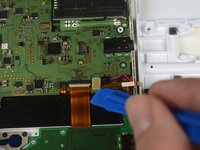
Pry the last ribbon cable attached to the lower case using a plastic opening tool.
-
-
-
Locate the joystick assembly near the top right corner of the motherboard.
-
Remove the two 8mm Phillips #00 screws from the back of the joystick.
-
Use the flat end of the spudger to pry off the joystick pad from its plastic housing.
-
-
-
Lift the joystick pad and place it on its back. This will reveal the ribbon cable connected to the joystick pad.
-
Use the flat end of the spudger to pry up the retaining flap for the ribbon cable.
-
Lift the joystick out of the device.
-
-
-
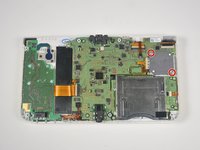
Locate the gamecard reader near the bottom right corner of the motherboard.
-
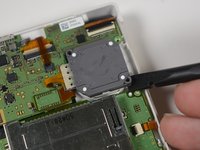
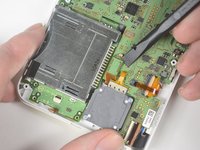
Unscrew the four 3mm Phillips #00 screws along the edge of the gamecard reader.
-
Lift the black latch on the ZIF connector along the right side of the reader using a plastic opening tool.
-
-
-
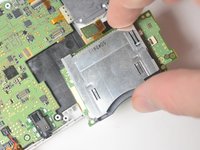
Pry the ribbon cable from its socket, just left of the joystick, using the flat side of a spudger.
-
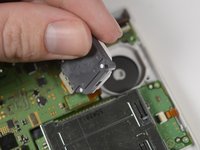
Grab the right edge of the gamecard reader and lift it out of the device, watching to make sure the ribbon cables don't snag.
-
-
-
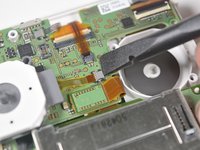
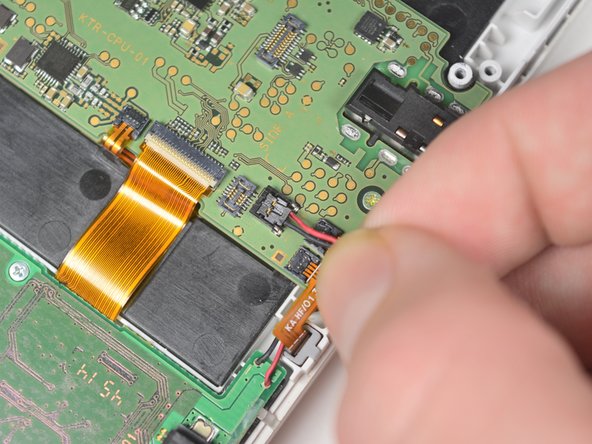
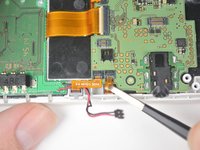
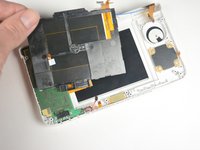
Remove the power cable, indicated by the black and red wires, by gently pulling it up and out of the connector.
-
Gently pull the ribbon cables out of the 4 ZIF connectors.
-
-
Инструмент, используемый на этом этапе:Tweezers$4.99
-
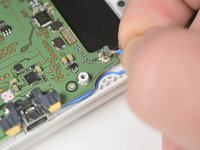
Pull up gently on the blue wifi antenna.
-
Pry the retaining tab on the connector behind the infrared receiver and gently pull the ribbon cable from the connector with tweezers.
-
-
-
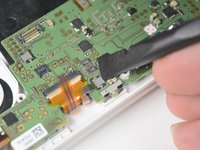
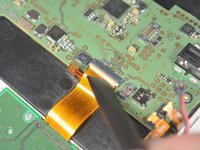
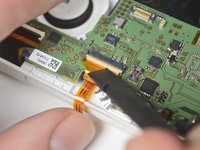
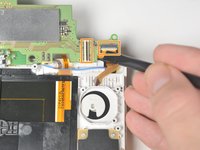
Lift the retaining tab and remove the large ribbon cable on the left side of the motherboard.
-
Lift the retaining tab and remove the large ribbon cable on the top of the motherboard behind the infrared receiver.
-
Lift the retaining tab and remove the large ribbon cable on the top of the motherboard just above the joysitck housing.
-
-
-
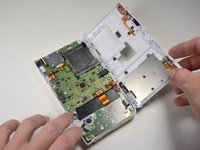
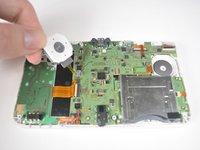
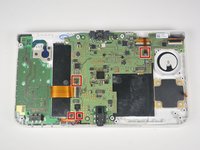
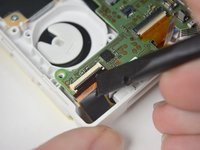
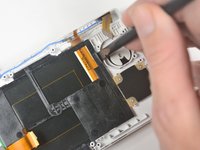
Remove the three, 3mm Phillips #00 screws that secure the motherboard to the device housing.
-
Lift the motherboard gently by the headphone jack.
-
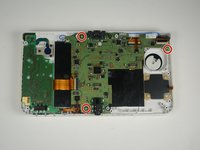
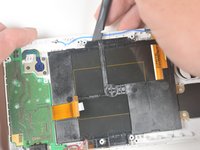
Remove the two ribbons on the back of the device by lifting the retaining tabs on the ZIF connectors.
-
-
-
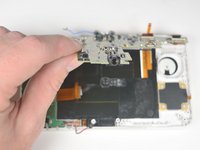
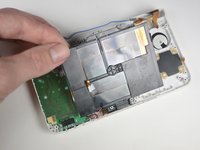
Pry the tab just left of the joystick housing until the right corner of the touchscreen is free.
-
Pry the top of the touchscreen gently until the top middle and left side of the touchscreen is free.
-
-
-
Gently pull up on the touchscreen from the left corner until the whole touchscreen is free.
-
Lift the touchscreen out of the device.
-


To reassemble your device, follow these instructions in reverse order.
Отменить: Я не выполнил это руководство.
5 человек успешно провели ремонт по этому руководству.
Команда

Cal Poly, Team 4-6, Livingston Fall 2016 Участник Cal Poly, Team 4-6, Livingston Fall 2016
CPSU-LIVINGSTON-F16S4G6
4 членов
Автор 46 руководств
2 Комментарии к руководству
so my new 3ds (normal size) bottom screen is pitch black (still is touch screen), if i do this procedure will it fix the problem? and if i watch a video of a new 3ds XL bottom screen being replaced would it be the same procedure as fixing a new 3ds normal size?
I followed instructions but now the 3DS wont turn on, black screens with a blue light the turns off after about 20 - 30 seconds
i opened up again and saw 3 zif connectors were not closed flush, not sure if this is the problem. If it i how do you go about replacing them?