Перейти к основному содержанию

Nokia 3120 Liquid Crystal Display (LCD) Replacement

Выберете то, что вам нужно

  1. Nokia 3120 Liquid Crystal Display (LCD) Replacement, Battery Installation: шаг 1, изображение 1 из 3 Nokia 3120 Liquid Crystal Display (LCD) Replacement, Battery Installation: шаг 1, изображение 2 из 3 Nokia 3120 Liquid Crystal Display (LCD) Replacement, Battery Installation: шаг 1, изображение 3 из 3
    • Remove the back cover plate of the phone. To do this press down the lock as you slide the cover toward the bottom of the phone.

  2. Nokia 3120 Liquid Crystal Display (LCD) Replacement: шаг 2, изображение 1 из 1
    • Once the back cover plate is removed, the battery should be exposed. Remove the battery by prying it out. This can be done with your finger-nail or a prying tool.

  3. Nokia 3120 Liquid Crystal Display (LCD) Replacement, Face Plate: шаг 3, изображение 1 из 3 Nokia 3120 Liquid Crystal Display (LCD) Replacement, Face Plate: шаг 3, изображение 2 из 3 Nokia 3120 Liquid Crystal Display (LCD) Replacement, Face Plate: шаг 3, изображение 3 из 3
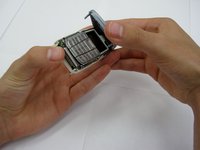
    • Using your fingernails or another tool, pry the front face plate out along its edges and corners.

  4. Nokia 3120 Liquid Crystal Display (LCD) Replacement, Liquid Crystal Display (LCD): шаг 4, изображение 1 из 1
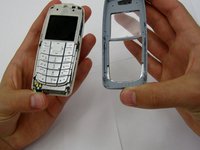
    • Once the cover plate has been removed, the keypad should easily pop out.

  5. Nokia 3120 Liquid Crystal Display (LCD) Replacement: шаг 5, изображение 1 из 2 Nokia 3120 Liquid Crystal Display (LCD) Replacement: шаг 5, изображение 2 из 2
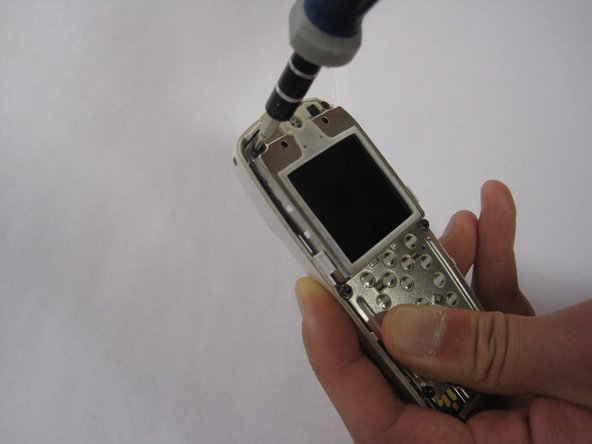
    • Using a screwdriver, remove the 6, 7 mm Torx-head screws on the front of the phone.

  6. Nokia 3120 Liquid Crystal Display (LCD) Replacement: шаг 6, изображение 1 из 1
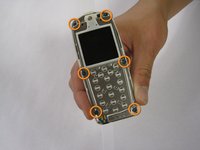
    • Once the screws have been removed, the front plate of the phone should be removed, exposing the inside electronic components of the phone.

  7. Nokia 3120 Liquid Crystal Display (LCD) Replacement: шаг 7, изображение 1 из 1
    • Take out the cell phone electronic board

  8. Nokia 3120 Liquid Crystal Display (LCD) Replacement: шаг 8, изображение 1 из 1
    • The LCD screen can now be removed from the body of the phone.

Заключение

To reassemble your device, follow these instructions in reverse order.

2 участников успешно повторили данное руководство.

Pierre Tong

Участник с: 03/11/13

77 Репутация

Автор 4 руководств

Команда

Clemson, Team 13-2, Benson Spring 2013 Участник Clemson, Team 13-2, Benson Spring 2013

CLEM-BENSON-S13S13G2

3 членов

Автор 14 руководств

0 Комментариев

Добавить комментарий

Просмотр статистики:

За последние 24часов: 1

За последние 7 дней: 1

За последние 30 дней: 7

За всё время: 1,385