Перейти к основному содержанию

Nvidia Shield Display Assembly Replacement

Выберете то, что вам нужно

  1. Nvidia Shield Display Assembly Replacement, Remove Front Panel: шаг 1, изображение 1 из 3 Nvidia Shield Display Assembly Replacement, Remove Front Panel: шаг 1, изображение 2 из 3 Nvidia Shield Display Assembly Replacement, Remove Front Panel: шаг 1, изображение 3 из 3
    • Remove the seven 6.4mm T5 Torx screws from the back panel.

    • Use the spudger to separate the front and back panels.

  2. Nvidia Shield Display Assembly Replacement, Remove Green Grill: шаг 2, изображение 1 из 2 Nvidia Shield Display Assembly Replacement, Remove Green Grill: шаг 2, изображение 2 из 2
    • The green grill is not screwed in so it can be pulled right out.

  3. Nvidia Shield Display Assembly Replacement, Remove Battery Cables: шаг 3, изображение 1 из 3 Nvidia Shield Display Assembly Replacement, Remove Battery Cables: шаг 3, изображение 2 из 3 Nvidia Shield Display Assembly Replacement, Remove Battery Cables: шаг 3, изображение 3 из 3
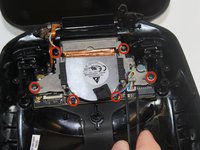
    • Remove the six 6.5mm T5 Torx screws.

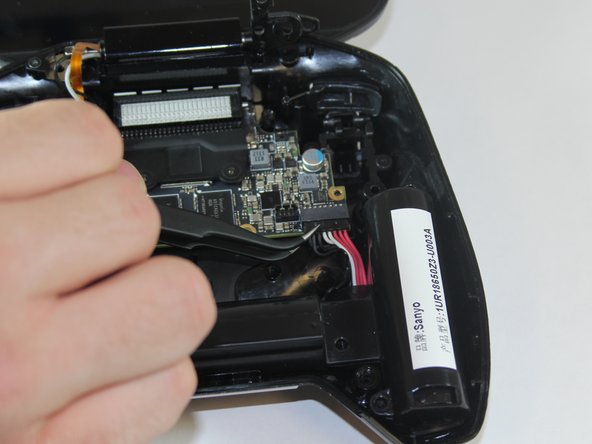
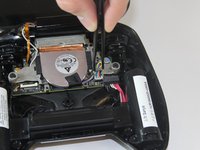
    • Disconnect the power wires.

    • Peel back the copper tape and disconnect the black and white wires.

  4. Nvidia Shield Display Assembly Replacement, Remove Battery Apparatus: шаг 4, изображение 1 из 1
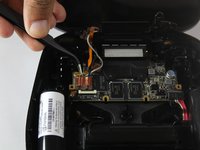
    • Pull the battery apparatus out once all cables are removed.

  5. Nvidia Shield Display Assembly Replacement, Removing Fan: шаг 5, изображение 1 из 3 Nvidia Shield Display Assembly Replacement, Removing Fan: шаг 5, изображение 2 из 3 Nvidia Shield Display Assembly Replacement, Removing Fan: шаг 5, изображение 3 из 3
    • Cooling is important for electronics, the last thing they want is to overheat.

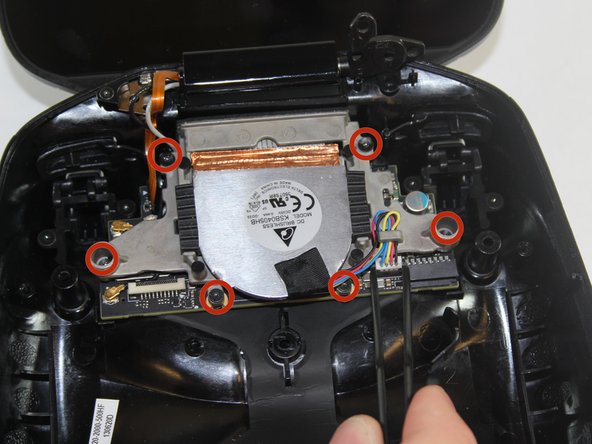
    • Remove the two 7.3mm and four 8.4mm T5 Torx screws and disconnect the power cable.

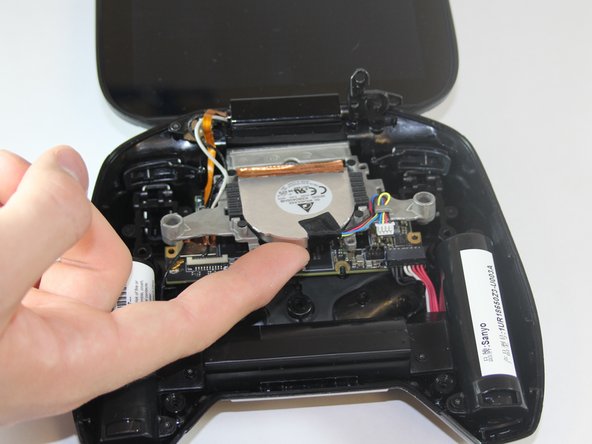
    • Lift the fan free after the screws and cable are removed.

  6. Nvidia Shield Display Assembly Replacement, Disconnecting from logic board: шаг 6, изображение 1 из 1
    • On the left side from where the display is attached to the back panel there is one 3.8mm T5 Torx screw that needs to be removed.

    • Once removed, the display should be able to be detached.

Заключение

To reassemble your device, follow these instructions in reverse order.

5 участников успешно повторили данное руководство.

Noel Fletcher

Участник с: 09/22/14

116 Репутация

1 руководство автора

Команда

USF Tampa, Team 1-1, Hickman Fall 2014 Участник USF Tampa, Team 1-1, Hickman Fall 2014

USFT-HICKMAN-F14S1G1

4 членов

Автор 18 руководств

Один комментарий

Where can o get a replacement screen

jorge valenzuela - Ответить

Добавить комментарий

Просмотр статистики:

За последние 24часов: 0

За последние 7 дней: 4

За последние 30 дней: 19

За всё время: 6,426