Перейти к основному содержанию
Присоединяйся к сообществу ремонтников - Создай аккаунт

Oster 6329 Bread Grabber Spring Replacement

Выберете то, что вам нужно

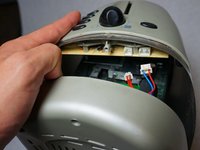
  1. Oster 6329 Bread Grabber Spring Replacement, Outer Shell Removal: шаг 1, изображение 1 из 2 Oster 6329 Bread Grabber Spring Replacement, Outer Shell Removal: шаг 1, изображение 2 из 2
    • Using the Phillips-head #2 screwdriver, unscrew the three 1cm Phillips-head screws on the plastic base of the toaster to separate the outer metal shell from the plastic base.

    Спросите у FixBot
  2. Oster 6329 Bread Grabber Spring Replacement: шаг 2, изображение 1 из 1
    • Push the plastic push-down handle down and pull the plastic handle straight from metal arm.

    Спросите у FixBot
  3. Oster 6329 Bread Grabber Spring Replacement: шаг 3, изображение 1 из 1
    • Loosen the outer metal shell from the plastic base by holding the plastic base while pulling up on the metal shell.

    • Only lift the outer shell a little so as not to disconnect the cables that connect the circuit board.

    Спросите у FixBot
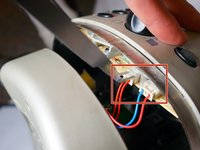
  4. Oster 6329 Bread Grabber Spring Replacement: шаг 4, изображение 1 из 2 Oster 6329 Bread Grabber Spring Replacement: шаг 4, изображение 2 из 2
    Инструмент, используемый на этом этапе:
    Tweezers
    $4.99
    • Disconnect the cable clips from the circuit board using the tweezers to free the outer metal shell from the plastic base.

    Спросите у FixBot
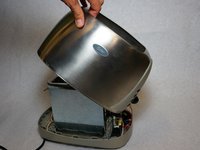
  5. Oster 6329 Bread Grabber Spring Replacement: шаг 5, изображение 1 из 2 Oster 6329 Bread Grabber Spring Replacement: шаг 5, изображение 2 из 2
    • Lift the top outer metal shell.

    • Carefully lift the outer metal shell at an angle so as not to damage the components in the front of the toaster.

    Спросите у FixBot
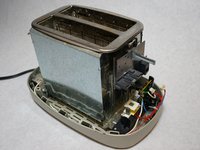
  6. Oster 6329 Bread Grabber Spring Replacement, Bread Grabber Spring: шаг 6, изображение 1 из 1
    • Press down on the toaster handle to access to the grabber spring located behind the large metal plate.

    Спросите у FixBot
  7. Oster 6329 Bread Grabber Spring Replacement: шаг 7, изображение 1 из 1
    • Locate the grabber spring.

    Спросите у FixBot
  8. Oster 6329 Bread Grabber Spring Replacement: шаг 8, изображение 1 из 1
    • Use the large needle nose pliers to unwind the grabber spring from one side of the carriage to remove.

    • Repeat this step for the opposite side.

    Спросите у FixBot
  9. Oster 6329 Bread Grabber Spring Replacement: шаг 9, изображение 1 из 1
    • Remove the old spring from the toaster unit to insert new.

    Спросите у FixBot
Заключение

To reassemble your device, follow these instructions in reverse order.

3 человек успешно провели ремонт по этому руководству.

Isaac Williams

Участник с: 01/24/14

237 Репутация

Автор 2 руководств

Команда

Cal Poly, Team 13-15, Regan Winter 2014 Участник Cal Poly, Team 13-15, Regan Winter 2014

CPSU-REGAN-W14S13G15

5 членов

Автор 6 руководств

0 Комментарии к руководству

Добавить комментарий

Статистика просмотров:

За последние 24 часов: 2

За последние 7 дней: 9

За последние 30 дней: 60

За всё время: 1,221