Введение
Paint job scratched? Going custom? Change out your faceplate assembly!
Выберете то, что вам нужно
-
-
Place PSP face down, so that the UMD Drive is facing upwards.
-
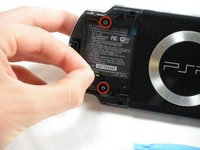
Locate the battery door and open.
-
Remove the battery from inside.
 Спросите у FixBot
-
-
-
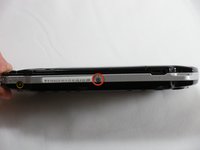
Locate the sticker in the battery compartment labeled: "En: Warranty Void if Seal Damaged."
-
Remove the sticker using the PSP Opening Tools.
-
-
-
-
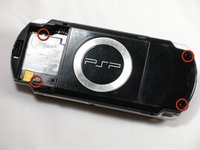
Remove the following screws from around the bezel:
-
Two 4 mm Phillips
-
One 5 mm Phillips
-
-
-
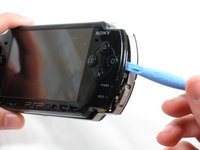
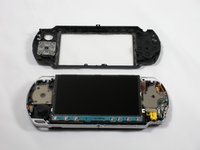
Gently pry the front bezel away from the casing using a PSP opening tool.
-
Start on the right hand side of the PSP bezel, and carefully work the tool around the side.
-


To reassemble your device, follow these instructions in reverse order.
Отменить: Я не выполнил это руководство.
17 человек успешно провели ремонт по этому руководству.

Команда

Cal Poly, Team 6-3, Maness Fall 2009 Участник Cal Poly, Team 6-3, Maness Fall 2009
CPSU-MANESS-F09S6G3
5 членов
Автор 48 руководств
2 Комментарии к руководству
Does the front casing also have the plastic glass screen on it as well? Or is that separate?
sorry this is a decade too late HA. i just did a swap for the plastic screen cover and yes, for anyone in the future, the plastic cover is on the front shell piece, you will need some tweezers or something narrow to get the plastic screen popped off, dont crack the front shell, the bottom gets fragile so just be slow and methodical. but its an easy swap, maybe 15 minutes. good time to clear out the lint around the joystick as well.