Перейти к основному содержанию
Присоединяйся к сообществу ремонтников - Создай аккаунт

Panasonic ARC ES-LT3N Battery Replacement

Выберете то, что вам нужно

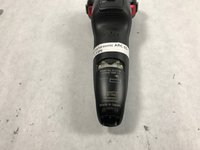
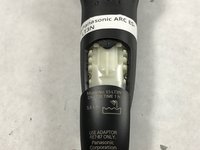
    1. Panasonic ARC ES-LT3N Battery Replacement, Back Casing: шаг 1, изображение 1 из 2 Panasonic ARC ES-LT3N Battery Replacement, Back Casing: шаг 1, изображение 2 из 2
      • Flip the razor over so the back is facing you.

      Спросите у FixBot

      Добавить комментарий

    2. Panasonic ARC ES-LT3N Battery Replacement: шаг 2, изображение 1 из 2 Panasonic ARC ES-LT3N Battery Replacement: шаг 2, изображение 2 из 2
      • Using a Phillips #00 screwdriver, remove the 6 mm screw just above the charger port.

      Спросите у FixBot

      Добавить комментарий

    3. Panasonic ARC ES-LT3N Battery Replacement: шаг 3, изображение 1 из 2 Panasonic ARC ES-LT3N Battery Replacement: шаг 3, изображение 2 из 2
      • Slide the plastic cover at the bottom of the razor downward to remove.

      Спросите у FixBot

      Добавить комментарий

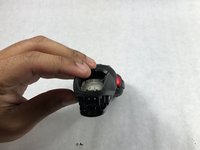
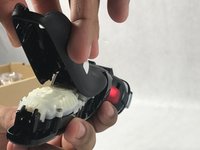
    4. Panasonic ARC ES-LT3N Battery Replacement: шаг 4, изображение 1 из 2 Panasonic ARC ES-LT3N Battery Replacement: шаг 4, изображение 2 из 2
      • Lift up the rear casing from the bottom of the razor.

      • This may require you to gently pry it apart with you fingers.

      • Lift up the rear casing from the sides of the razor.

      • Pull rear casing up and off razor.

      • Be careful not to break any plastic!

      Спросите у FixBot

      Добавить комментарий

    1. Panasonic ARC ES-LT3N Battery Replacement, Battery: шаг 5, изображение 1 из 1
      • Using the Phillips 00 driver bit, remove six screws (12mm) from the battery case.

      Спросите у FixBot

      Добавить комментарий

    2. Panasonic ARC ES-LT3N Battery Replacement: шаг 6, изображение 1 из 1
      • Remove battery case.

      Спросите у FixBot

      Добавить комментарий

    3. Panasonic ARC ES-LT3N Battery Replacement: шаг 7, изображение 1 из 2 Panasonic ARC ES-LT3N Battery Replacement: шаг 7, изображение 2 из 2
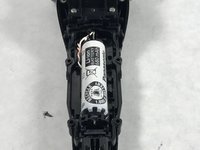
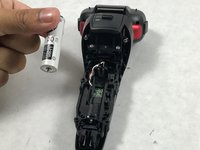
      • Remove old battery by lifting the battery up and left.

      • There are plastic brackets holding the battery on the right. Removing up and left ensures that the brackets will not be damaged and the battery will not come loose.

      Спросите у FixBot

      Добавить комментарий

Заключение

To reassemble your device, follow these instructions in reverse order.

Отменить: Я не выполнил это руководство.

2 человек успешно провели ремонт по этому руководству.

Andrew Trainor

Участник с: 03/05/17

648 Репутация

Автор 5 руководств

Команда

UMass Dartmouth, Team S8-G3, Catania Spring 2017 Участник UMass Dartmouth, Team S8-G3, Catania Spring 2017

UMASSD-CATANIA-S17S8G3

3 членов

Автор 10 руководств

1 Комментарий к руководству

Where does one actually find the replacement batteries though?

WooKstah - Ответить Поделиться

Добавить комментарий

Статистика просмотров:

За последние 24 часов: 1

За последние 7 дней: 9

За последние 30 дней: 53

За всё время: 2,442